When you send a document to somebody, it’s not always guaranteed that it will include the same fonts. If the document’s recipient does not have its fonts installed, the document reverts to defaults. If retaining an MS Word document’s exact text formatting is essential, you should embed its fonts.
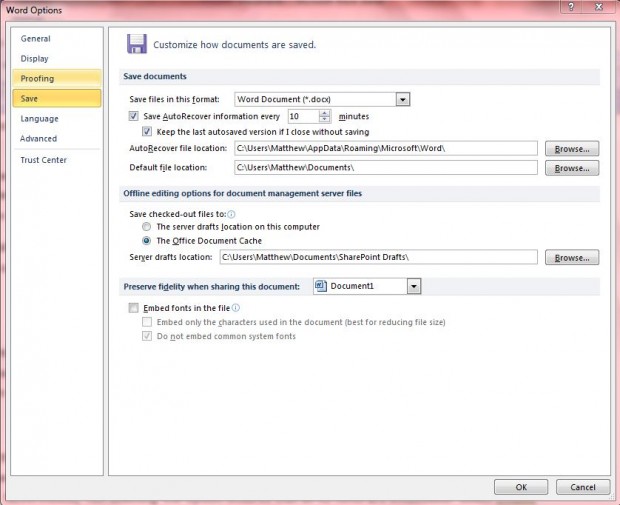
To embed MS Word 2010/13 document fonts, open the software and click File. Then you should select Options to open the Word Options window. Click Save to open the window in the shot below.
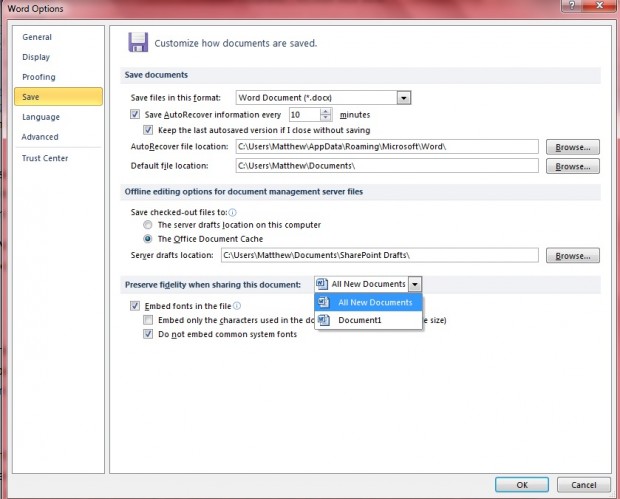
Note the Embed fonts in the file option near the bottom of the window. Click on that check-box to make the font a part of the document. To embed fonts in new documents, select the All New Documents option from the drop-down list.
If you select the Do not embed common system fonts’ check-box, not all the fonts will be embedded within the document. However, it’s probably not essential to embed common system fonts, such as Times New Roman. Nevertheless, not selecting the option ensures the embedding of all its fonts. Select Embed only the characters used in the document check-box to reduce file size. Click OK to close the Windows Options window.
Now that the embedded fonts are a part of the document, sent documents retain their exact fonts even if the person who opens it doesn’t have all its fonts installed. Consequently, the document layout will also remain the same as the original.

 Email article


