 Email article
You never know when a Windows 7 malfunction might occur. If that happens, having a system repair disc could be handy. Then you can run the disc from Windows Boot Manager to select from a variety of alternative recovery options.
To set up your own repair disc, first insert a DVD – RW into the drive. Although a CD – RW should also be suitable as the repair disc only takes up 128 megabytes. Then enter repair disc into the Start menu search box, and select Create a System Repair Disc to open the window in the shot below.
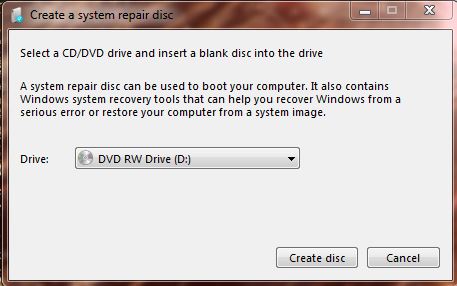
Select a CD/DVD drive from the drop-down list, and then click on the Create disc option. That will create a repair disc with a variety of recovery options to pick from such Startup Repair, System Restore and Command Prompt. You should label the disc: Windows 7 System Repair Disc.
However, you cannot open the disc from within Windows. To check out your new repair disc, click the Start menu and Restart (with the disc still in the drive). As Windows 7 restarts, press F2 to open Windows Boot Manager.
From the Windows Boot Manager, you should press the F8 key to open a list of boot options. Note the Repair Your Computer option which is your new System Repair disc. Click on that option to open the repair disc options in the shot below.
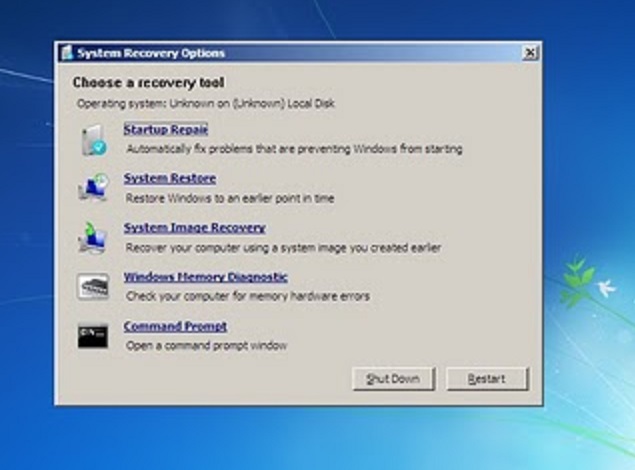
This System Repair disc might come in handy to resolve a Windows 7 technical issue such as corrupted user account. As such, the disc is a great addition for your backup and recovery toolbox.


