Have you had enough of those annoying email spams and unsolicited newsletters? Well, you can always opt-out from these types of emails in just one click. If you don’t know how, just read this guide and carefully follow the instructions listed below. Just keep in mind that this method will only work if you’re using Gmail on Google Chrome.
Block unwanted email senders on Gmail – Google Chrome
- Open your Chrome web browser then go to the Chrome Web Store. Search and download the extension called “Block Sender”. Install it on your web browser.
- Once installed, log-in to your Gmail account using your email and password.
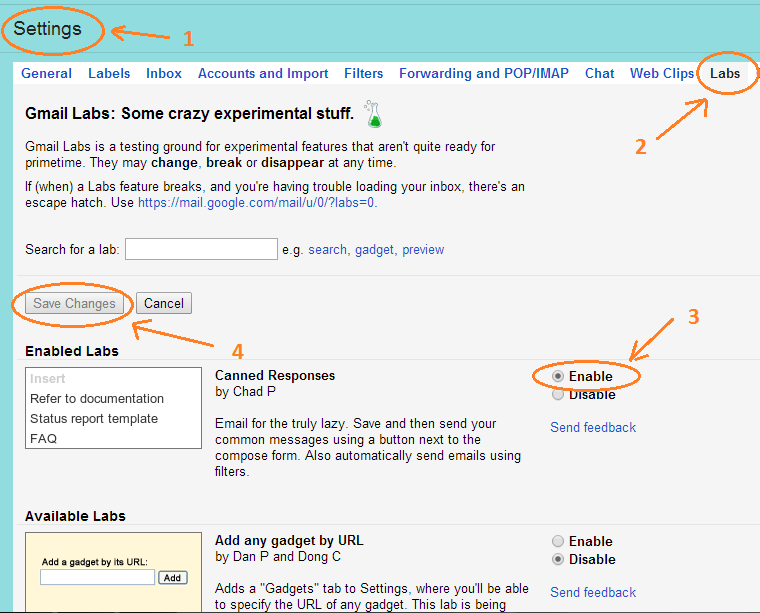
- Since this method will require you to enable your Gmail’s canned responses, better do it ahead of time. Go to your Gmail Settings > Labs then click the “Enable” option next to “Canned Responses”. Click “Save Changes” to confirm your action.
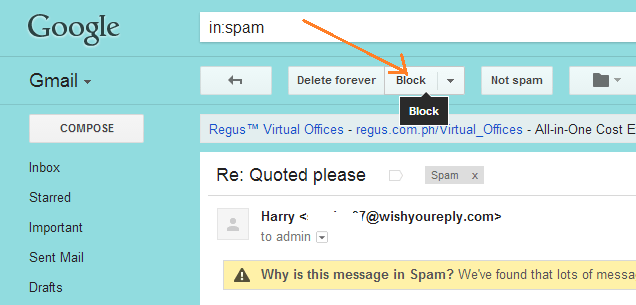
- Now, go back to your Inbox or Spam list. To block an annoying email sender, just select any email that comes from that sender. Go to the toolbar that’s located on top of the email message then click the button that says “Block”. By doing so, you will be able to block all emails that comes from that particular sender.
- (Note: For your first block, you will be allowed to send a fake bounced message to your sender. If you’re asked to enable your Gmail account’s canned responses, just click “Yes”. After this, the “fake bounced message” will no longer be available for your subsequent blocks.)
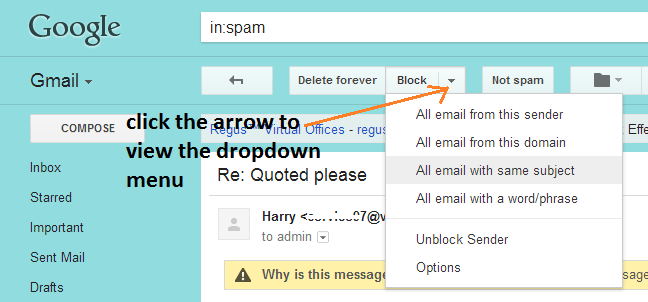
- If you do not want to block all of the emails that come from a particular sender, just click the drop-down menu that’s located right beside the “Block” button and then choose the option that you like. Speaking of which, you can choose to block all emails that comes from the sender’s website, block all emails with the same subject or block all emails that contains a specific word or phrase.
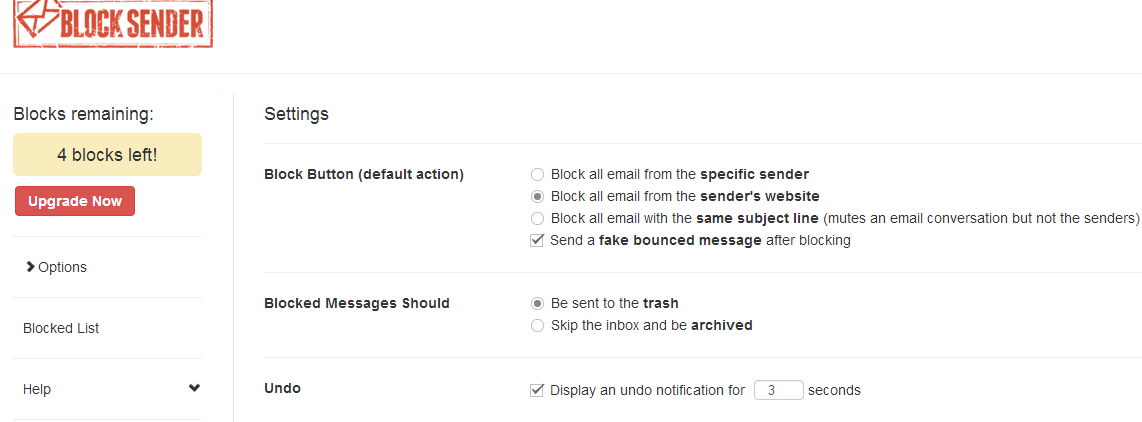
- If you wish to update your default options, just click on the arrow that’s sitting right next to the “Block” button to view its drop-down menu. Click “Options”. A new window will appear and it will show the extension’s default settings. The changes that you’ve made will be automatically saved.
- To unblock a sender, just click the drop-down menu again and then select the option for “Unblock Sender”. You will then be taken to your Gmail account’s “Filters” list. There, you will be able to manually select the senders that you wish to unblock.
However, keep in mind that the free version of this extension will only allow you to block a limited number of emails and senders per month. If you wish to lift this limit, you can purchase and upgrade to its premium version.

 Email article


