 Email article
It is easy to add or insert images, shapes and clip art in Microsoft Word but how about removing them? Let’s just say that you are editing an existing document. Unfortunately, that document has a lot of images embedded in it that aren’t really needed. So why keep them when you can remove them?
Well, with Microsoft Word, you have the option to remove each image or photo separately or you can simply opt to batch remove them. For removing a single photo, you can just click on that picture that you wish to remove and then press “Delete”. It’s that easy.
Now, if you wish to remove those images in bulk, you can do the following steps:
Step One
Type “Ctrl + F” to open the “Find and Replace” dialog box.
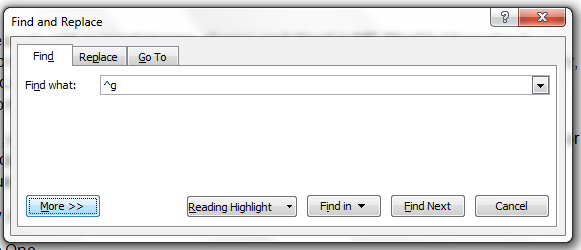
Step Two
On the “Find” tab, type ^g on the “Find what” section then click the “Replace” tab.
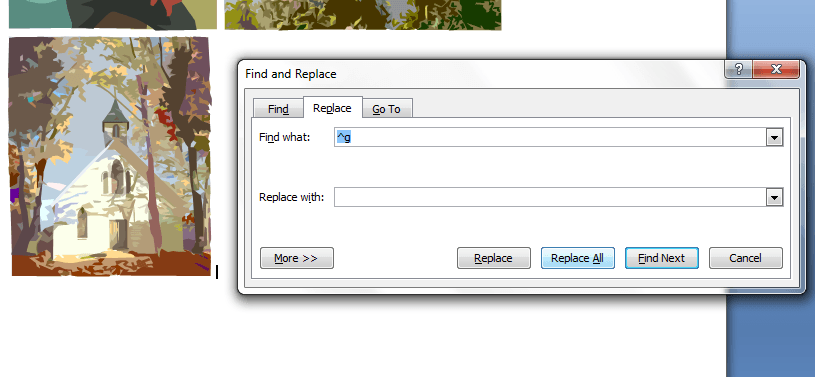
Step Three
Leave the “Replace with” section as blank or empty then click “Replace All”.
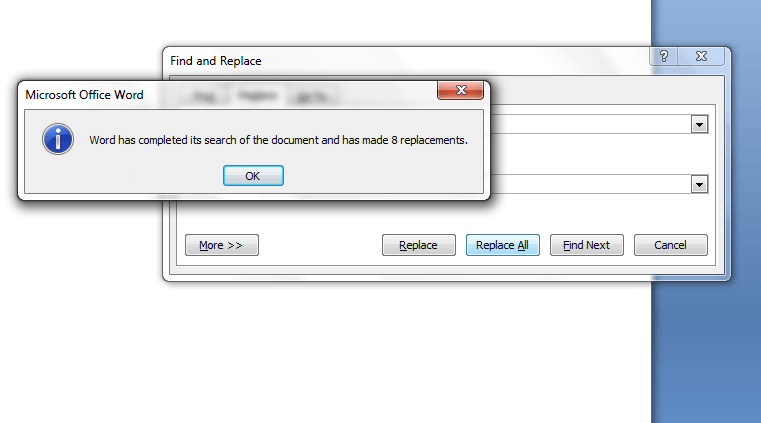
That’s it. You will then receive a confirmation message that basically states that Microsoft Office Word has successfully removed all of the images in your document. Just close the “Find and Replace” dialog box as soon as you’re done.
Anyways, this method does not only apply to photos. It can also be applied to other graphics such as clip arts.
By learning how to bulk remove images from MS Word, you can save a lot of time and effort in editing various documents. This method usually works on MS Office Word 2007 or any of its latest versions.


