Gone are those days where users often rely on tactile buttons to carry out certain Android commands. Today, there are more ways to control your Android device such as voice commands and gesture controls.
Speaking of which, did you know that you can actually set custom swipe gestures in Android? If you want to learn how, better read on.
How to set custom swipe gestures in Android
- On your Android device, go to the Play Store then search for an app called “All in one Gestures”.
- Download and install the app on your Android device.
- Once installed, launch the app from your app drawer.
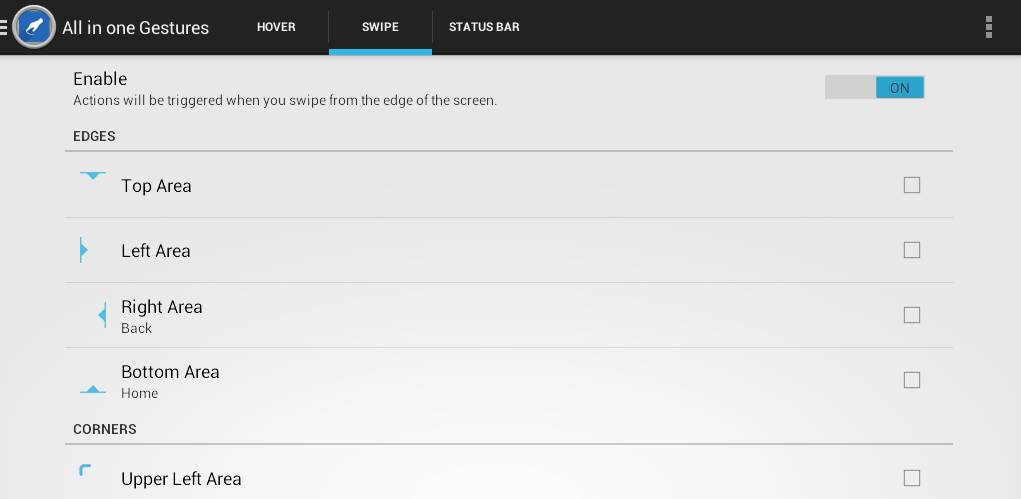
- On the app’s main interface, there are three tabs for setting up custom gestures. There’s the “Hover” tab, “Swipe” tab and the “Status Bar”. The definition for these tree tabs are as follows:
- Hover – If enabled, actions will be triggered when you move your stylus over the hotspot
- Swipe – If enabled, actions will be triggered when you swipe from the edge of the screen
- Status Bar – Lets you perform certain actions by tapping on the status bar
- You can just opt to enable one of the tabs and just leave the other two disabled. You can also choose to enable all three custom gesture tabs. The choice is yours.
- To set up a custom gesture, tap any tab that you like (ex. Swipe) then select one of the hotspots or trigger spots – ex. left area, top area, right area, bottom area, upper left area, lower left area, etc.
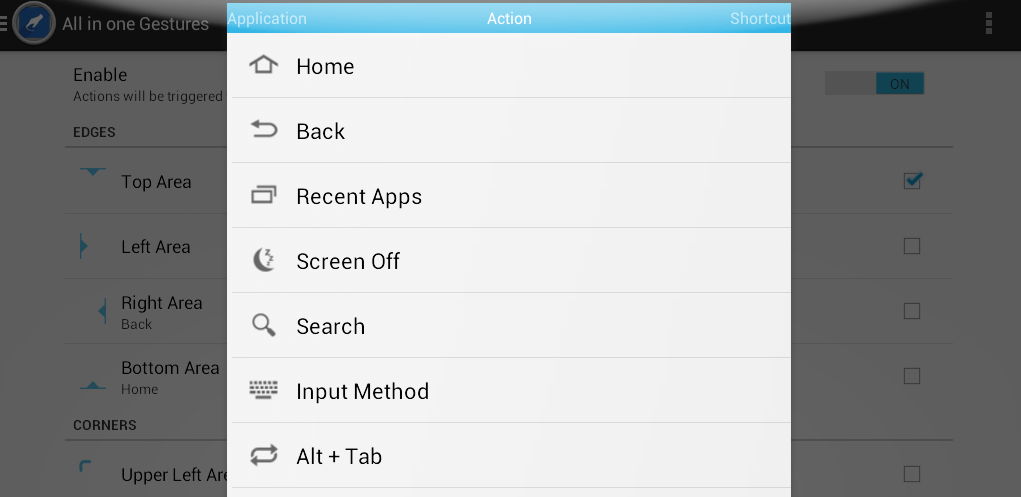
- An overlay window will appear and it will ask you to choose your preferred action or command. You can choose to open a certain app, activate a shortcut or carry out a system command such as search, screen off, adjust volume, go to home screen, go back, view recent apps, etc.
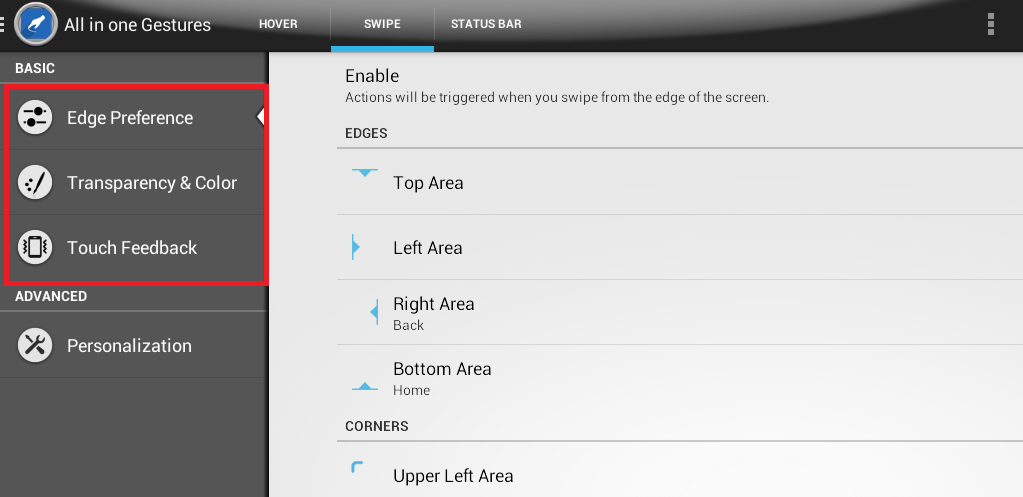
- Once you’re done, press the menu button on the top-left corner of the app.
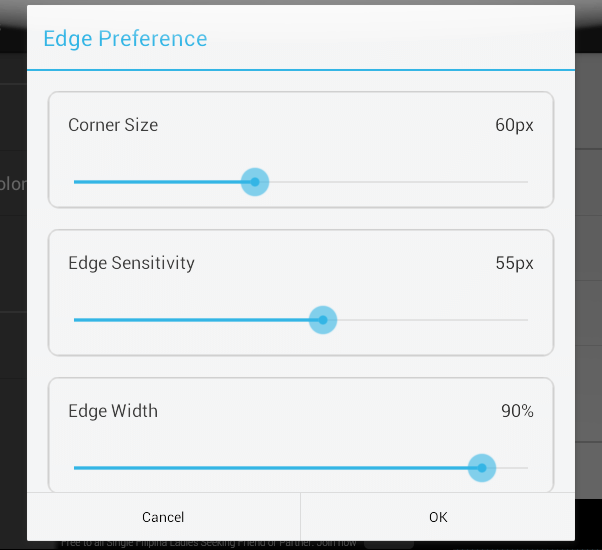
- Customize the edge preferences as well as the trigger spot transparency, color and touch feedback.
- Test out your custom gestures by touching the hotspots.
That’s it. You’re done.

 Email article


