You can add plenty of shortcuts to the context menus in Windows. Previous articles have told you about how to add software, folder and system tool shortcuts to the context menus. With the Cooltweak program we can also add image resize options to them.
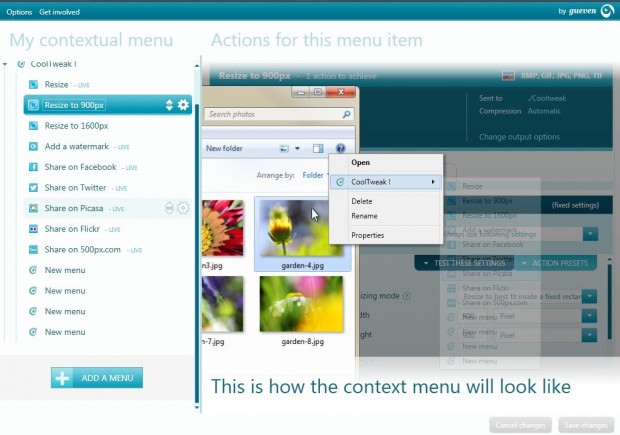
Open this page and click Download Web Installer to save the setup wizard. Then run through the installer to add the software to Window XP, Vista, 7 and 8. When the software launches it opens the menu editor in the shot below.
There you should select the Resize, Resize to 900 px and Resize to 1600 px options. To add them to the context menu, click the ADD A MENU button at the bottom. Then press the Save changes option at the bottom of the window.
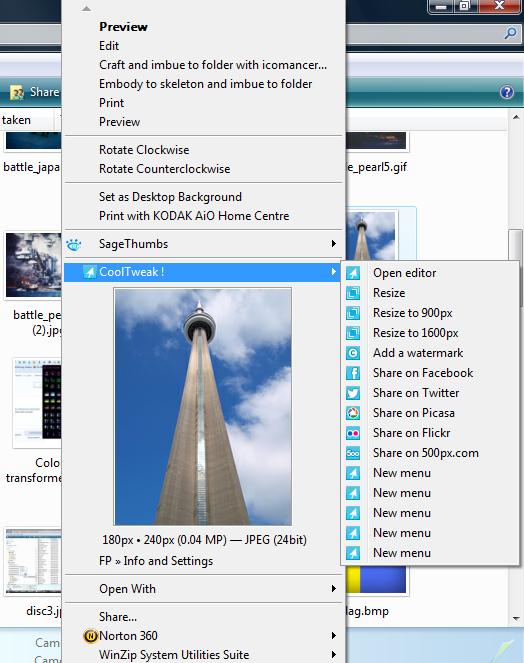
Next right-click a file to open its context menu. The context menu will now include a Cooltweak submenu as in the shot below. From the submenu you can select Resize, Resize to 900 px and Resize to 1600 px options.
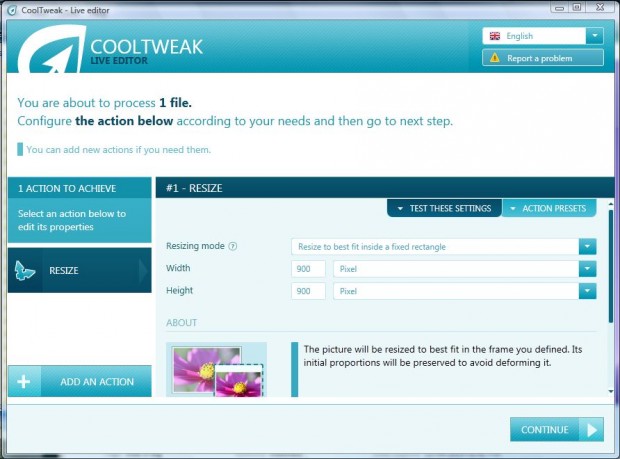
Select Resize to 900 or 1600 px options to adjust the image dimensions. That saves the resized image to in a Cooltweak folder under the parent directory of the file. Alternatively, click Resize to open the window below.
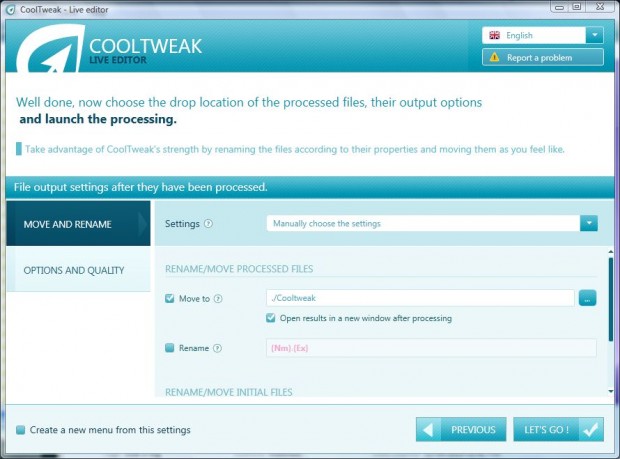
There you can enter specific resize values in the Width and Height text boxes. In addition, select a resize mode from the Resizing mode drop-down list. Then press the Continue button to open the window in the shot below.
From there you can choose a folder to save the resized image to. Click the Rename check box to enter an alternative title for the resized image. Then press the Let’s Go option to save the resized image file.
So with Cooltweak we can now resize images directly from the file context menu. In addition, you can also add watermark and photo sharing options to the context menu. As the software’s website states, “Give it a try and this handy tool will quickly become essential.”

 Email article


