 Email article
When you press the PrtScn button, it saves the shot to the clipboard for you to paste into another application with Ctrl + V. However, with the Screenshoter software we can take snapshots and save them to a specified folder with the PrtScn key so there’s no requirement to paste them into an application. With this program you can also take shots of selected areas.
How to take a screenshot and automatically save it with the PrtScn hotkey in Windows
You can add the software to most versions of Windows from the publisher’s website. There, press the DOWNLOAD NOW button to save the Zip file. Then you can open the software from the Zip without extracting it with the freeware 7-Zip utility. Screenshoter has a system tray icon from which you can open its window by right-clicking the icon and selecting Open window.
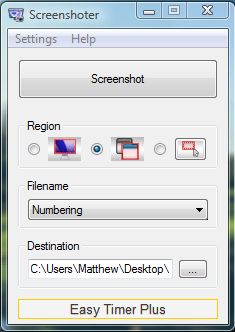
When you open the window above, you can select a folder path to save snapshots to. There press the … button to choose an alternative folder path. Next, press the PrtScn key to capture and save a snapshot. You can open the snapshot from the path specified in the Screenshoter window.
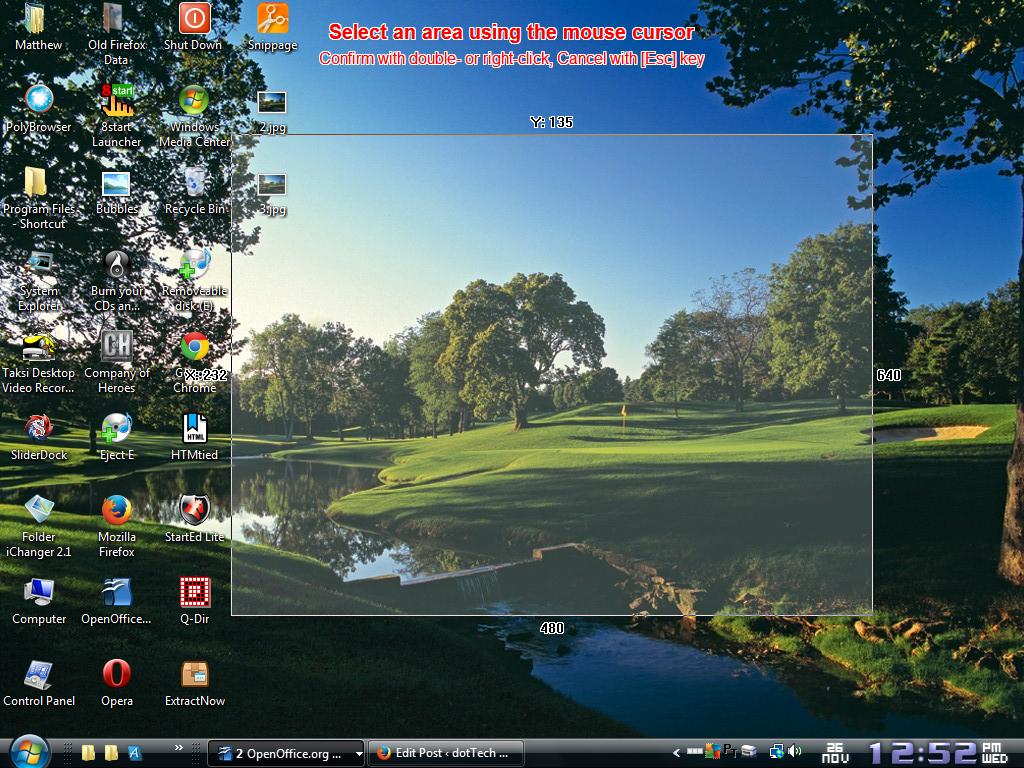
From the Screenshoter window you can also select to capture smaller regions in your snapshot. Select the Active window button to capture just the currently active window with PrtScn. Click on the Area button to capture a selected area with the mouse as below.
So Screenshoter gives us a handy shortcut for taking and saving screenshots with the PrtScn key. Check out this YouTube page for a short demo of the software.


