 Email article
Scheduling a post in Facebook is easy. Now, what if you want to backdate your posts? When you backdate a post, you’re basically putting a date that’s earlier than the actual date. It can be highly useful especially when you’re posting multiple posts at the same date. It can also be applied to content that you should’ve posted at a specific time but didn’t manage to do so.
Speaking of which, did you know that you can actually backdate posts in Facebook? It’s a feature that is currently available on Facebook Pages. If you want to put an earlier date to a post instead of the actual date and time, here’s what you need to do.
How to backdate posts in Facebook
- Log in to Facebook and go to your Facebook Page. If you’re managing multiple pages, then simply select one of the pages that you manage.
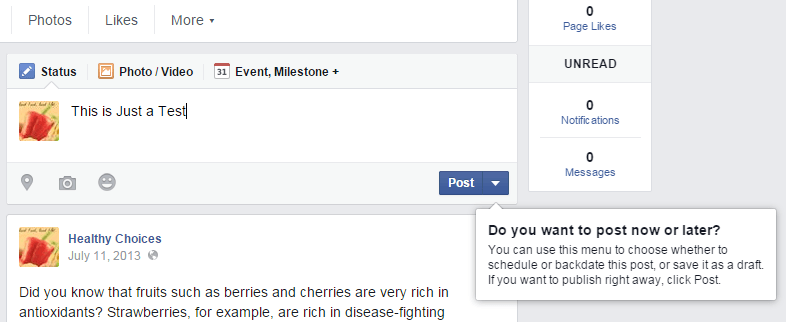
- Next, compose your post like usual. Attach photos, links, videos, etc.
- Once you’re done writing your post, click the small arrow next to the “Post” button in your Facebook Page status box.
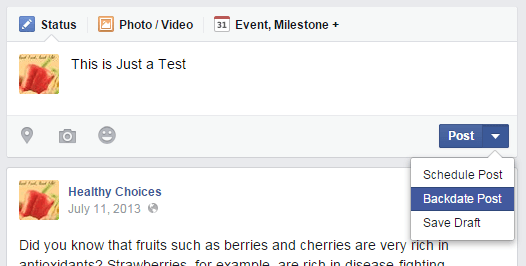
- There will be a sub-menu. In the sub-menu, select “Backdate Post”.
- An overlay window will appear. It will then ask you to set the date for your backdated post. You can backdate a post as far back as 1970. After setting the year, don’t forget to set the month and date. Just make sure that you’re not setting a date that’s earlier than the creation date of your page or else, your post will not be posted.
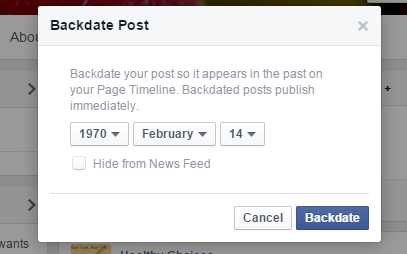
- Click “Backdate” when done.
- That’s it. Your backdated post will be posted immediately. You can view it on the timeline and feed of your Facebook Page.
Anyways, it would be great if the said feature will also be made available to regular Facebook users. For now, you can go ahead and check it out.


