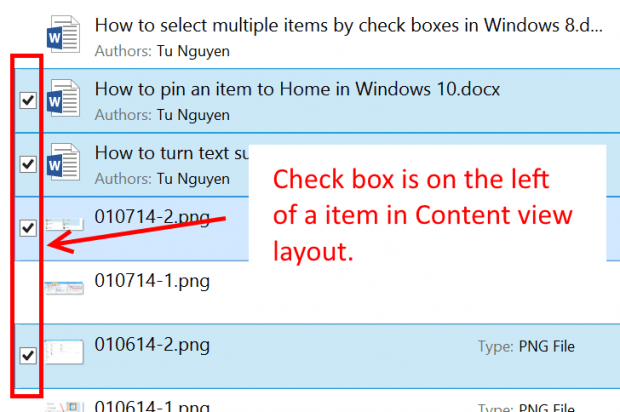
Since Windows 8 introduced to public, there are more and more device with touch screen available in the market. However, not all Windows elements, especially the Desktop, are fully optimized for your fingers. For example, traditionally, if you want to select multiple items at once, hitting Ctrl and chose them is the only thing you need to do. With touch screen, it’s nearly impossible to select items that are not side by side. Fortunately, Windows gets an option to show a little check box on an item so you can easily select them with your finger.
How to show item check boxes
In previous versions of Windows, the option “Show item check boxes” is buried under Folder Options. Thanks to Windows 8’s Explorer ribbon style, you only need a few click to access this option. This works for both Windows 8 and Windows 10.
- Open Windows Explorer.
- Click/tap View tab.
- Then place a check at “Show item check boxes.”
Tips
After enabling this option, you won’t see any check box because it only show up when the mouse pointer hovers the item. I don’t know why Microsoft does that because with fingers, you can’t perform a hover action like the pointer. Therefore, you have to guess where the check box is to tap it. I promise you it will drive you crazy!
So here’s my solution. It is much much easier to use those check boxes if you choose the following view layouts: Detail, List, Content, and Small icons. Why? Because in these layouts, the check box is placed right on the item left side. You just tap the left space of the item, do not tap the icon, to select it. In other view layouts like Large Icon, you must tap precisely at the icon’s top left corner to place a check box. It’s very difficult and frustrating.
However, let’s just enjoy it and hope Microsoft will figure out how to make this task easier in the future.

 Email article


