Nowadays, there are so many types of note-taking apps. You just have to take your pick. There’s a note-taking app for every platform may it for Windows, Android, iOS and even Chrome.
Speaking of which, what if you want a note-taking app that is secure, private and can easily fit your busy lifestyle? Well, in that case, you can consider using “Fetchnotes”. It’s a simple yet very useful tool that you can use to create, organize and share notes.
How to create and organize notes with hashtags in Chrome
- First, download and install the Fetchnotes app from the Web Store.
- Once installed, launch the app.
- After which, you will be taken to the Fetchnotes homepage where you will be required to log in or sign up.
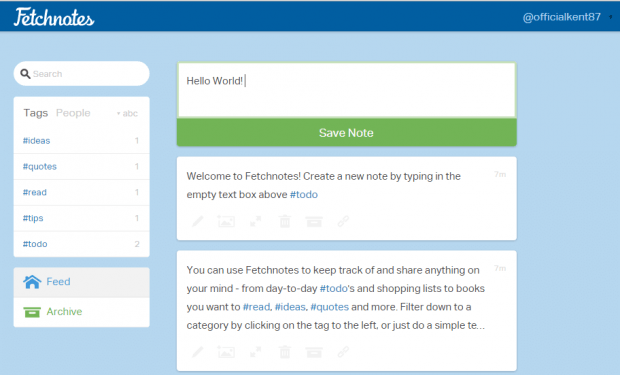
- After logging in, you will be immediately taken to your Fetchnotes online dashboard. On your dashboard, you can see a simple interface with minimalist design. On the left side, there’s the search bar, tags, people, feed and archive section. As for your notes, they will be displayed on the center. You should also take note of your Fetchnotes username. You can share your username to others so they can mention you in their notes.
- To create a new note, just type anything that you like on the empty field right above your existing notes. Once you’re done, click “Save Note”.
- To edit an existing note, double-click on it. If you hover your mouse over the note, you can find the tools to edit, collapse and delete your note.
- To organize your notes, just make sure to include at least one hashtag. For example, you can use the #travel hashtag to organize your travel notes. You may then filter down your notes by category by clicking the tags on the “Tags” section.
That’s it. As you can notice, the interface of Fetchnotes is similar to Twitter so you can easily figure out how it works. The main difference is that it is made for notes. Plus, your notes are private. You may be able to share them but they won’t be visible to the users that you didn’t mention.

 Email article


