If you still haven’t noticed, the default zoom level in Chrome is 100 percent. This is the standard level that’s suited for most users. At this zoom level, the text and other webpage elements don’t appear too large or too small. Even so, you can manually increase or decrease the zoom level. It will just depend on the site that you’re viewing.
Now, what if you want to change default the zoom level? Well, that’s easy. Just read and follow the steps below to learn how.
How to change the default zoom level in Chrome
- Open Chrome then click the menu icon at the omnibar.
- On the menu that appears, click “Settings”.
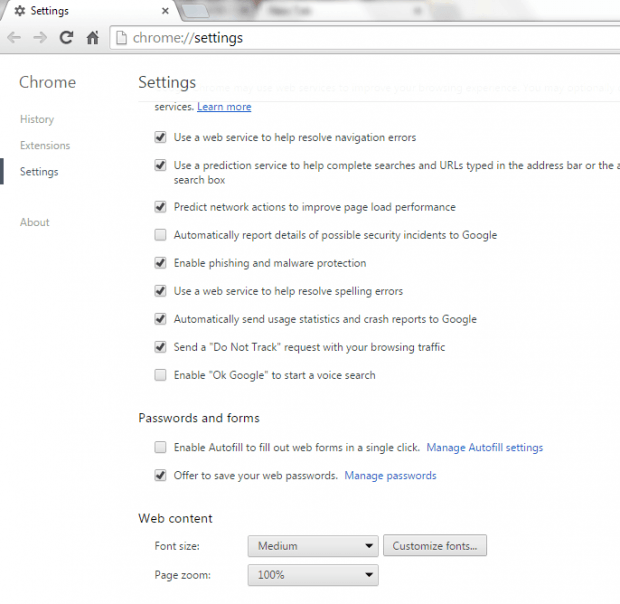
- Alternatively, you may just type chrome://settings on the address bar then hit “Enter”.
- On your browser’s settings page, scroll down until you see the “Show advanced settings” link.
- Click the link and then scroll down again until you find the section for “Web content”.
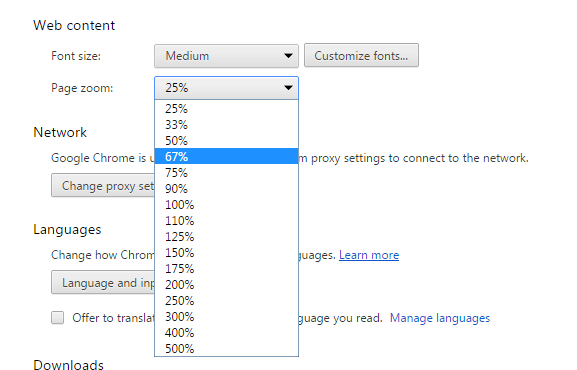
- Under “Web content”, click the drop-down menu for “Page zoom” then change the default zoom percentage. By default, it’s 100% but you can increase or decrease the percentage. A higher zoom percentage denotes larger texts and page elements. A lower zoom percentage denotes smaller texts and page elements.
- So after changing the default zoom level, you may close the settings tab.
- That’s it. You can immediately notice the changes.
If you want to restore the zoom settings back to normal, just repeat the steps listed above but make sure that you set the zoom percentage back to 100%. It’s as simple as that.

 Email article


