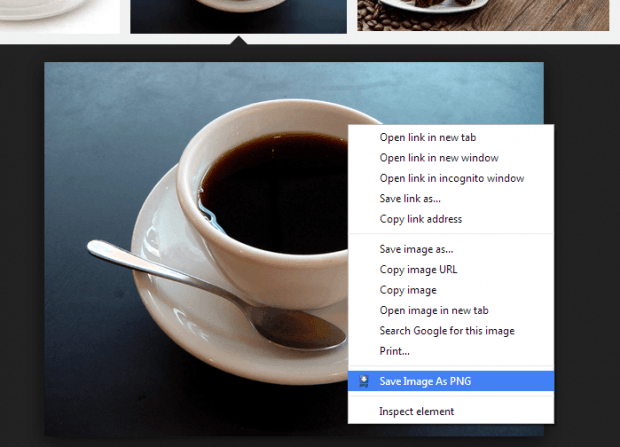
In Chrome, you can easily save images from any web page. Just use the “Save image as” option in the image context menu. By default, you can download and save the images in their original format. For example, if you download a JPG file, then it will be saved as JPG. Now, what if you want to convert the image first to PNG before saving it to your computer?
If that’s what you want, then you can choose to add a “Save image as PNG” option to your browser’s image context menu. If you want to learn how, simply read and follow the steps below.
How to easily save images as PNG in Chrome
- Open your Chrome web browser and then download and install the “Save Image As PNG” browser extension.
- Once installed, go to Google Image Search or to any site where you can search, view and download images.
- View the photo that you want to download and save as PNG.
- Right-click on the photo and then on the context menu that appears, select “Save image as PNG”.
- It may take a few seconds for the extension to convert your image so be patient.
- After converting your image to PNG, the “Save as” dialog will appear so all you need to do is to choose the location or folder where you want to save your image.
- Click “Save” to confirm and that’s it.
- Your image will be saved as a PNG file. You can confirm it by right-clicking on the image. Go to “Properties” and then check the “Type of file”. It must be .png.

 Email article


