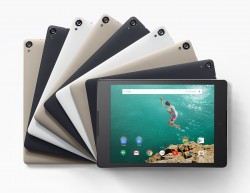
 The Google Nexus 7 is arguably the best tablet in the Mountain View companies range. It isn’t bad when comparing it against just about anything that runs Android because it’s always at the top of the list when it comes to Google software updates. We are now seeing the first batch of Android 5.1 OTA updates rolling out for the Nexus 7 with the build number LMY47D. If you are running that firmware build already you can follow the guide below to open up the system internals with root access. Only then can you start installing custom ROMs.
REQUIREMENTS
- You need to have the Nexus 7 device to use the guide. Do not try flashing the files we have below on a different device because it may soft-brick the tablet or phone.
- You should already be running the latest version of Android 5.1 Lollipop with the firmware build number LMY47D before starting the guide. Check the build number by looking at the About Device menu.
BEFORE WE BEGIN
- Install the Google Nexus USB drivers on your computer. Turn off the computer and turn it back on again to have the drivers working properly.
- You are installing the official ClockworkMod recovery during the steps. If you don’t want to do that you can skip the CWM file and just flash the SuperSU.
- We advise people backup the OS and ROM using a third-party application from the Google Play Store or use the built-in backup utility.
- The following does the void the warranty if you follow it through. You must flash the official stock Android firmware file back on the device and unroot before the warranty works again.
HOW TO ROOT THE GOOGLE NEXUS 7 RUNNING LMY47D ANDROID 5.1 LOLLIPOP AND FLASH THE CLOCKWORKMOD RECOVERY/TWRP RECOVERY
- Download Android SDK from here.
- Setup ADB and Fastboot on your computer using the guide from the link above.
- Download ClockworkMod recovery here, or the TWRP from here.
- Copy and paste the file over to the /platform-tools directory of the Android SDK on the computer.
- Download SuperSU from here.
- Plug the Nexus into the computer and transfer the SuperSu over to the internal storage SD card.
- Boot the Nexus 7 to fastboot mode by pressing the Volume Down and Power and holding the buttons down.
- Navigate to the /platform-tools folders and click on a blank white space and hold down Shift. Now choose to open the Command Prompt window.
- Type the command:
fastboot flash recovery recovery-clockwork-touch-6.0.4.3-grouper.img- Choose the recovery option from the menu.
- Scroll down the list until you see “flash zip from SD card” and select the same.
- Select the “Choose zip from SD card” and search for the SuperSU file.
- Now flash the file and wait until it finishes.
- Navigate back to the main recovery windows and select to ‘reboot system now”.
You are all done! Now you can start installing your choice of custom ROMS and root-requiring application from the Play Store and other third-party sources.

 Email article


