Did you know that aside from plain documents, you can also create envelopes and other print materials in Google Docs? Speaking of which, this post will teach you how to create a simple envelope document in Google Docs. Anyways, you don’t need to worry even if you aren’t that skilled in using Google Docs. Just follow the steps listed below.
How to easily create envelope documents in Google Docs
- Okay, so the first thing that you need to do is to log in to your Google account.
- After which, download and install a free Chrome browser app called “Envelopes for Google Docs”.
- Once Envelopes for Google Docs is installed, launch it from your browser’s apps page.
- Next, you will be asked to authorize the app’s access to your Google Docs account. Just click “Authorize” whenever you see the authorization message.
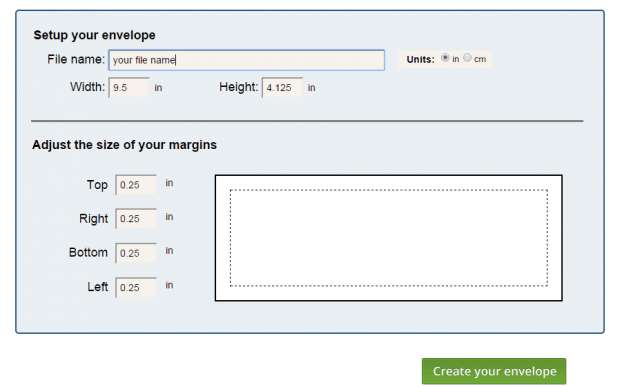
- On the next page, you will be asked to set up your envelope. Enter your envelope file name, width, height, margins, etc.
- Click “Create your envelope” to confirm.
- Next, click the link that says “click here to access your file”.
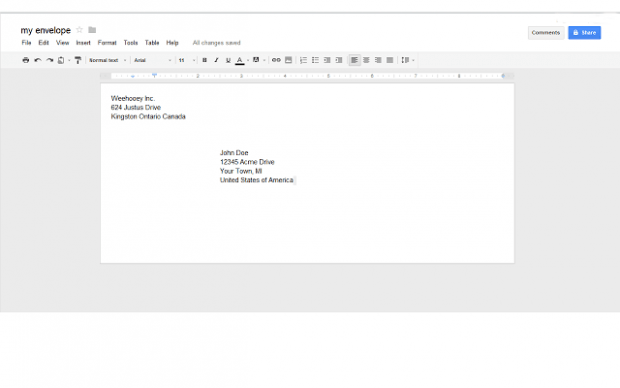
- In a new tab, you will be able to see your blank envelope document in Google Docs.
- Just type or enter any text that you want to place in your envelope (ex. company name, addresses, etc.) and don’t forget to download a copy of your work.
That’s it. Your custom envelope is finally ready. To print it, just go to “File” > “Print” or simply enter “Ctrl + P” on your keyboard.

 Email article


