 Email article
Word has a feature that allows you to add a watermark to a document. By default, you can select a watermark from the gallery. Most of these watermarks are based on text but what if you want to use your own watermark? To be more specific, what if you want to use a custom image or picture as a watermark? Well, in that case, you can refer to this guide.
How to use an image as watermark in Word documents
- Launch MS Word from your desktop.
- Once you’re on MS Word, create a new blank document.
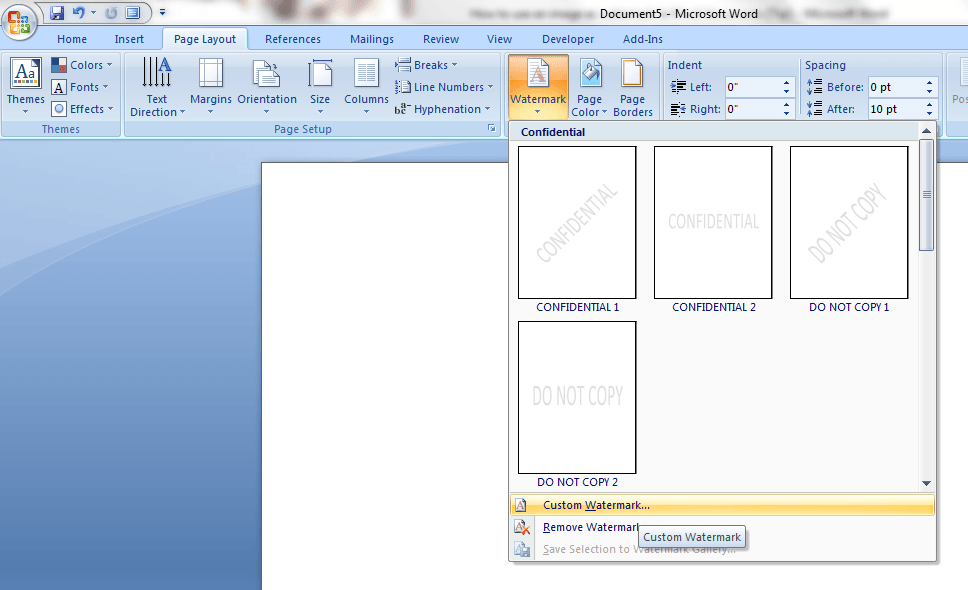
- After which, go to the “Page Layout” tab and select “Watermark”.
- On the “Watermark” drop-down menu, select “Custom Watermark”.
- On the dialog box that appears, select “Picture Watermark” and then click “Select Picture” to choose the image that you want to use watermark.
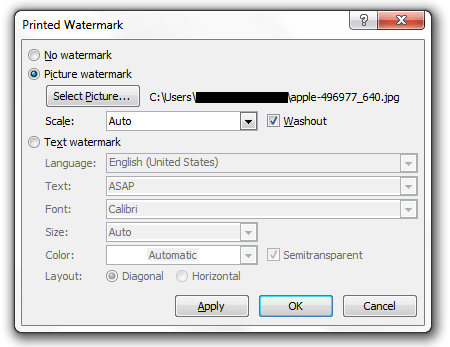
- For “Scale”, select “Auto” and then click the check box next to “Washout”. By doing so, you can achieve a “washout” or faded effect for your document watermark.
- Click “Apply” then “OK” to confirm.

- That’s it! As you can notice, your document has been automatically updated to show a watermark in every page.
By adding a watermark to your documents in MS Word, you can protect your documents from any unauthorized claims. You can also choose to save a blank version of your watermarked document as a template.
It’s very easy to do so go ahead and give it a try.
Note: This guide only applies to Microsoft Office Word 2007 or higher.


