Perspective is something your images may or may not lack. Either way, Paint.NET’s Perspective plug-in might come in handy. With that you can add or reduce perspective in a picture.
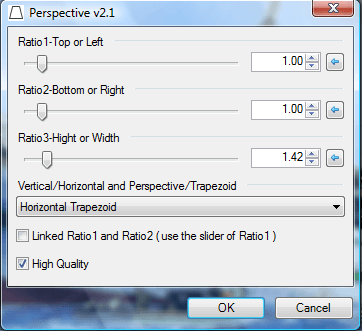
First, add this plug-in to the image editor from here. Click the ZIP icon on that page to save its ZIP. To extract the plug-in’s ZIP, right-click it and select Extract All. Extract it to Paint.NET’s Effects folder. Run the software, click Effects > Distort and select Perspective to open the window below.
 Firstly, you can select four alternative perspective settings from the drop-down list. You can select a Vertical Perspective, Horizontal Perspective, Vertical Trapezoid and Horizontal Trapezoid. The vertical settings adjust the images vertical perspective, and the horizontal options will configure the sideways perspective.
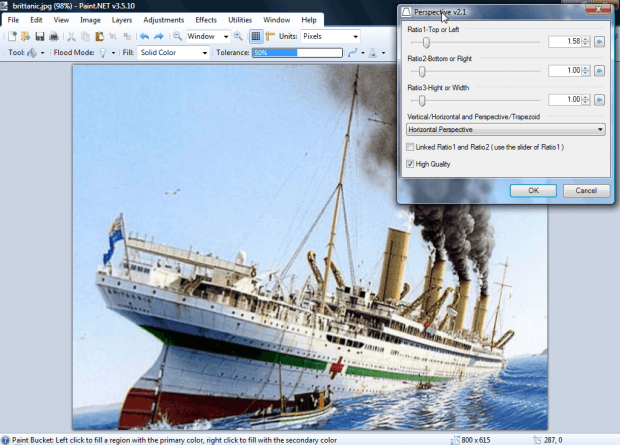
Then you can adjust the perspective by dragging the bars on the window. If you selected a vertical setting, dragging the Top or Left bar adjusts how much of the picture is on the left side. Dragging that bar further left reduces the height of the picture’s left side. Drag it further right to increase the perspective from the left of the image as in the snapshot directly below.
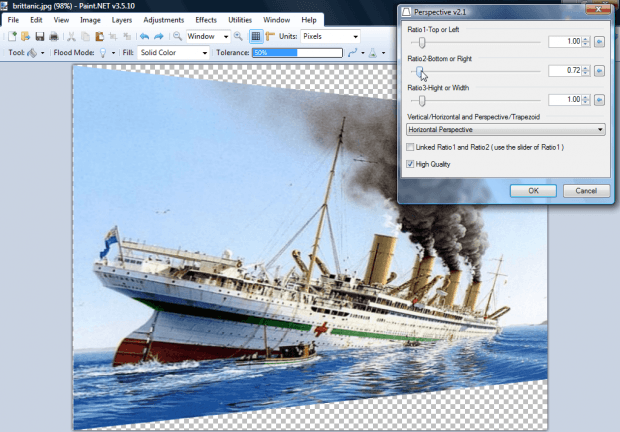
 The Bottom or Right bar will adjust the amount of image on the right. If you drag that further left, it will shrink the right of the image as below. That will leave areas of transparent background that you can fill with fill tools.

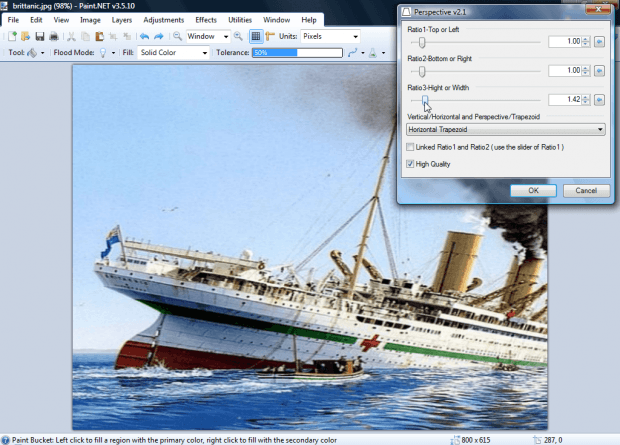
There’s also a Height or Width bar that you can drag to edit the image. Dragging that to left will reduce the height or width depending on whether you’ve selected a vertical or horizontal setting. If you drag it further right the h or w expands, which can cut out parts of the picture as in shot below.

So this is a handy tool for adjusting perspectives in images. With it you can add greater horizontal or vertical perspective to a picture. This forum page includes further details for the plug-in.

 Email article


