A self-extracting archive enables people to extract archives without extra software such as 7-Zip. If you have lots of files to attach to an email, you can attach them as a self-extracting archive. You can set one up with the IExpress tool in Windows.
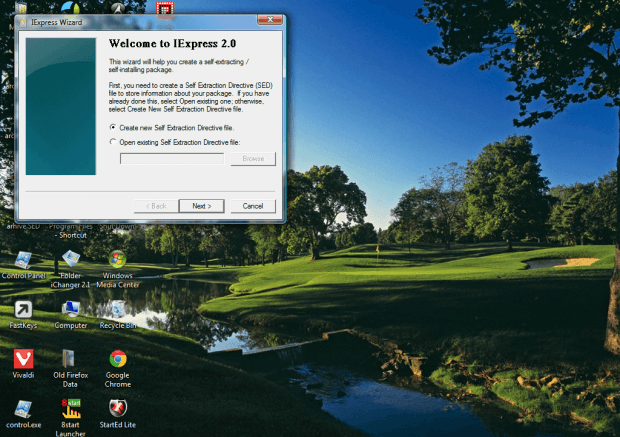
Enter iexpress.exe in the Start Menu search box to open the window below. That opens the IExpress Wizard with which you can set up a self-extracting archive. First, select the Create new Self Extraction Directive file option and press Next.
To set up a self extracting archive for files, and not an installer, select the Extract files only option. Then press the Next button to enter a package title. That’s the title which appears in the archive’s dialog boxes.
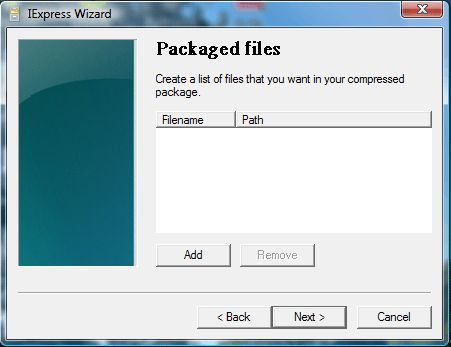
You can also select confirmation prompts and license agreements, but they’re not exactly essential if you’re just archiving a collection of images or other documents. Skip through those steps until the packaged files step opens as below. Press the Add button to select the files to include in the archive.
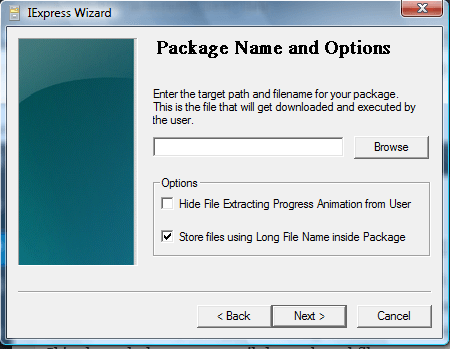
The package name and options step is also an essential one. There enter a target path and file title for the package. Press the Browse button to choose path destinations. Then select the Save Self Extraction Directive option to save SED file.
Press the Next button to finish the archive. Then when you click on that archive, you can select a folder to extract the files to as below. That extracts the archived files to folder.
So now you can set up self-extracting archives in Windows without any third-party software. As Windows still lacks support for various compression formats, self-extracting archives might be a good alternative.

 Email article


