If you’ve long been using separate tools for time tracking and project management, then you might consider looking for a more efficient option. If you’re a Chrome user, then you can opt for a tool that will not only track your working time, but will also help you manage your tasks and projects in one dashboard.
How to track time and easily manage projects in Chrome
- For this, you will need to add a third-party app to Chrome. So go to the Web Store and add the “TrackingTime” app.
- After adding the TrackingTime app to Chrome, launch it. The app will open a new panel on your desktop. Register for a free account and then log in to your dashboard.
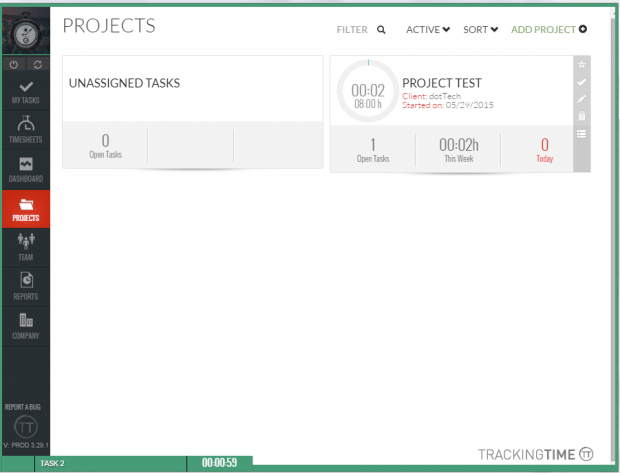
- On your TrackingTime dashboard, click the “Projects” tab on the left sidebar and then select “Add Project”. Enter the details required for your new project such as your project name, client, service, billing, due date and time. Click “Add Project” to confirm.
- Once your project is created, click the “My Tasks” tab on the sidebar then add a new task. Enter your task name, project, due date and time estimate. Click “Save” to confirm.
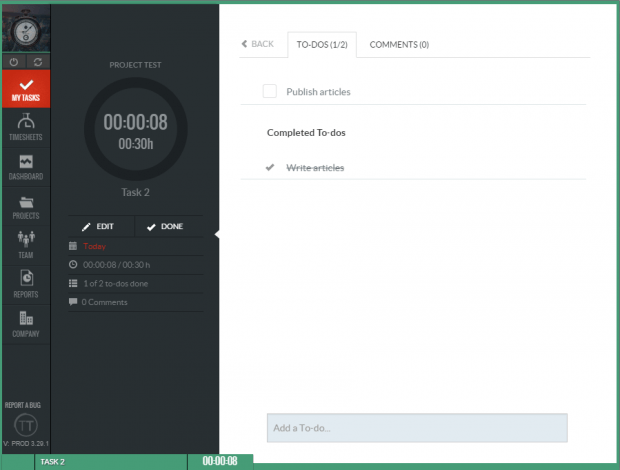
- For every task, you can also create a to-do list. Just type the things that you need to do for that particular task on the “TO-DO” section.
- Now, to start tracking time, just click the “Play” button on the timer.
- As you work on your project, you can monitor your progress and check the things that you’ve already finished on your to-do list. You can also add comments or notes if you want.
- Once you’ve finished your task, click “Done”.
- If you want to track and evaluate the time that you spent on a specific project, just go to the “Timesheets” tab.
- To view a report on your previous and current projects, just go to the “Reports” tab.
So that’s it. The TrackingTime app for Chrome is really easy and convenient to use so you better check it out!

 Email article


