In Windows 10, Alarm & Clock is a new app that adds extra features to your system clock. It can create additional clocks as in Windows 7. But what I love is that it has a quick way to compare clocks in different time zone at any chosen time. And to take advantage of the new Start Menu, you can now pin any clock as a live tile.
How to add additional clocks
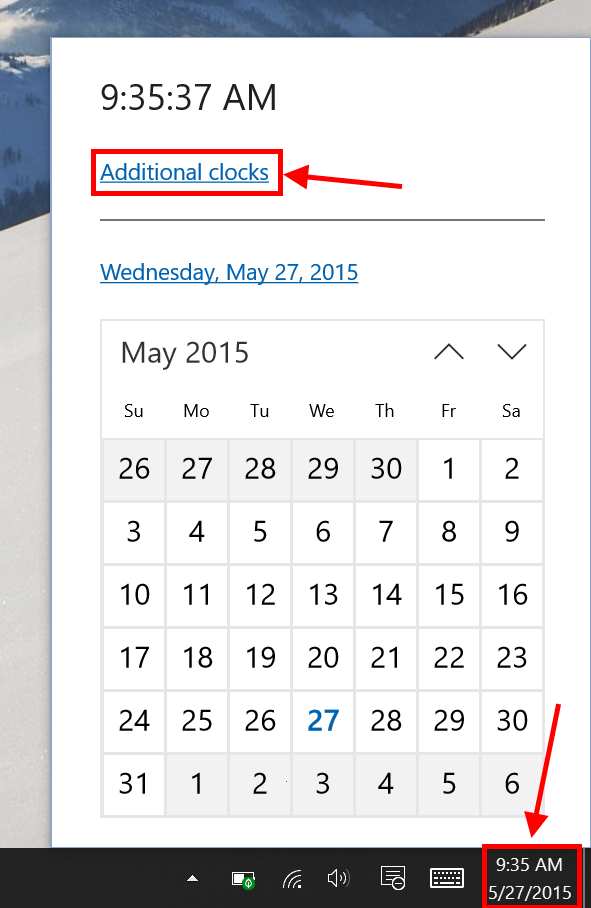
- First, hit the clock at the bottom right of your screen. You may notice the different UI from Windows 7/8 (sadly the analog clock is no more).
- Tap “Additional clocks” to open the Alarm & Clock app.
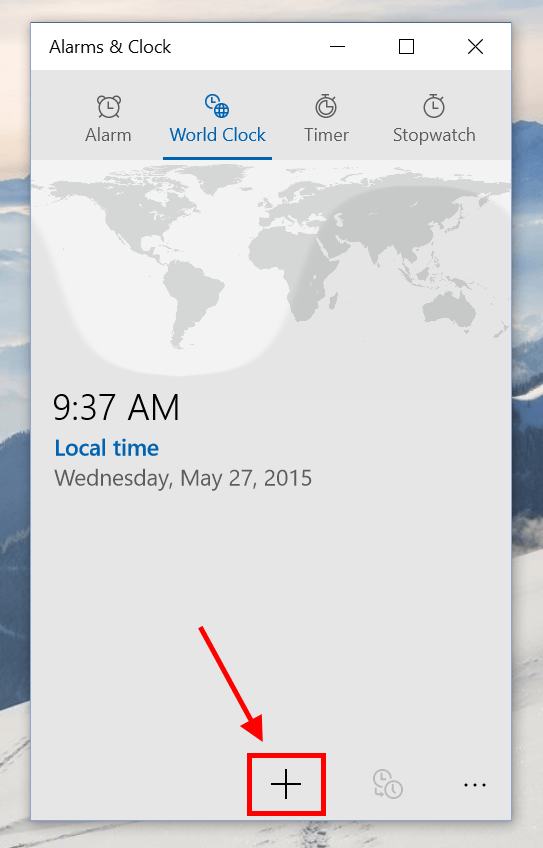
- In the app, tap the plus button at the bottom.
- Then just simply search for the place you want to add.
In the current build of Windows 10, your additional clocks won’t be shown in the clock panel when you click the clock on the system tray. That’s why you may want to pin your clocks to the Start Menu.
How to pin clocks to Start Menu
- Open Alarm & Clock app from the Start Menu.
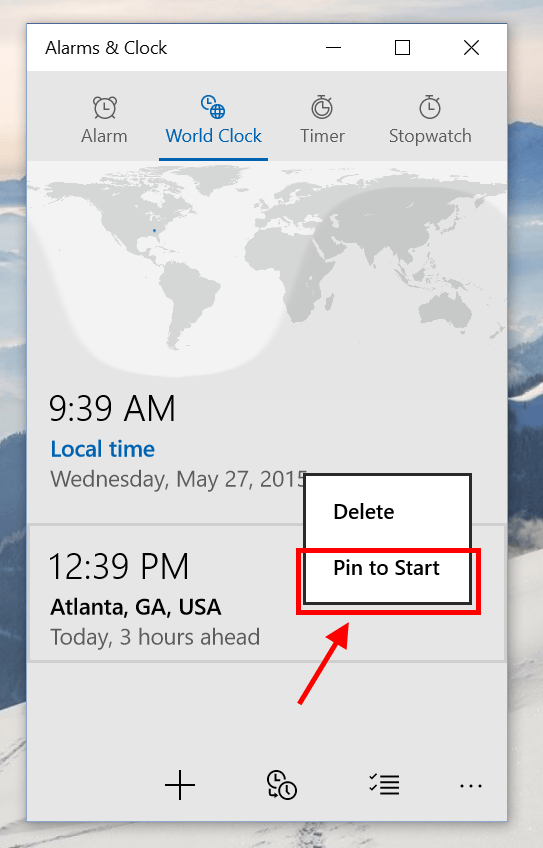
- In tab World Clock, right click/long tap on the clock you want to pin and select “Pin to Start.”
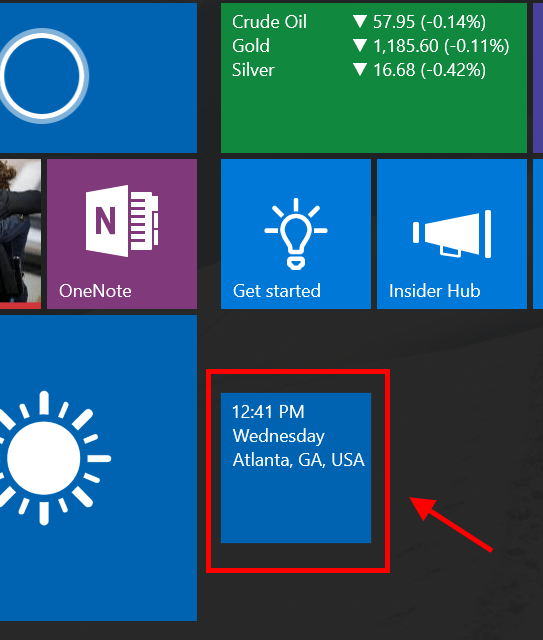
- Now you’re clock is pinned in the Start Menu as a tile.
How to compare clocks
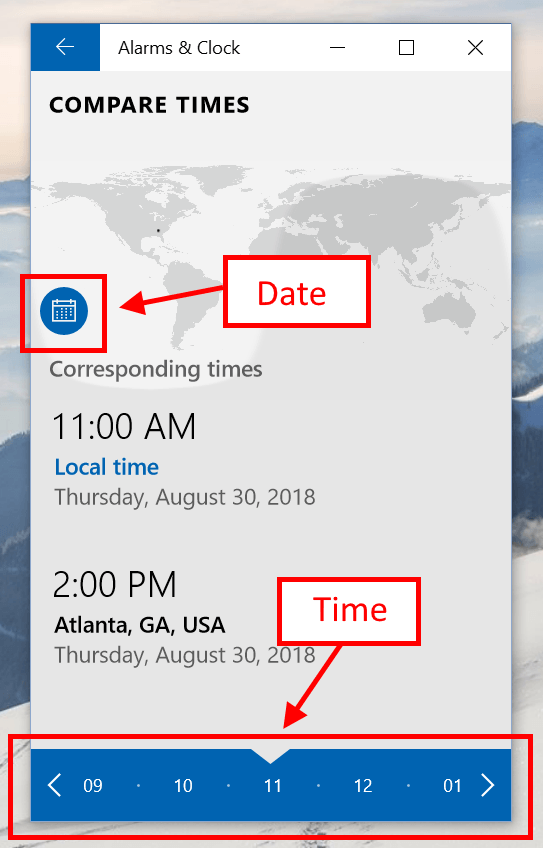
Comparing clocks is my favorite feature of the app. I find it very helpful anytime I need to catch a conference event in a different country. The app gives me the ability to select the date and time of a distant place and see what time it is in my time zone.
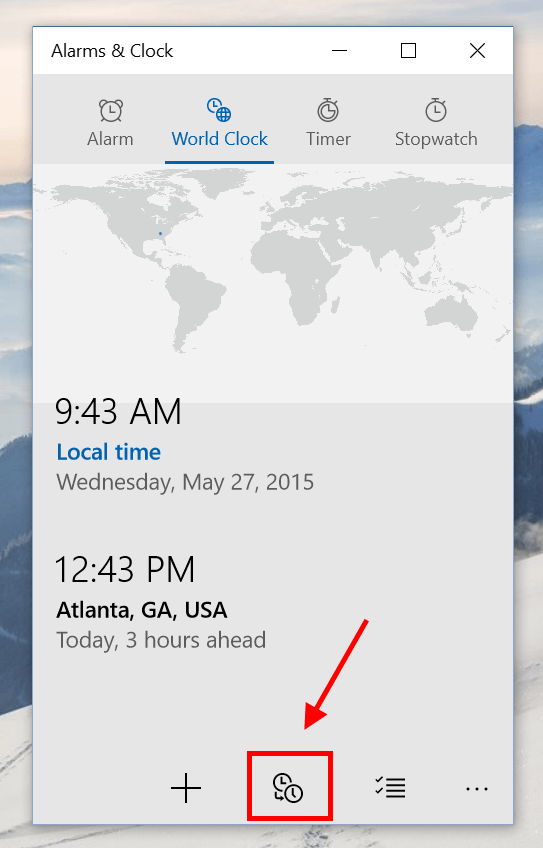
- To compare clocks in Alarm & Clock app, you just need to tap the compare clocks button next to the plus button.
- Then just choose your date and time as shown in the figure below and let the app does the calculation.
Voila! You’re done.

 Email article
