In Gmail, there’s often a tendency for you to keep on adding or sending emails to new contacts. The thing is once they get too many, you definitely need a more efficient way to sort them out. One good way is by organizing your contacts into groups. It’s similar to adding specific labels to emails but this time, you’re going to do it for your Gmail contacts.
By doing so, you can easily send out bulk emails without the need to manually enter each email address in the compose box. This is great especially if you’re always dealing with tasks that involve sales and marketing, email support, newsletters, etc.
How to sort contacts by groups in Gmail
- Log in to your Gmail account.
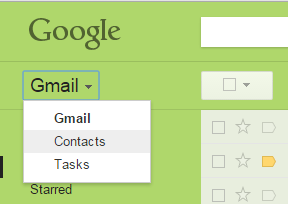
- Once you see your Gmail inbox, click the “Gmail” text right below the Google logo and then on the drop-down menu, select “Contacts”. This will allow you to open the Gmail contacts page in a new tab.
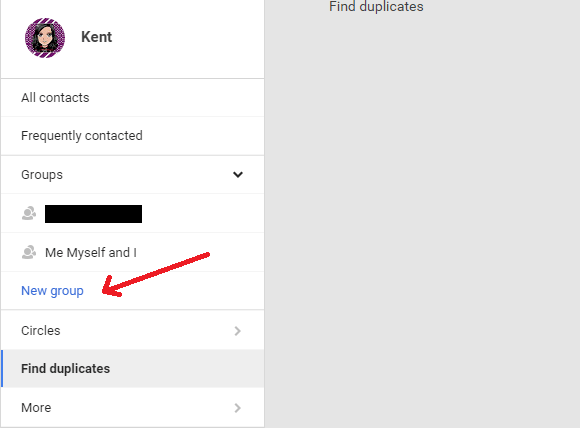
- On the contacts page, go to the menu on the left and then select “Groups”.
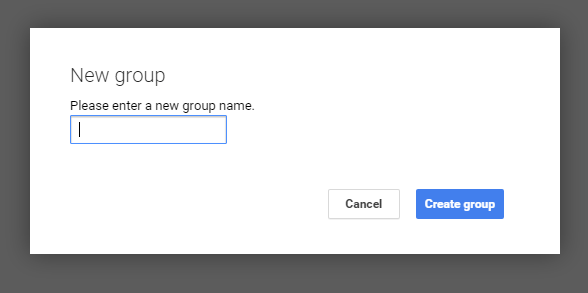
- To create a new group, select “New Group”. On the dialog that appears, set your desired group name and then confirm by clicking “Create group”.
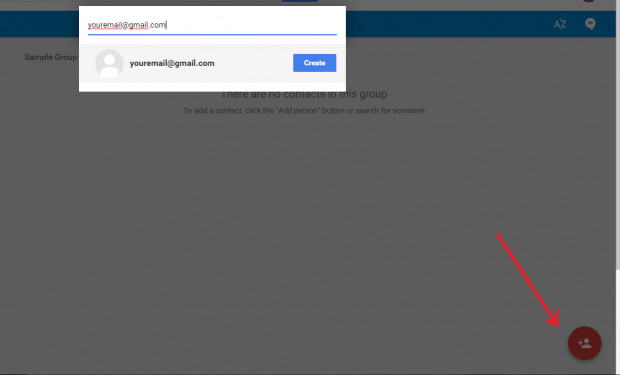
- Once your new group is created, just click the red add contact icon on the bottom-right portion of the page and then you may manually add contacts from your Gmail contacts list.
- If ever the contact that you wish to add isn’t on your contact list, you may still add it to the group. Just type the full email address of your contact, press “Enter”, fill out the contact details and you’re done.
Additional Tip:
For imported contacts, Gmail will automatically sort them out according to the date that they were added. You can just rename that existing group or simply copy or move the contacts from that group into a new group.
It’s as simple as that.

 Email article


