Whenever you click the Start button in Windows 10, you can immediately see a group of tiles on the right. These tiles are commonly referred to as Start Menu tiles or live tiles.
With live tiles, you can easily view and access certain apps. You can also get a quick view of the weather, latest sports and world news, etc. In other words, they’re quite useful especially if you like to conveniently access your favorite desktop apps.
Now, here’s the thing. Windows 10 has a default set of live tiles that you can customize. You can rearrange or delete existing live tiles. You can also replace empty live tile spaces with new ones. Speaking of which, this post will teach the basic steps on how to set a custom Start Menu tile or live tile in Windows 10.
How to set custom Start Menu tiles (live tiles) in Windows 10
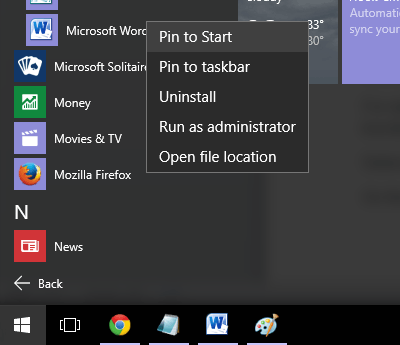
- For starters, you can choose any program or app from “All Apps” to add as a custom live tile. To do this, simply click “Start” and then go to “All Apps”.
- Select a specific app (ex. Skype or MS Word) and then right-click on it.
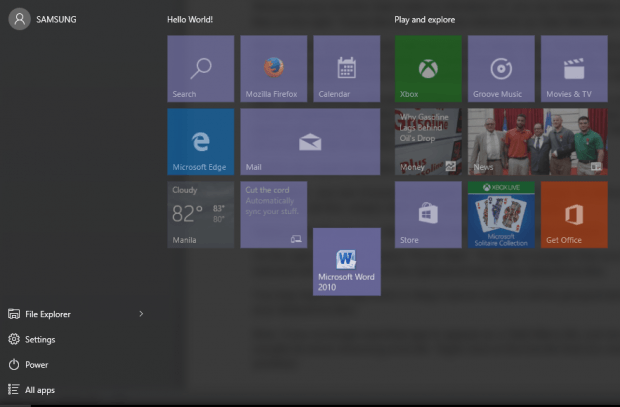
- On the right-click menu, select “Pin to Start”. The app or program that you have selected will then appear on the right panel below your default live tiles.
- You may leave the app there or drag it above so that it will be grouped alongside with your default live tiles.
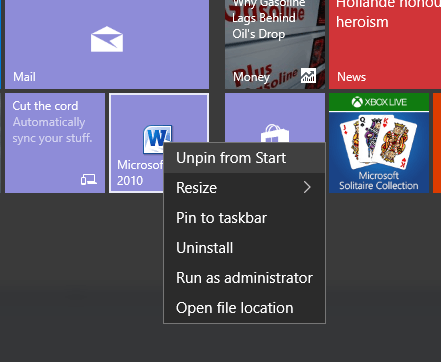
- Now, if you no longer want that app to appear as a Start Menu tile, just do what you usually do when removing a live tile – right-click on the live tile that you wish to remove and then select “Unpin from Start”.
That’s it. You’re done.

 Email article


