Action Center is a component in Windows 10 that serves as a central place to display all the notifications from the system and your apps. It basically is the mobile-inspired notification center for the desktop. There’re also quick action buttons that let you turn on and off some frequent settings with a click. However, some of you want to disable Action Center completely. In this article, I’ll show you just that.
How to disable Action Center in Windows 10 Home
Windows 10 has several versions but two main ones for home customers are Home and Pro. The different between the two is that the Pro version got more advanced features that home users rarely use.
There is an easy way to disable Action Center via Group Policy but this component is not available in Windows 10 Home. So we’ll need to go the hard way, which is editing the Registry.
As usual, before you do anything with the Registry, don’t forget to back it up just in case things go wrong. And here’s how to disable Action Center by editing the Registry.
- Open Registry Editor by typing “regedit” into the search box on the Taskbar and run the first result.
- In the Registry Editor window, navigate to the key:
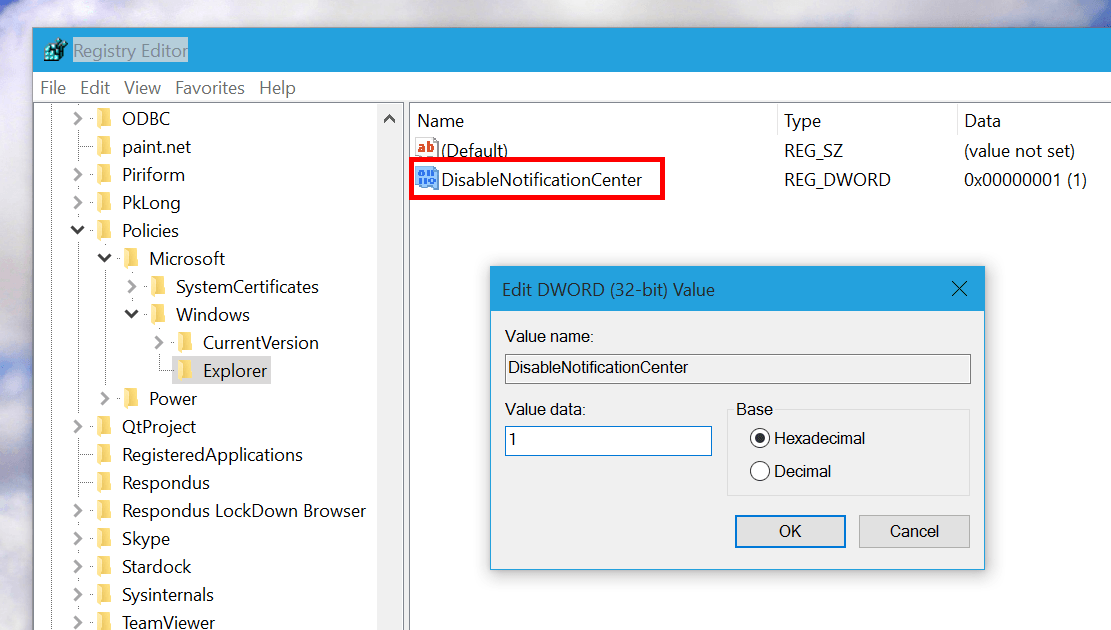
HKEY_CURRENT_USER\Software\Policies\Microsoft\Windows\Explorer
- If you don’t have the “Explorer” key, you can create one by right click on the “Windows” key and choose New -> Key. Then name the new key “Explorer
- Now you’re in the key “Explorer,” right click on the empty space in the right pane then select New -> DWORD (32-bit) value. Name it “DisableNotificationCenter.” After that, double click it and set the value to 1.
- Finally, don’t forget to restart your PC to apply the change.
How to disable Action Center in Windows 10 Pro
As I said above, Action Center can be easily turned off via Group Policy, which is available in Windows 10 Pro, but not the Home version.
- To open Group Policy, you need to type “group policy” into the search box then run “Edit Group Policy” in the result.
- In the Local Group Policy Editor, navigate to
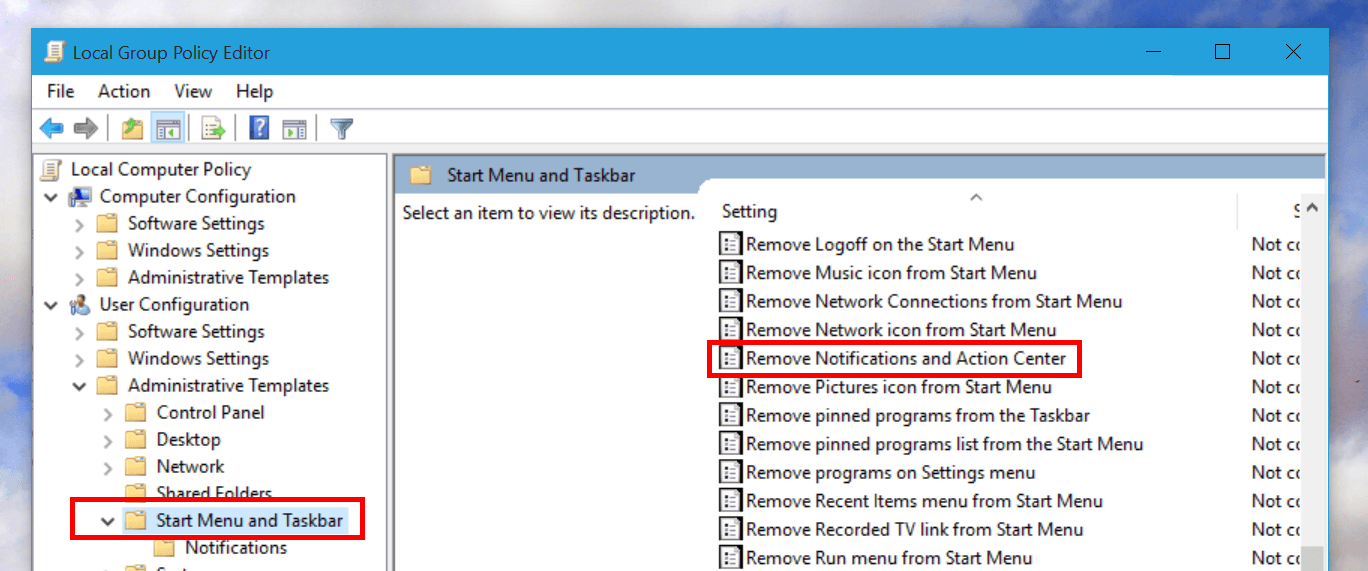
User Configuration\Administrative Templates\Start Menu and Taskbar
- In the right pane, you’ll see a setting named “Remove Notification and Action Center.” Double click it to open its properties.
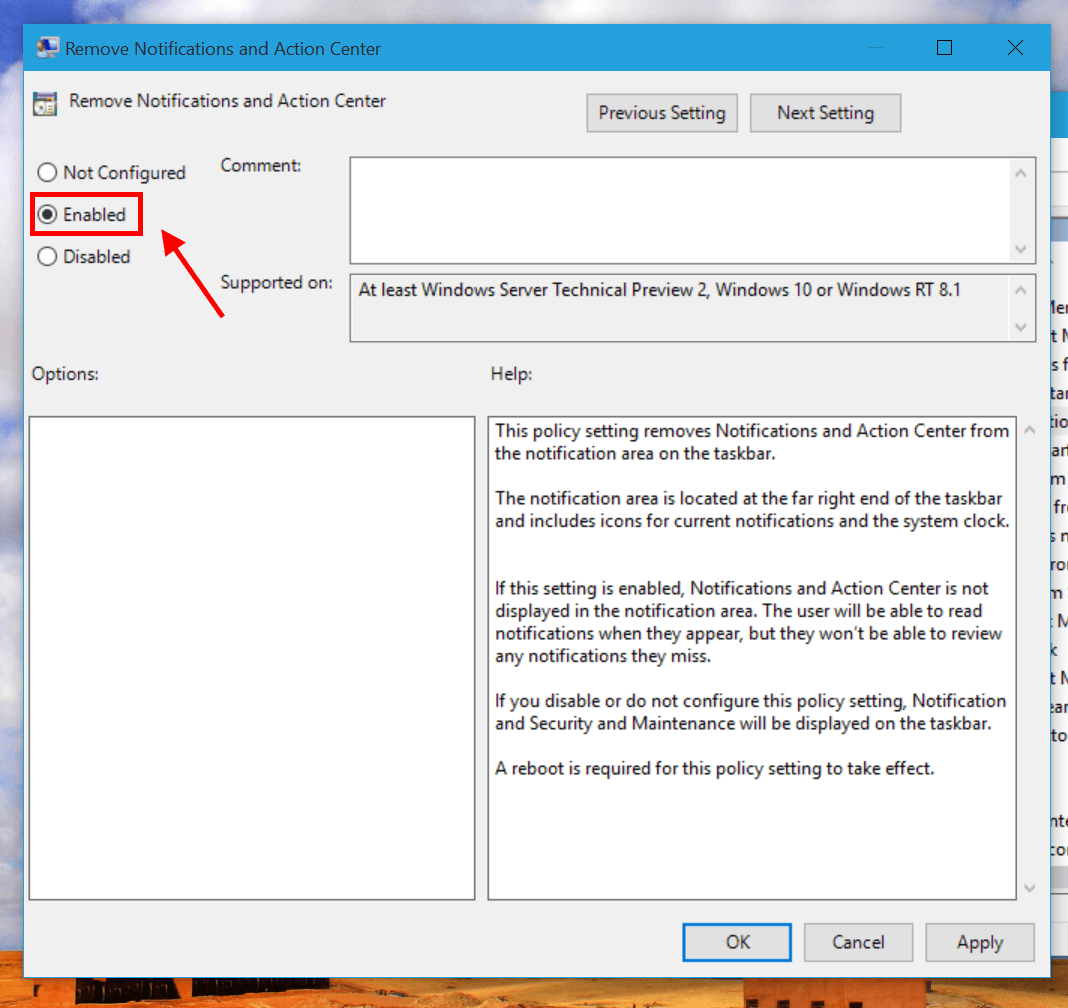
- Then just select “Enabled” and click OK to finish. When you choose “Enabled,” that means: “I want to enable the remove of Notification and Action Center.”
- And restart your device to apply the change.
When you disable Action Center, as expected, you won’t see its icon in the system tray. However, flyout notifications will still show then disappear as normal but there won’t be a way to see already gone notifications.
Anyways, you’re done!

 Email article


