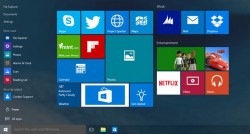
 As you probably know, Windows 10 now comes with a new Start menu after Microsoft received many complaints about it disappearing in recent Windows 8 and 8.1 updates. With Windows falling far behind in mobile devices, they did make an OS that worked well on mobile with Windows 8 and 8.1, but wasn’t so great on desktops. Removing the iconic start menu was such a large change, it left many confused how to navigate. While the new Windows 10 start menu isn’t the same as the old one we know from Windows 7, Windows Vista and the much beloved Windows XP, it does give us back the navigation we’d come to know and love.
If there’s one obvious problem with the Windows 10 start menu, it’s glitches within the modern-looking tiles. If you want to keep the tiles instead of unpinning them from the start menu, you might want to choose which tiles and apps appear on the left side of the menu under the ‘Most used’ apps section.
Notes:
- There is no setting available that let’s you pick what items to pin from the Most Used apps list. However, we can create and manipulate a list by using an addition by subtraction technique I’ll show you below.
HOW TO PIN ITEMS ON THE LEFT OF START MENU IN WINDOWS 10
- Open the Start menu and wait for the ‘Most used’ apps list to populate.
- Those who do not see any Most used list in the menu probably must enable the option first. Navigate to Settings > Personalization group > Start tab and enable them.
- Now all of you would see the list. Right-click over the app you don’t want to see remain in the list.
- You should see four option from a new menu window that pops out. Click over the last option in the list, namely “Don’t show in the list“.
- Continue removing all the apps you don’t want to see until you are left with the apps and tiles you enjoy viewing.
That’s it, you’re done. Many people like to use their inner artist and match colors and delete any tiles that just don’t look all that great with the other tiles. Hopefully your start menu looks more attractive when you’re done.

 Email article


