 Email article
Windows 10 is the latest operating system from Microsoft. It comes as a free upgrade for Windows 7 and 8.1 users for the first year. The giant company has put a lot of effort in getting as much as machine to Windows 10. In latest report, some users found out that their Windows 7/8.1 PC downloaded the Windows 10 installation even when they didn’t reserve the upgrade.
This behavior doesn’t do any harm except it takes about 4 to 6 GB of your system drive. If you really don’t have a plan to upgrade to Windows 10, you can remove this downloaded folder and the upgrade offer all together to free up your disk space.
What is the $WINDOWS.~BT folder and how to remove it
If you are on Windows 7 or 8.1 and suddenly you see the system drive free space reduces without you install any new program, the $WINDOWS.~BT folder might be your suspect. This folder comes from Windows Update and it contains the bits of Windows 10. It can range between 4 and 6 GB depend on your system. As a folder, it can be deleted easily. However, first, you need to see it because it’s a hidden folder.
- To show a hidden folder, in either Windows 7 or Windows 8.1, click Start then type “folder options.” Open Folder Options.
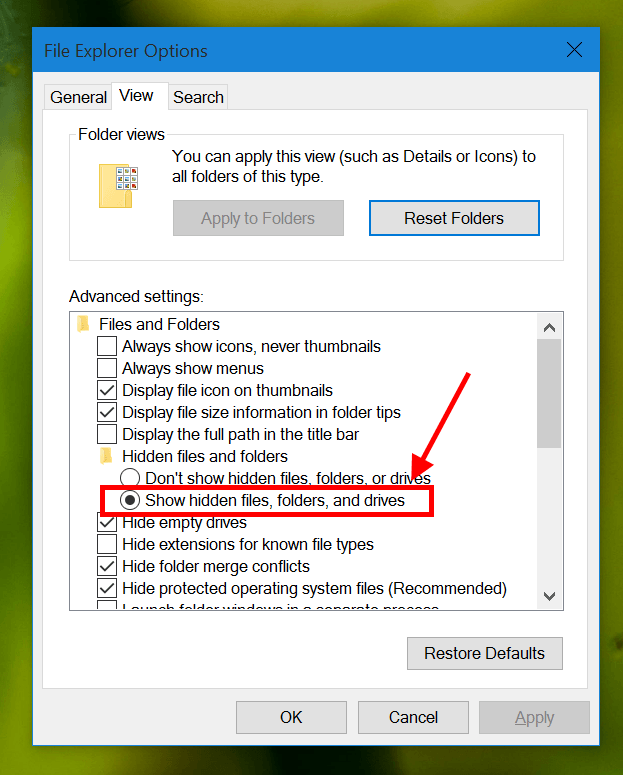
- In Folder Options window, select View tab.
- Scroll down the list you’ll see the section “Hidden files and folders.” Select “Show hidden files, folders, and drives.”
- Click OK to apply the change.
After you set to show hidden folders, navigate to your system drive and you’ll see the $WINDOWS.~BT folder. Just simply select it and hit Shift + Delete to permanently delete the folder.
There is a catch though. Because the upgrade offer is still in your system, Windows Update will eventually download Windows 10 installation when it has a chance. And you’ll end up with the $WINDOWS.~BT folder again. To stop this, you’ll need to uninstall a update that gives you this offer.

How to uninstall Windows 10 offer update
- First, you’ll need to open Windows Update from the Control Panel.
- On the left pane, click “Installed updates” at the bottom.
- Then find this update: KB3035583 by using the search box on the top right corner.
- When you see it, select the update and click Uninstall button to remove.
- Finally restart your device.
Afterwards, you’re done and there’s no longer a Windows 10 installation downloaded to your system in the future.


