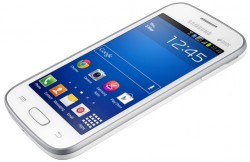
 These are the instructions to install TWRP recovery on Samsung Galaxy Star Plus smartphones. TWRP recovery represents a custom recovery. When you install a custom recovery you are agreeing to replace the stock recovery with a custom version made by third-party developers. It’s for that reason that you warranty won’t work, but you can d much more with the custom version so the choice is yours.
REQUIREMENTS
- The following guide is made for the Samsung Galaxy Star Plus. You may also use it on the Samsung Galaxy Star Pro. Do not use this guide unless you have one of those two devices. If you install the TWRP file in this guide on any other device, you will brick that device.
BEFORE WE BEGIN
- Download the Samsung USB Drivers for mobile phones from the official Samsung website. You can find a shortcut to that webpage from here. Just scroll down the page until you get to the Samsung brand name.
- Installing a custom recovery on the Samsung Galaxy Star Plus is the secret to installing a custom ROM. As you might have already read above, it also voids the manufacturer’s warranty just like installing a custom ROM or root access would. So long as you don’t have Knox on the device, you can get the warranty working once more by unrooting the guide.
- Unrooting the Samsung Galaxy Star Plus is fairly easy, but you’ll need a dedicated guide to get that done.
HOW TO INSTALL TWRP RECOVERY ON SAMSUNG GALAXY STAR PLUS SMARTPHONES
- Download the TWRP recovery file you need from here.
- Download Odin 3.09 from here.
- Extract the two files on the desktop by right-clicking over the files and choosing the option that says ‘extract here’ .
- Reboot the Samsung Galaxy Star Plus in download mode.
– completely power down the device by holding in the Power key for about 10 seconds. Now reboot the same device by holding the Volume Down + Home + Power keys. Eventually you will see the option for download mode. - Connect the smartphone to the computer with the USB cable.
- Wait for the ID: COM port to change color; if you don’t see that you need to install the USB drivers or reboot the computer.
- Click the PDA or AP button, depending on your version of Odin.
- Browse the desktop for the TWRP recovery file.
- Click the Start button and your device will now flash that custom recovery image on your device.
- Wait for the device to reboot and the Odin flashing tool to say that your device has passed. Now you may unplug from the computer.

 Email article


