In the effort to make Windows 10 work on any type of device, Microsoft has added many features that were considered only for phone. With the official launch in July, we got Battery Saver and a lot of mobile-related settings like Data Usage and apps’ privacy permissions. In the newly released November update, Windows 10 adds “Find My Device” along many other features and improvements. As its name suggests, this feature helps you locate your device in case you lost it.
Basically, Find My Device saves the device’s location once in a few hours to your Microsoft Account so you can access the information anywhere just by logging into the online account management. Microsoft says that the feature sends its location data only if the device is connected to Wi-Fi and has sufficient battery.
If you’ve ever used a similar feature on your phone, you know that you can lock, ring, and send a message to the lost phone. Find My Device can’t do that (yet) with Windows 10 laptops and tablets.
How to enable Find My Device
Before doing this, make sure you signed in with a Microsoft Account. As with any personalized feature, you can’t make it work without a Microsoft Account.
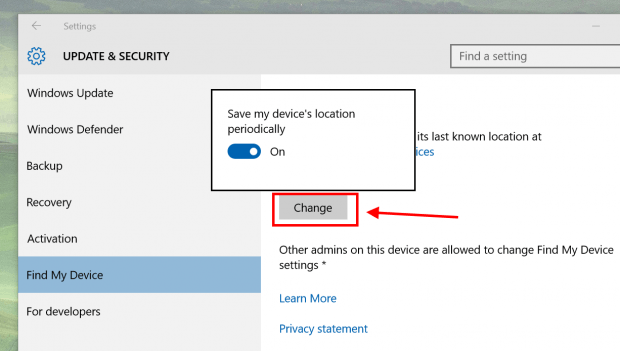
- Open Settings app and select “Update & security” category.
- Select “Find My Device” on the left side.
- Click the “Change” button then switch on the option to enable Find My Device.
How to manage your devices in Microsoft Account
The online Microsoft Account website is a central hub to manage everything about your account, billings, security, and devices.
- Go to http://account.microsoft.com/devices and sign in with your Microsoft Account.
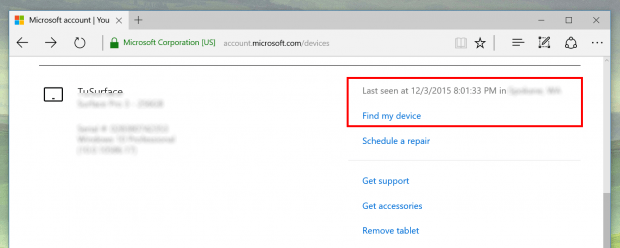
- You’ll see your devices list here by their names.
- With a glance, you can see a device’s location information as showed in the picture below.
- To see a detail location, you just need to click the link “Find my device” and there will be a map that shows where the device is.

 Email article


