 Email article
 Rooting the Lenovo A8 Unicom Edition has been a difficult task up until now with numerous one-click tools failing to do the job. However, thanks to a post found on a Lenovo forum page, we can now install a custom recovery and root the Lenovo A8 Unicom Edition. The guide below teaches you how to install a custom recovery on Lenovo A8 and the guide at the end of the post shows you how you can root the smartphone.
REQUIREMENTS
- Patience: I am translating this guide from a Chinese forum and using Google translate. I hope that I do a good enough job for you to understand it and get it working.
BEFORE WE BEGIN
- Download the Lenovo USB Drivers for your A8 Unicom Edition smartphone, the Flash Tool and the TWRP Recovery by visiting this forum page and clicking where it shows this on the page:
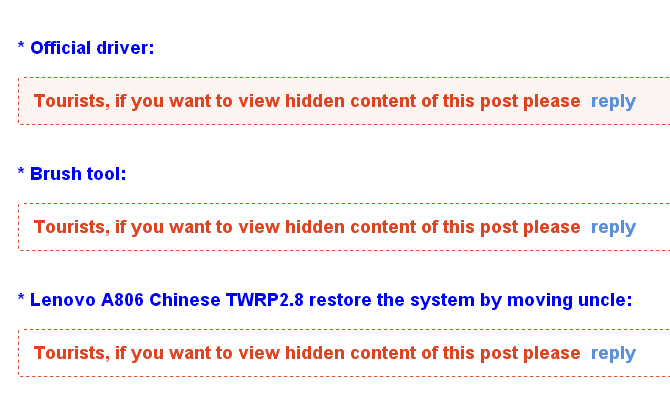
You will need to click where it says “reply” and create a Lenovo account to the forum.
- Make sure you have the Developer Options turned on if you don’t have it on already. You can do that by heading to the Home > Menu > Settings > Developer Options > USB Debugging Mode.
LENOVO A8 UNICOM EDITION A806
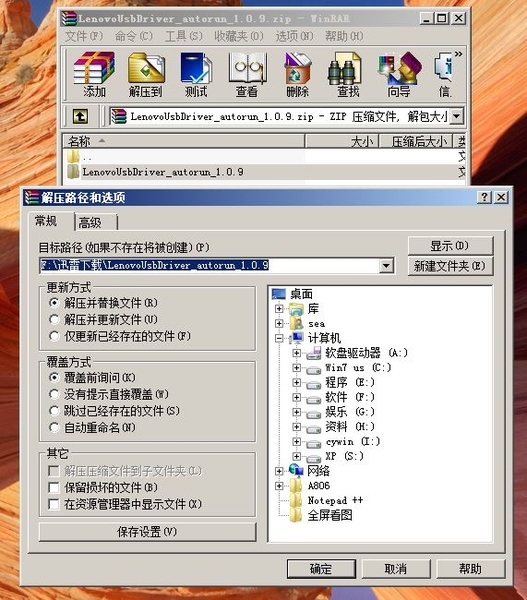
- Start by extracting the Lenovo drivers on your computer.
2. Click the button on the left from the bottom right side of the screen to run the installation program.
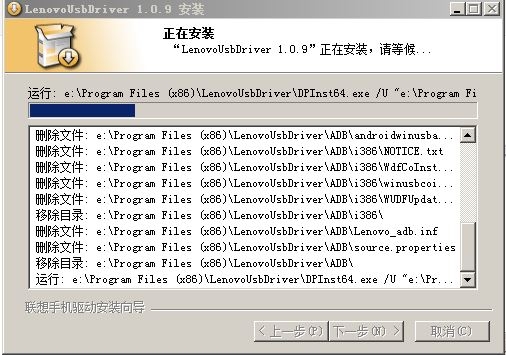
 3. You will then be greeted with this screen where you can see the installation progress bar.
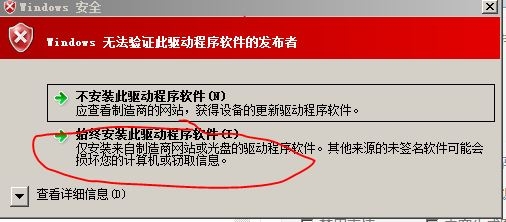
4. Do not worry about any pop-up warning boxes you might encounter along the way. They will disappear after the installation is complete. You may need to click the bottom box that is highlighted in red. Though, according to my Google translate, it’s better to wait and see if that disappears by itself.
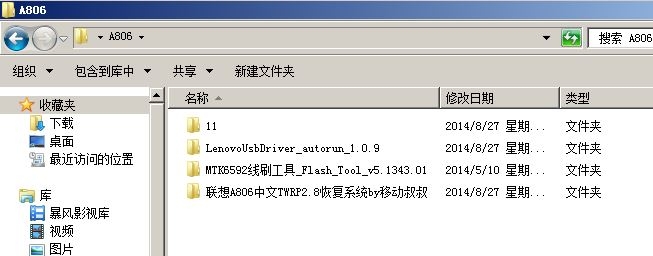
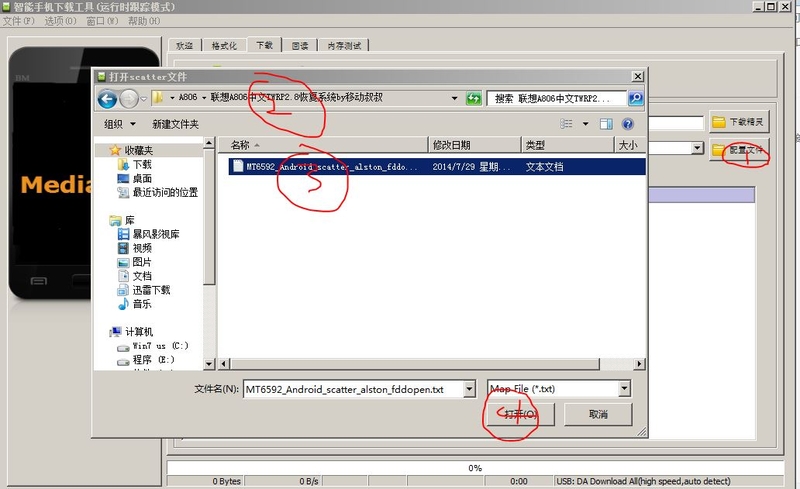
5. Unzip the Flash tool file to find the MTK6592 wire brush tool _Flash_Tool_v5.1343.01 file.
6. Unzip the TWRP recovery to find the Lenovo A806 Chinese TWRP2.8 recovery system by moving uncle.
7. Transfer the files over to the desktop, right-click and choose the “extract here” option if you are using Windows OS to have those files extracted.
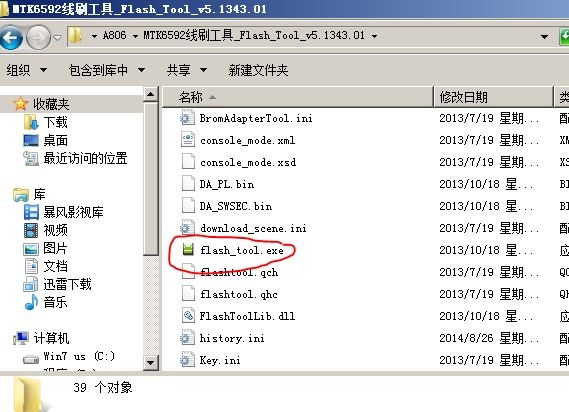
8. Double-click the Flash Tool executable file as shown in the screenshot below.
9. Click the ‘OK’ option if you get a pop-up box like in the screenshot below.
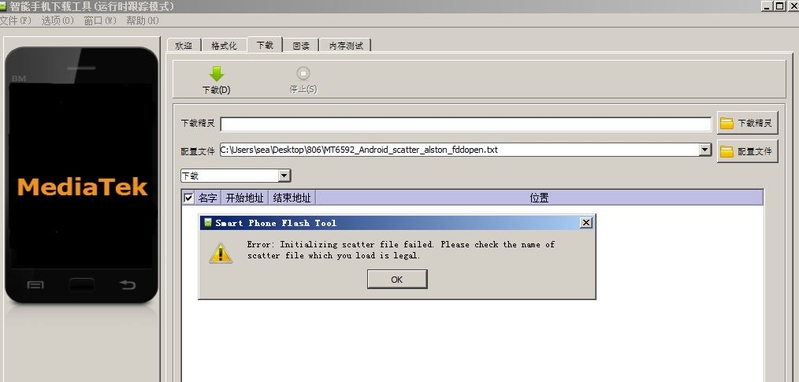
10. Here is where things get tricky with the language conversion. Here is what I was greeted with when using Google translate:

11. It’s my guess that this man wasn’t talking about genitalia. Make of that what you will.
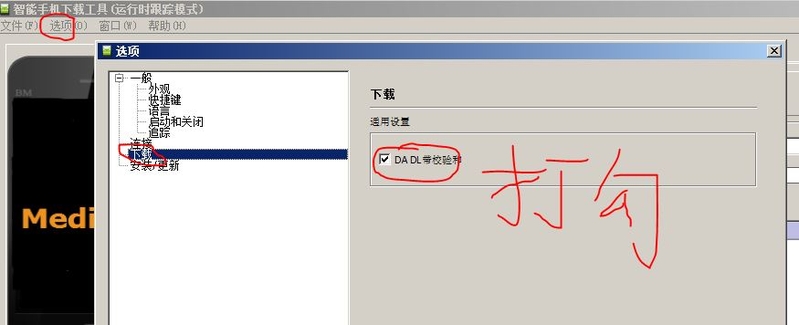
12. Make sure the DA DL box is checked. You can see how to find that box by clicking over the second-last option from the menu on the left and then checking the box when it pops out in the right side.
13. Click and highlight the bottom box and then click the button that is circled in red.

14. Click the download button.
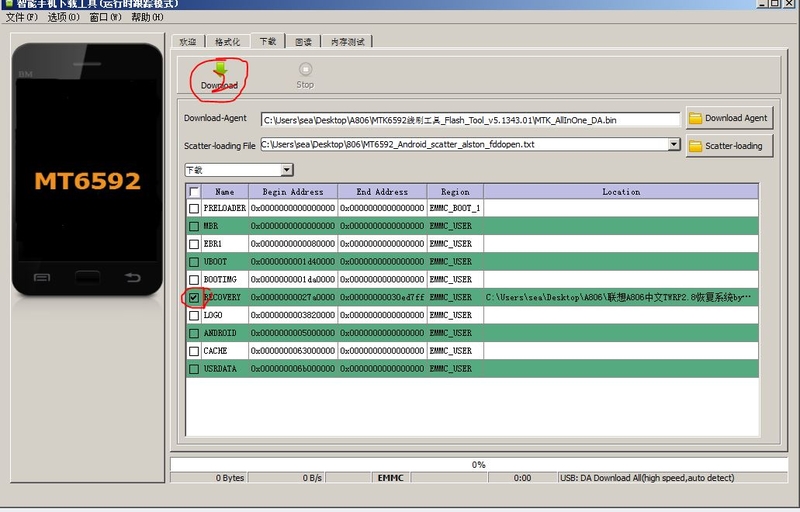
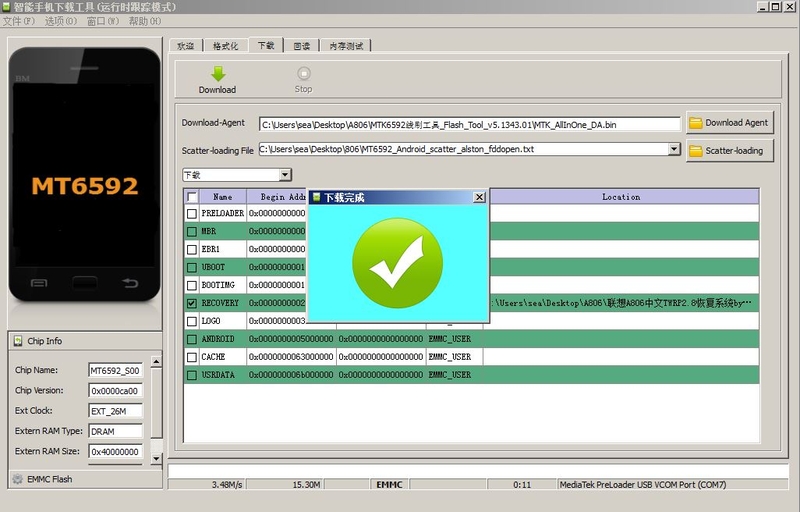
15. That is now getting flashed on your device.
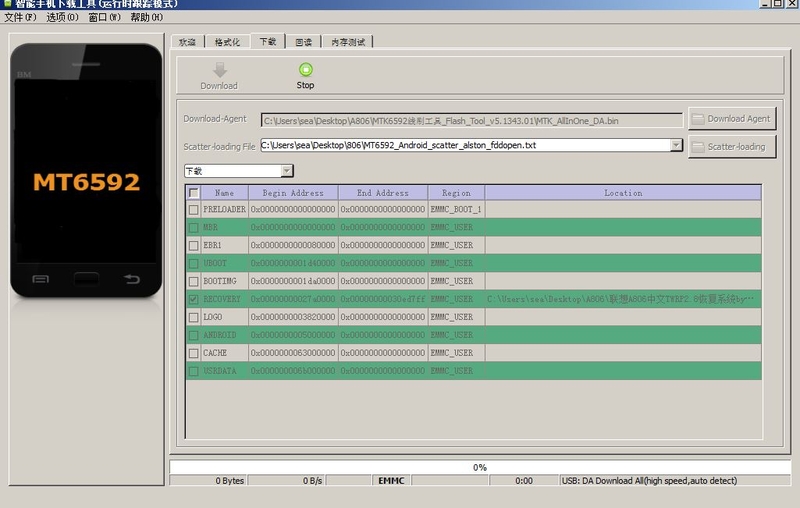
16. Soon you will be greeted with the success message to let you know that your device passed and you now have a custom recovery installed.
17. That’s how to install the custom recovery on Lenovo A8 A806 smartphones. You can boot your device into the recovery by pressing the Power + Volume Down + Volume Up buttons. You might need to reboot your device before trying it for the first time.
You may also want to root Lenovo A8 A806 smartphones after installing the custom recovery. The recovery is great for installing new ROMs or taking complete backups far easier than using any apps. The root access will give you the chance to install many more apps from the Play Store and other third-party sources like the developer websites.


