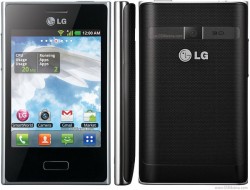
 Rooting your LG L3 smartphone with the model number E400 is like giving it Sudo permissions on a Linux computer. Running the Sudo command is like giving your computer administrator permissions so you have full control over the operating system. With the way Android is designed, delivering a new device without the administrator permissions is best for most users since Android is based on Linux, which is known as being insecure for people who do not know how to use the internet. Even though Linux is known as being less secure, it is also known as the operating system to use for many geeks. Like Linux, Android is also known as a cool operating system and many prefer to use it with its open system to reap the rewards of that openness and its power.
These are the guidelines to root LG L3 E400 on Android 4.3 Jelly Bean:
REQUIREMENTS
- You must have a Windows PC to follow this guide. You cannot get the files to run on a Linux or Mac machine. Those who are desperate and without a Windows operating system to use could try running Windows from a virtual machine.
- You must have the LG USB Drivers working on your Windows PC before you start with the guide. Download the drivers and get them running before you advance with the tutorial.
BEFORE WE BEGIN
- Be conscious of the fact that you are voiding the LG warranty by following this tutorial. You can unroot the device by flashing the stock ROM on it and get the warranty working again. All that is assuming you still have time left on the warranty which most of you will not since this L3 smartphone is aging.
- You need to enable the USB Debugging Mode on the LG L3 smartphone by first tapping on the Menu > Settings > About Device > tap the build number. Keep tapping over that build number roughly seven times and it will say you are using the L3 device as a developer.
- Finish enabling the USB Debugging Mode by heading back out of there and starting again by tapping the Menu > Settings > Developer Options > USB Debugging Mode.
HOW TO ROOT LG L3 E400
- Download the rooting exploit from the original post in this XDA Developers thread.
- Extract the rooting package to the desktop by right-clicking on the file and choosing the “extract here” option from the menu.
- Connect the LG L3 smartphone to the computer using the USB cable.
- Run the bat.file you can see after extracting the rooting package on the desktop.
- That file will now proceed to root your L3 smartphone; do not touch any buttons until it is done.
- Unplug your L3 smartphone from the computer once it is done.
- You should find that SuperSU is now available from the app drawer. That same SuperSU application is what is going to keep your L3 smartphone safe. Definitely open the Play Store app and install the SuperSU app if you do not see yours from the app drawer.
Finish your rooting by opening the Google Play Store once more time and installing any version of the root checker app. The ‘Basic Root Checker‘ is the most popular version since it’s free. You can take it up a notch and install the paid version that comes with some added features.

 Email article


