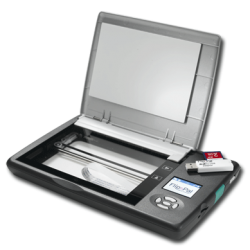
 Scanning and digitizing old photos is a trend today to preserve photographs taken in the past. Our photo albums are our treasure chests that contain millions of memories, but the pictures get destroyed over time due to dust and decay. These photographs which contain lovely memories need to be preserved. The best possible way to preserve them is by scanning and digitizing old photos.
Tips and Guidance for Scanning and Digitizing Old Photos
- List the photos: First step is to decide how many old photos are there to scan and digitize. Once you have the list you can start scanning and digitizing your old photos.
- Scanning: Scanning and digitizing old photos is a time consuming process. Here, you will have to first decide how many photos you are going to scan at a time. You can scan single images or multiple images depending on the size of the image. If you are using multiple images, by using editing software, you can separate them to make individual images. It is always recommended to use a scanner to scan images. Don’t just use a smart phone to save your precious memories. Taking a photograph to save it isn’t wise as the quality of the image will be low.
- Cleaning your scanner bed: Before you start the scanning process, make sure you use a clean and dry cloth to clean the scanner bed. You can use damp cloth if it has smudges, or in some cases use white vinegar to clean it. Then dry the scanner bed completely and then start your scanning. It is always recommended to clean the scanner bed before each section of scanning as it gives good quality scanned images.
- Cleaning the dust particles from your photos: Also, prior to starting to digitize old photos, you may need to remove dust particles and dirt from the old photos. For cleaning never use any fluids or water. A soft, dry cloth should be all you use.
- Don’t flatten the creases in your photos: If your photos have physical creases, then don’t try to flatten them. If you try to do so, it will only damage your photos more. Use editing software to remove creases after scanning is done.
- Color scan: It is highly recommended to go for color scanning. Don’t try to scan the pictures in black and white or grey scale. That is of course unless that is an artistic look you want. However, you should always make a plain copy as well.
- Setting up of resolution and file format: It is always nice to go for the highest resolution. Scanning at 600dpi to TIFF is ideal for creating archives. The format of file depends upon the exact purpose of scanning and digitizing old photos. If you’re going to keep the photos in the computer then it is better to save them in TIFF format.
- Editing tool: After you’re done with scanning, you can use any good editing tool to edit your photos and make them more beautiful. If you are not an expert, then by doing cropping and straightening you can improve the overall quality of your scanned pictures. If you have some knowledge of editing, then adjusting the color, red eye removal, removing creases from photos will give better results. After you’re done with editing the photos, save them to a hard disk in TIFF format.
Advantages of Scanning and Digitizing Old Photos
Using this method you can keep your photos forever and keep the beautiful memories related to them alive. Scanning and digitizing old photos is better than physical photos because photos can be easily reorganized, backed up, consume less physical storage space, a number of copies can be created easily and shared with friends and family without any trouble.

 Email article


