 The AT&T variants of the Samsung Galaxy S7 and the S7 Edge are more challenging to become a root user on than most from other phone carrier networks due to them not wanting you to get rid of their services after you have purchased the device. Usually, we would become the root user by flashing a CF-Auto-Root tool from the Odin flashing tool and be done with it, but it is not that easy this time. There isn’t the option of installing a custom recovery like Team Win’s TWRP and then installing the SuperSU from the custom recovery image either since there is no custom recovery available at the moment.
Samsung Galaxy S7 Edge owners who are subscribers to the AT&T network (or just have the SM-G935A model number) can install flash the SuperSU a different way and get root access to the internal system. We do it by flashing a new kernel and then flashing the SuperSU from a command prompt window on the computer instead.
REQUIREMENTS
- The following guide is made for the AT&T variant of the Samsung Galaxy S7 Edge smartphone that comes with the SM-G935A model number. Do not follow these steps unless they are confirmed as working on another device. There is talk that this same method could work for all Qualcomm variants of the Samsung Galaxy S& as well as the S7 Edge, but we do not endorse that without more evidence.
- You need a computer that is running a version of the Windows operating system to use this guide because it needs ADB, and our ADB is developed for Windows only. There is an ADB out there available to install on MacOS and Linux distributions, but not only is the file different that you need to download but also the commands varies with sudo being present.
BEFORE WE BEGIN
- You must unlock the Developer Options menu on the Samsung Galaxy S7 Edge smartphone by tapping on the Menu > Settings > About Device > Build Number. Continue tapping on the build number space and it will soon give you a message on the display that says you are using the device as a developer which means the Developer Options menu is now available.
- Enable the USB Debugging Mode from the Developer Options menu on the Samsung Galaxy S7 Edge smartphone by tapping on the Menu > Settings > Developer Options > USB Debugging. Once the USB Debugging Box is marked, leave the Developer Options menu, and it remembers your preferences.
HOW TO ROOT SAMSUNG GALAXY S7 EDGE SM-G935A RUNNING ON ANDROID 6.0.1 MARSHMALLOW SOFTWARE UPDATES
- Set up ADB on your Windows computer and then come back and follow the rest of this guide when you are done. Those who already have ADB on the computer do not have to set it up again as it does not ever need updating.
- Download Modified Odin and Engineering Kernel.
- Download the engboot kernel for the S7 Edge smartphone.
- Flash the kernel to your Galaxy S7 Edge smartphone.
- Boot the Samsung Galaxy S7 Edge into the download mode and then connect it to the computer with the USB cable.
- From the Odin flashing tool, click the AP button and upload the kernel to this location.
- Click the Start button to flash the kernel and then reboot the device once you are finished.
- From the computer you are using, create a super folder, so you have the C:\adb\super
- Download the SuperSU 2.74 on the computer.
- Open the ADB folder and open another command prompt window by right-clicking and holding down the Shift key where it shows the white background.
- Enter the command: “cd super” to navigate to the SuperSU folder.
- Make sure you have the USB Debugging Mode enabled once again (Menu > Settings > Developer Options > USB Debugging Mode).
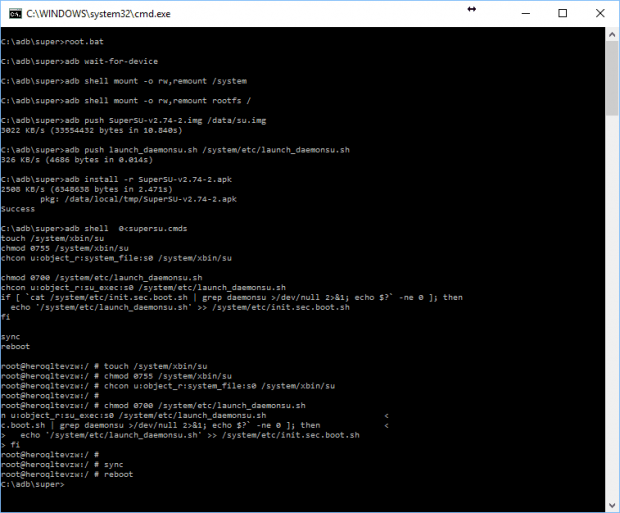
- Enter the next command: “Root.bat” and you should see the following:

In conclusion, that is how to root Samsung Galaxy S7 Edge SM-G935A smartphones (the AT&T variant) when it is running on the Android 6.0.1 Marshmallow updates by flashing Chainfire’s SuperSU package using ADB commands from a computer. You should find that using this rooting guide results in the same goodness of any other rooting guide which is your ability now to install any of the applications available from the Google Play Store and install custom ROMS that does not come pre-rooted once you have installed a custom recovery. Anyone who likes to do things by the book might prefer installing one of the root checker applications from the Google Play Store before getting stuck into the root apps so you can confirm the root status and make sure everything is working. The root checker app is just for checking the root status and is not a requirement in the rooting process. All of the root applications work right away as soon as you install them and confirm that you want to grant them root access to the internal system when the message pops up on the display.

 Email article


