 There could be many reasons why you wanted to change your DNS (Domain Name System) server and there are many ways to change your DNS server. You can change it for your entire network in the router or change it on individual PCs. But, is it easy to change your DNS server? Many people find it difficult to change the DNS server on their own and if not done carefully, it can cause many an issue. By going through the steps given below, you can easily change your DNS settings.
To Change Your DNS Settings in the Router
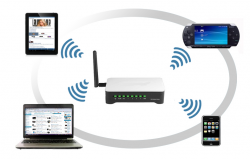
If you wish to change the DNS settings for the entire network, you have to make the change in the router. All the devices like your PC, laptop, Smartphone and tablet get the DNS settings from your router. So, when you make the change in the router, they all be affected. By default, your router will be using the DNS settings provided by your broadband supplier.
For changing the DNS settings for the router, you need to access the web interface of your router. Once you are in the web interface, go the section where you can see the DNS setting of the router (different routers have a different web interface. You need to check the manual for more information) and then make the necessary changes. The changes will affect your entire network.
To Change Your DNS Settings via Windows Control Panel
By going to the Windows Control Panel, you can make changes to each individual device DNS server. What it means is that you need to change the DNS setting for your Wi-Fi connection, as well as for your Ethernet connection separately.
To to change your DNS settings, go to the Network & Sharing Center and from the list of network connections displayed, select the one you need to make the change to and then click on ‘properties.’ From there, select the option “Internet Protocol Version 4 (TCP/IPv4).” Now again click on properties and then make the necessary changes.
Once you make the changes to the DNS server, you have to flush the DNS cache with the following command “ipconfig /flushdns.”
Changing DNS Settings for Your Android and iOS Smartphone
Android and iOS Smartphone do allow you to make changes to your DNS settings, but it will apply only for one single network. That means, if you want to connect to another Wi-Fi network, you will have to make the changes again.
If you have an Android Smartphone, to change your DNS, go to the settings and tap on Wi-Fi. Then, tap the ‘modify’ option and from there tap on ‘show advanced option’. Next, change the IP settings to “static” and then you can easily make the changes in the DNS settings.
If you have an iOS Smartphone, there also, you need to go to your Wi-Fi settings. Tap on the ‘network settings’ option and tap on the DNS to change your DNS settings for you iPhone.
Conclusion
It can be easy to change your DNS settings when you carefully follow the steps given here, but make sure you follow each step precisely and note down the changes you made so that you can refer to your notes later when required.

 Email article


