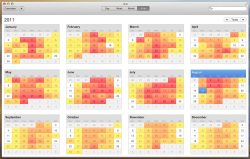
 The latest spam to make an appearance is calendar spam in your iCal. Have you been noticing these annoying bits of spam in your calendar and what to get rid of it? Many people out there struggle to properly delete calendar spam and don’t know exactly what action needs to be taken to permanently remove this stuff from their iCal. The following steps will help you properly delete calendar spam in your iCal.
Why Not Just Delete Each Calendar Spam in Your iCal?
Spammers always seem to find new ways to send spam. Receiving spam via a calendar invite can be really frustrating as you cannot disable calendar invites. Also, you cannot block unknown users who send calendar invites as there will be a number of legitimate calendar invites from unknown users. So, the only solution is to remove the calendar spam in your iCal.
However, an important point to keep in mind is that if you decline the calendar invite or delete the invite, it will send a notification to the spammer that you have declined or deleted the invite. Thus, they will get your correct email address. So, the only option left is to delete the event, without deleting the invite or declining the invite. Here’s what to do.
Delete Calendar Spam in your iCal From Your iPhone
For deleting calendar spam in your iPhone or iPad, what you will be doing is creating a new calendar, moving the spam to it and then deleting that calendar. First, you need to open the calendar app. Next, go to Calendars that is displayed at the bottom and tap on it. Then you will see an option called “Edit.” Tap on it. From the edit screen, scroll down to the bottom and then tap on the option “Add Calendar.” Now, name the calendar “Spam” or any other annoying name you choose.
After you have created a new spam calendar on your iPhone or iPad, it is time to go back to your original calendar and then tap on the option “Inbox.” Find the spam event you want to get rid of and then tap on “Calendar.” Choose the spam calendar you have created and add the event to it. Repeat this action for all the spam events you want to remove.
After you are done with adding spam events to the spam calendar, go back to the main Calendar, tap on it, and then tap on Edit and select the spam calendar you have created and delete it. Viola!
Delete Calendar Spam in Your iCal From Your MAC System
Deleting calendar spam in your iCal from your MAC system is somewhat similar to what you did in iPhone. You need to go to the Calendar app and then select “New Calendar.” Name it something like Spam and now go to Spam invites and then double click on each invite. Now, click on the square colored icon next to Spam so that it is assigned to the spam calendar. Once you are done with assigning, go to your Spam Calendar and right click and select the option “Delete.”
Conclusion
Spam is always a headache. The new spam you get to your calendar is a serious threat that needs to be handled carefully. The above steps will help you to successfully remove calendar spam in your iCal without giving the spammers the information they are fishing for.

 Email article


