 Email article
There’s significant evidence mounding up that Microsoft might want to get away from the old Control Panel that people weren’t able to use very easily. The new version of the Settings app that was initially available in versions of Windows 8 is now loaded with a large number of more settings in Windows 10 than it was when it first came out. We’ve also seen several changes made in more recent versions of Windows 10 that has made it harder to have the Control Panel in the Start menu. In earlier versions, it was possible to have the Control Panel pinned to the far left side of the Start menu where the Settings app is, and some were even replacing the Settings with the Control Panel entirely. In order to have been able to do that, you need to implement a workaround in the Taskbar and Start Menu Properties dialog box or the Control Panel Properties dialog box. Most people aren’t running versions of Windows 10 that are compatible with doing those two things anymore.
Microsoft wanting to get away from the Control Panel might be one of the reasons why they didn’t include it in the Start menu. The only two things available in the far left pane from the Start menu are the Settings app and the File Explorer. Though it is possible to tweak this and customize it to show more (or even take away what it is showing already), by navigating to the Settings app > Personalization > Start > Choose which folders appear on the Start menu, Microsoft isn’t including the Control Panel as a folder option from this list.
There’s not much you can do about getting the File Explorer to sit in the same place as the Settings app and File Explorer in the Start menu (the very far left side), but you can pin it to the Start menu and have it added via a tile. Additionally, there’s an even quicker way to get to the Control Panel that involves the Start button if you find the tile method of an inconvenience.
How to add Control Panel to Start menu in Windows 10
To pin the Control Panel to the Start menu as a tile, first you need to click on the “Start” button.
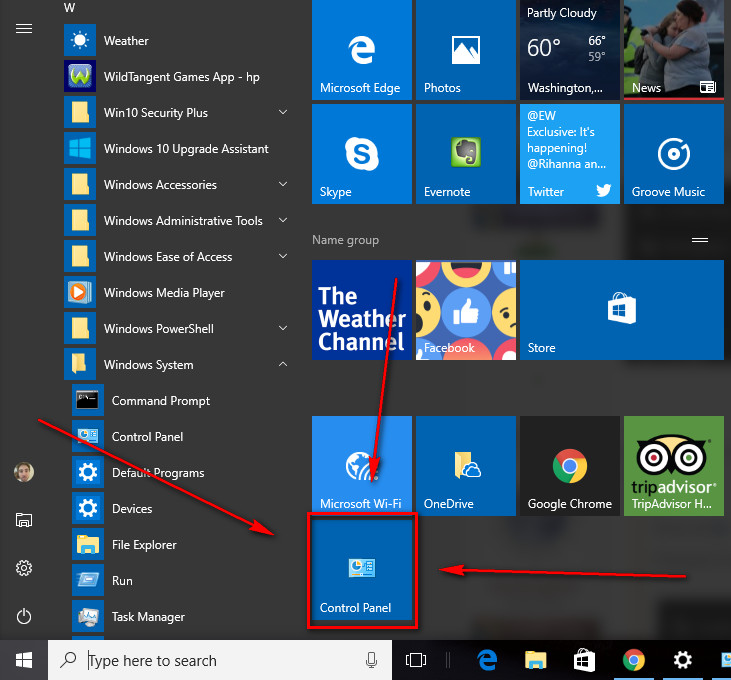
Next, scroll down the “All Apps” section (which lists all of the applications in alphabetical order) and click on the “Windows System” folder. It reveals another app beneath it called “Control Panel.” Right-click on the Control Panel entry and then choose the “Pin to Start” option from the menu.
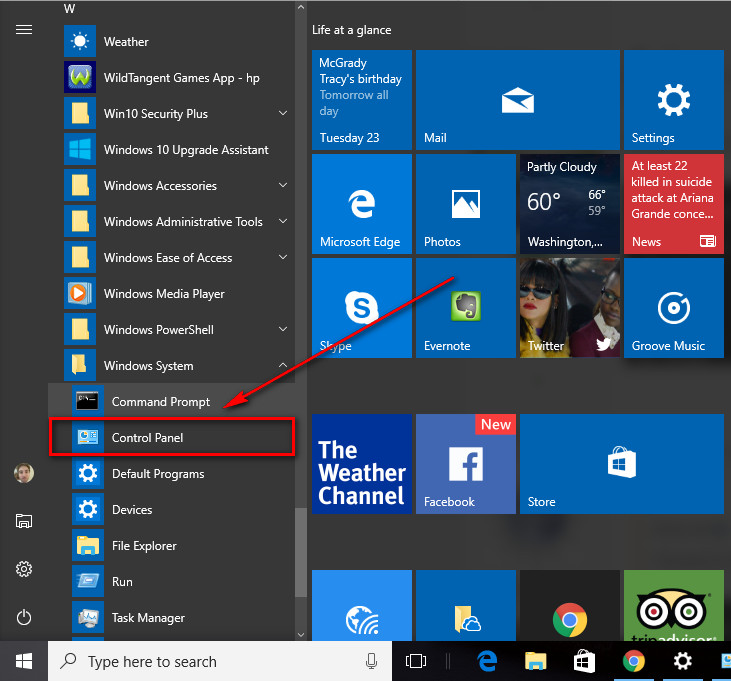
It then adds the new Control Panel tile to the Start menu where you have some spare space. Windows tries to make it obvious where it puts it for you by keeping that spot on the screen visible. You can also click and drag the new Control Panel tile and reposition it to where you want it in your Start menu.
If having the tile on the Start menu isn’t doing anything for you, then you might be interested in learning about the Control Panel option that comes directly from the Start button. To do that, right-click the mouse or touchpad on the “Start” button.

Then choose the “Control Panel” link from the list to have it open up on the computer’s display.

Don’t forget that the methods available in this guide are just the way you can get access to the Control Panel from the Start menu. You can also read our other article that goes into detail about all of the ways you can open the Control panel in Windows 10.


