 Email article
Part of what makes Windows such a great operating system is its ability to manage groups. No other operating system has managed to do it quite as well (although some might argue Linux has). Through my years of living, one thing I’ve noticed among non-tech enthusiasts is the opinion that “Mac is better than Windows” and the only reason you would use Windows over Mac is if you don’t have the money to buy a Mac. The flaw in that logic is pretty obvious: you can’t be judging the software based on what laptop or desktop it is running on. Sadly for Microsoft, that has been one of the distinct upsides of Apple choosing to only run macOS and Mac OS X on their high-quality MacBooks and iMacs.
It’s an opinion that often has me wincing because most Windows fans know that there’s lots Windows potentially does better than Mac—even though it mostly comes down to personal preference and opinion. There are some things that Mac doesn’t try all that much to compete against also, which is why most businesses use the Windows operating system. We see administrators manage groups from the Local Group Policy Editor in a Windows environment with ease, and Mac doesn’t have anything to truly rival that, for example. Microsoft, on the other hand, even makes it easy to manage the employees who do use Mac machines that are networked in the same Windows environment.
The Windows 10 OS also offers groups for sharing resources that are all connected to the same network. Having a group for sharing resources on a network is what you need to share a printer, scanner, or anything else your group might rely on for daily activities.
If the group is at a workplace or school, then it is called a domain. If the group is part of a home network instead, it is called a workgroup or homegroup.
How to Change Workgroup in Windows 10
Before finding out how to modify the workgroup in Windows 10, you’ll probably be interested in finding out how to locate the workgroup information on your home network. There are a couple of ways you can see the workgroup information.
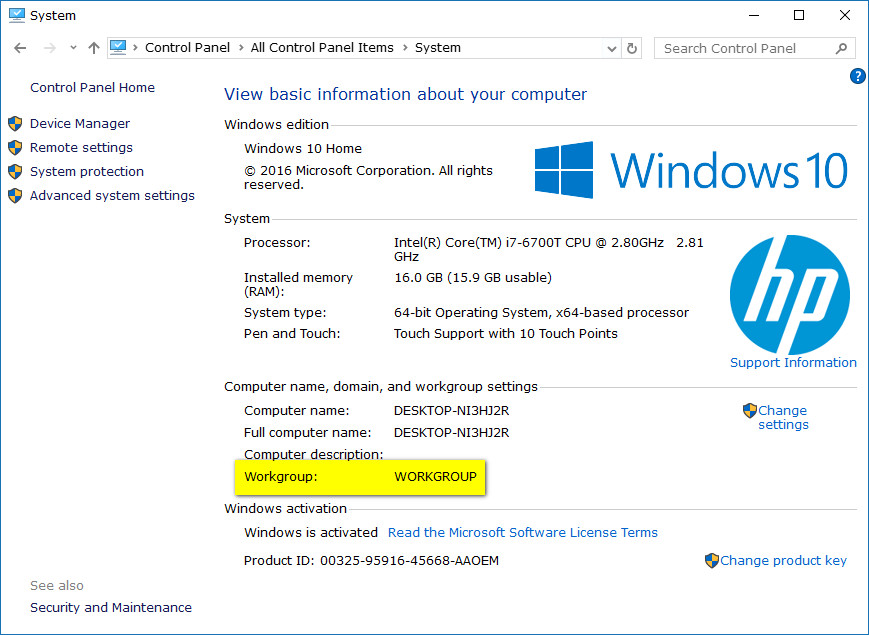
To find the name of the workgroup from Control Panel, head to the search field in the taskbar and type “Control Panel.” Then click on the “System” link from the Control Panel Items.
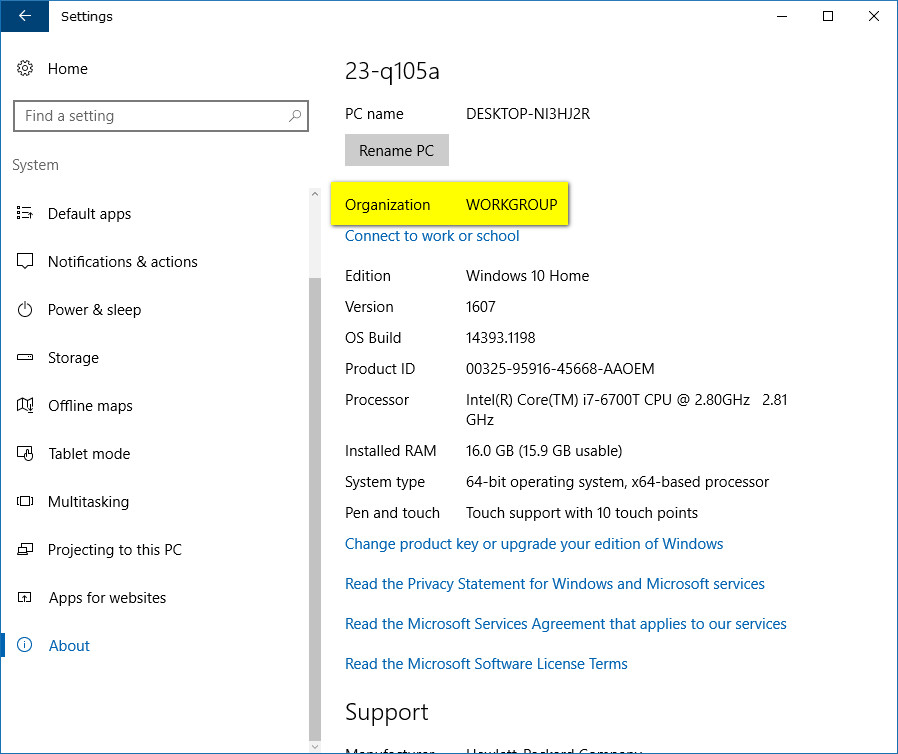
To get to the workgroup from the Settings, head to the Start menu > Settings > System > About and then look where it shows the “Organization.”
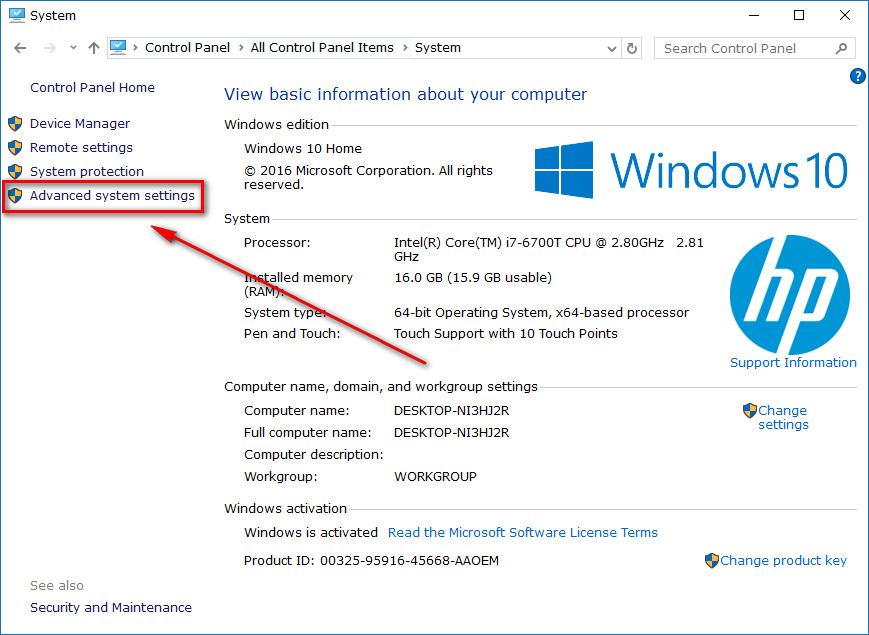
To get started with changing the name of your workgroup, navigate to the Control Panel > System and then click on the “Advanced system settings” in the left side pane.
Be sure to click on the “Computer Name” tab available at the top and then click on the “Change” button.
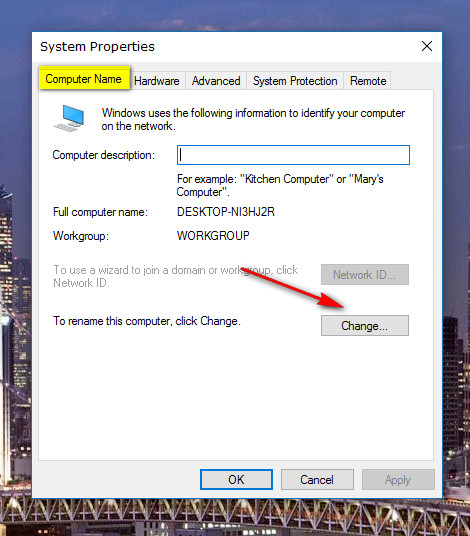
From within the Computer Name/Domain Changes dialog box, look for the “Workgroup” section at the bottom. Delete the current “WORKGROUP” name and replace it with the name of your choice.
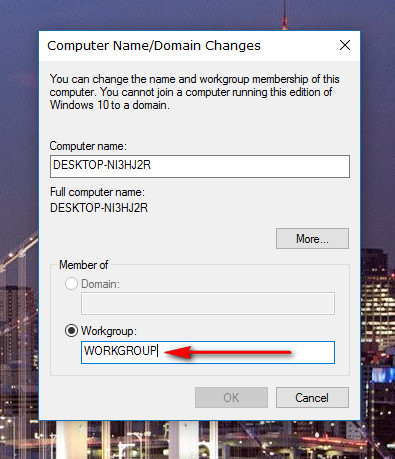
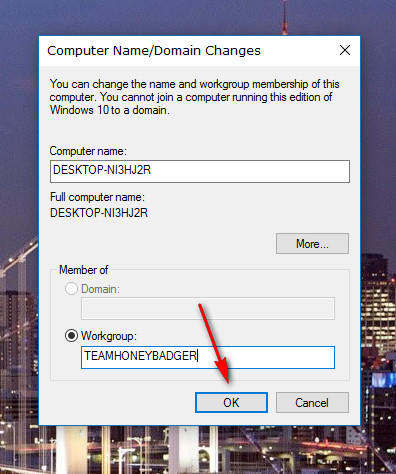
Once you have inserted the new workgroup name, click on the “OK” button.
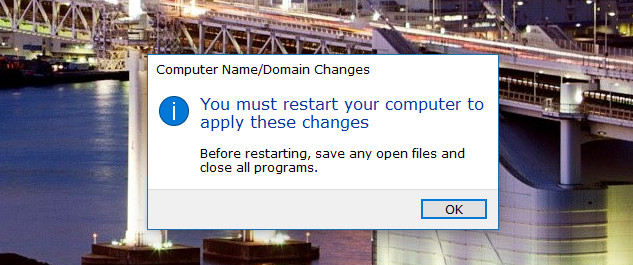
You’ll then get a pop-up message welcoming you to the new workgroup.

Before you can see the changes made to the workgroup, you first need to restart the computer. Click on the “OK” button. It doesn’t reboot the computer right away when you click on the “OK” button. It gives you the chance to save the work you might be doing and then in a little while it brings up a message asking if you would like to restart the computer now or later.
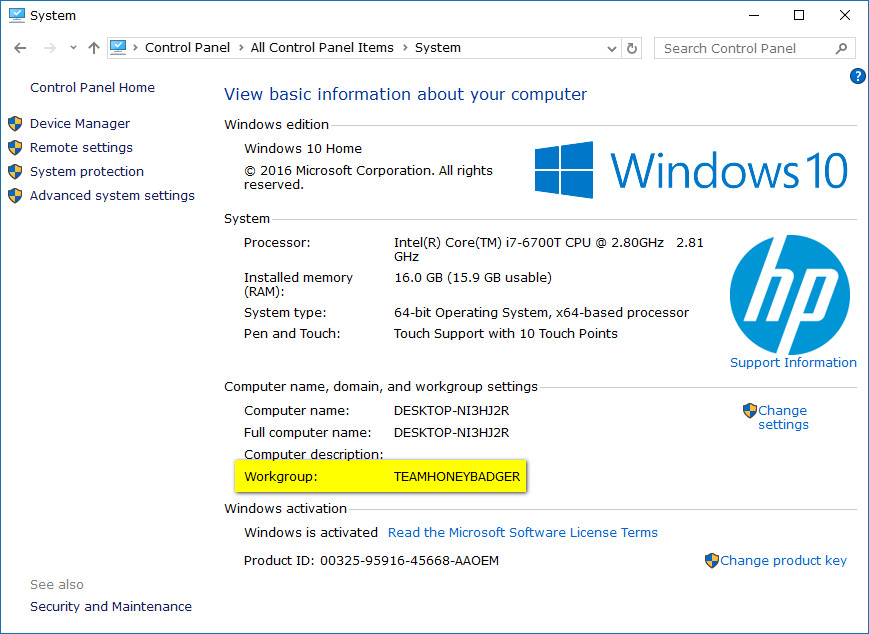
Now whenever you open up the workgroup section from the Control Panel or the Settings app, it presents you with the new workgroup name.
When you setup a new computer and get control of the admin account, the computer automatically creates a workgroup and gives it a name (usually workgroup also). Lots of people choose to set up these workgroups around the home so multiple PCs can connect to the same group and share resources such as documents and printers. All computers connected to the workgroup need to have a unique computer name to do so. On the other hand, if one of the computers connected to the workgroup is still running on Windows XP, you may need to change the workgroup name on those, so they match the ones running on newer versions of Windows like Windows 10.


