 Email article
Your WiFi network automatically is given a name when you first set it up. The network typically includes the name of the internet service provider that is providing for your network (likely for taking advantage of the self-advertising opportunity, as well as being convenient for users to be able to identify it easily), plus some letters and numbers. That name is usually printed on the router itself is or given to you on a card that comes with the router. Together, the name and password don’t look all that appealing, but it does the job required and gives each user a unique network identity.
It is possible to change the WiFi network name so that it is something you are a little more confident exposing to others. Even if you don’t have any plans on publicly exposing the WiFi network name yourself like I do by writing articles online, there’s some likelihood that your neighbors are going to see the name still.
In addition to changing the WiFi network name, it’s also possible to modify the password that needs to be created for a network so others can’t jump on your network and use your data. Like the WiFi network name, the password is also automatically assigned to you by your provider. You should look after that password just like you do with all other passwords. Having differentiating passwords for a bunch of different stuff is still the advised way to do things in general. If you have trouble remembering each of them, then you should try using a password manager or keep them stored behind one very long and arduous password that no one will ever get to crack inside an app like OneNote. However, if you have a password in mind that you would like to use, so you’ll find it easier to remember, then all ISPs make it possible for you to use it for your wireless network.
One of the tricks that IT technicians do to help solve issues with your connections is head over to the web-based administrative interface that most routers have. The way you can get access to it is by typing the IP address into a web browser and then hitting the Enter key to get back its results. Once you get the admin interface up on the computer, you can then do things like change the network name and password. The tricky part is first finding out what the IP address is — but there is a way to do it, and we’ll run through what that is now.
How to Change Your WiFi Network’s Name
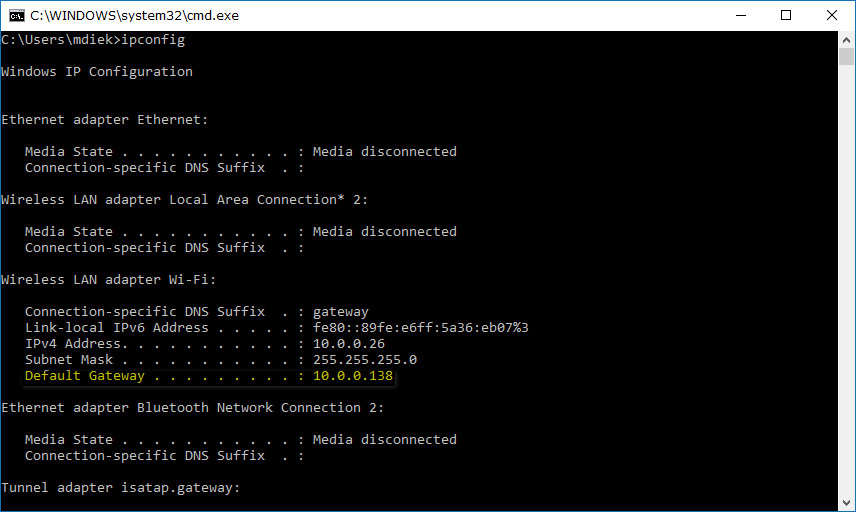
Open the Command Prompt window by pressing the Windows logo + R keys to open the Run dialog box and then type “cmd” and hit the Enter key on your keyboard.

Type “ipconfig” and then hit the Enter key on the keyboard to find the configuration of the IP address. Look for the “Default Gateway” line that also has an IP address next to it. That’s the IP address you need to know.
Open up your web browser of choice and paste or type the IP address from the Command Prompt window into the address bar and then hit the Enter key on your keyboard. The admin user interface you get now will vary depending on the internet service provider you are using, so your screen won’t look the same as mine. However, the guidelines for you to follow are similar for everybody, and you should have no trouble following the rest of the guide on your own computer screens.
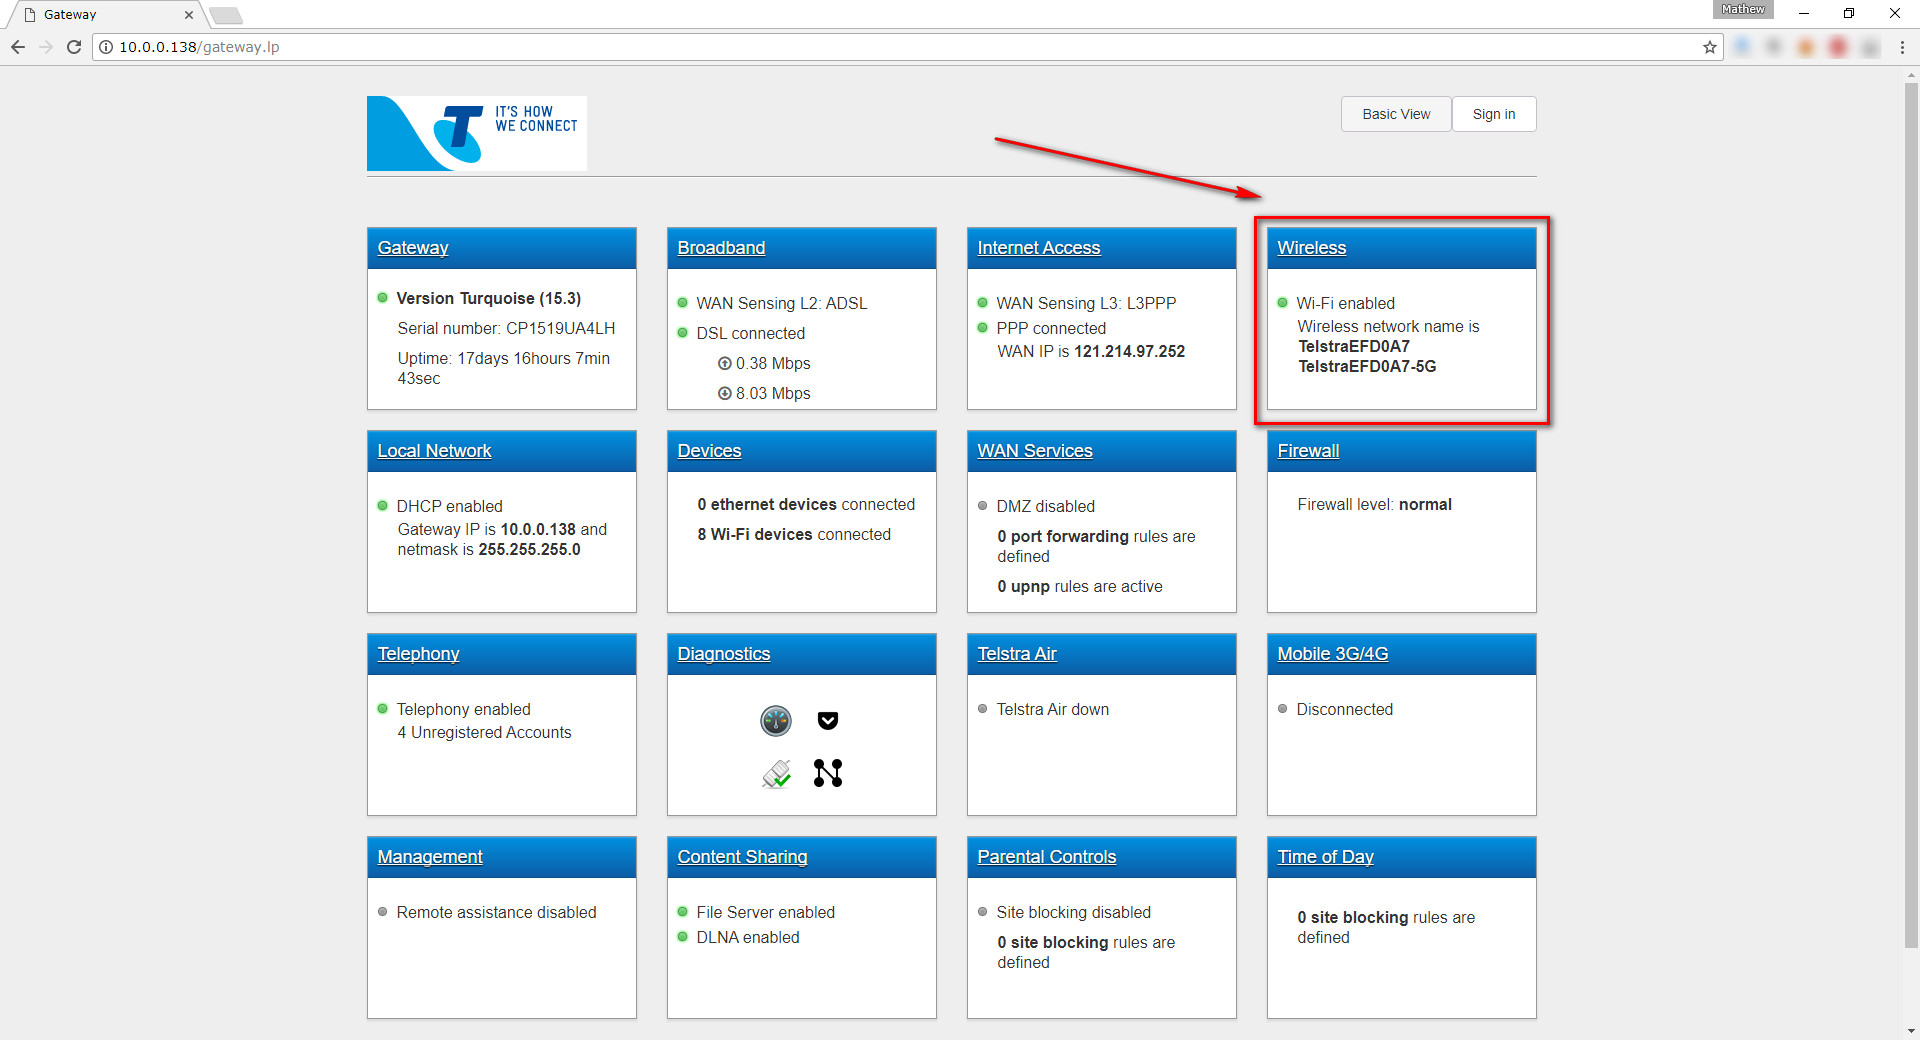
Using the menu at the top of your pages, look for “Advanced” or anything that is to do with settings. (Not to be confused with user settings, which is not the area you want.)
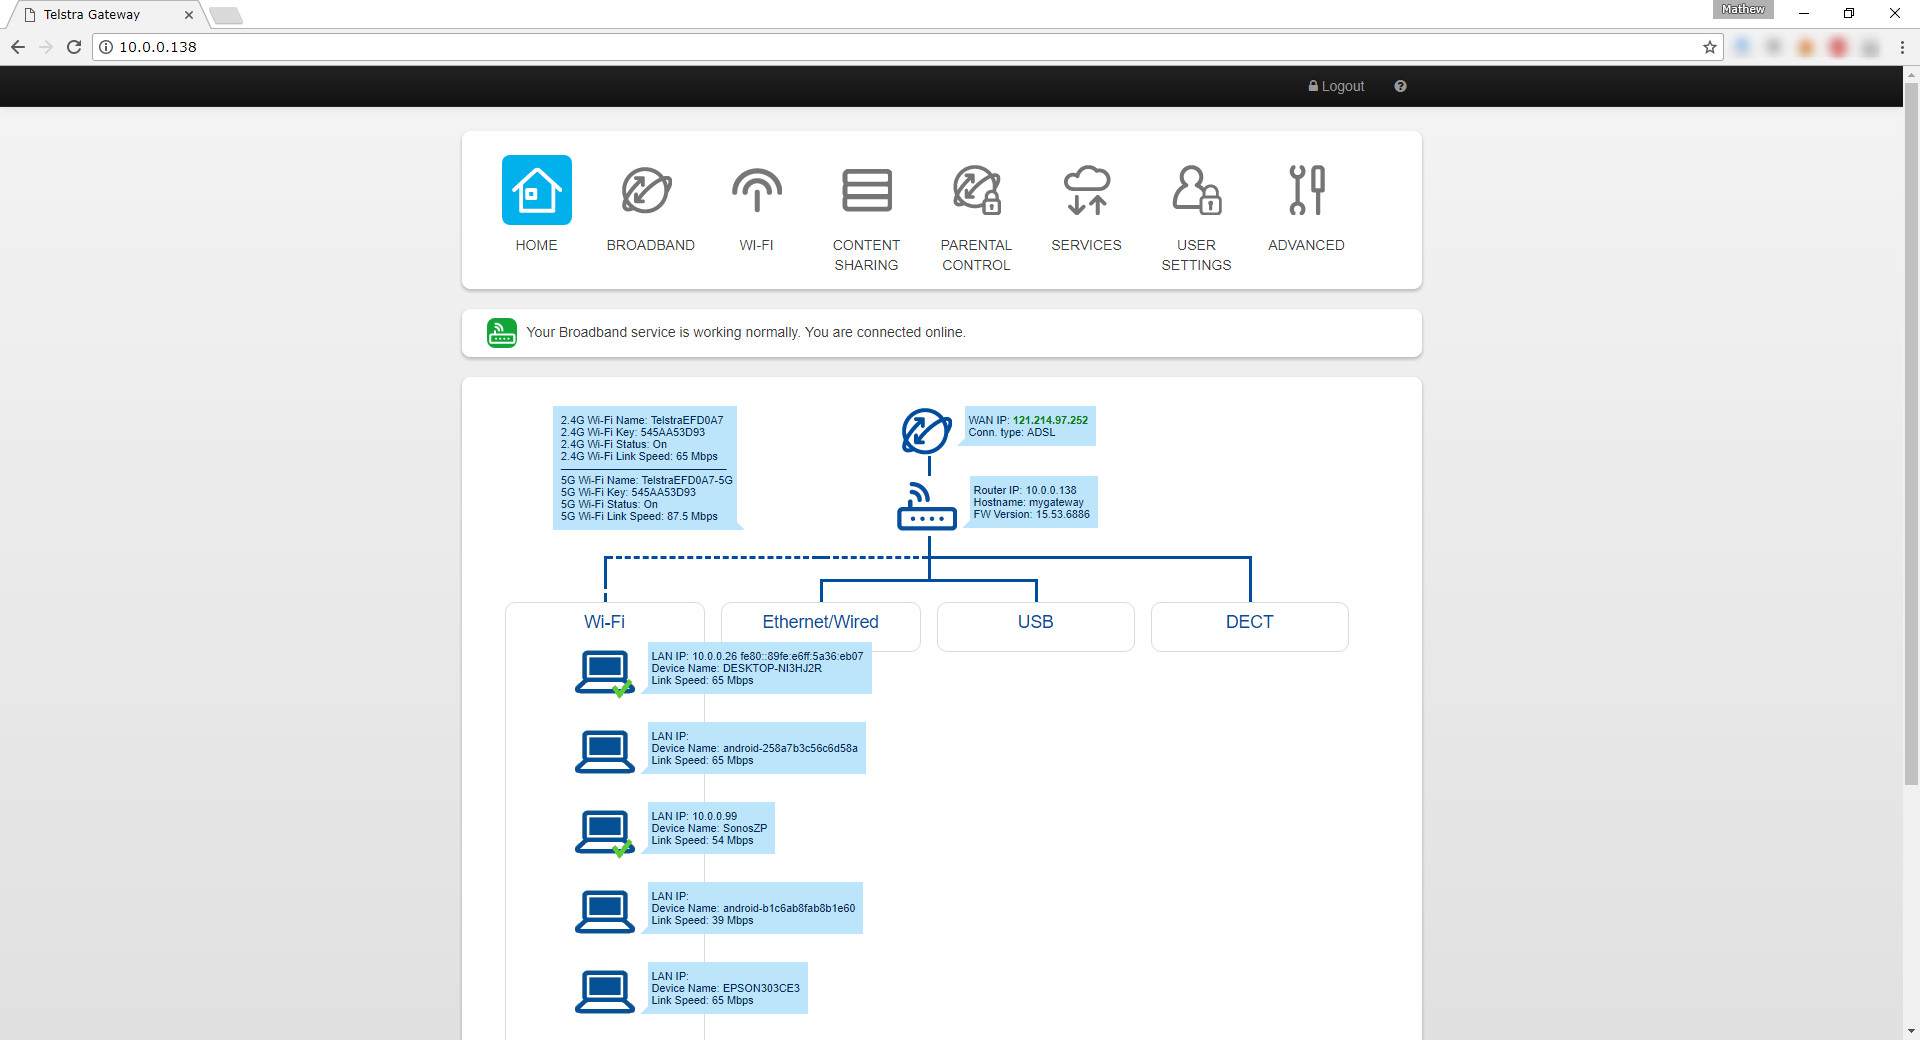
When you open up the right area, you’ll see a lot of extra options and one of them will be labeled “Wi-Fi” or “Wireless” — or a word that is associated with your WiFi connection. Click on that option when you find it.
You should get a pop-up window or something on the screen that gives you options related to your wireless connection now. Scroll down the page until you get to the “Network Name” field. That’s the one you want to change to get a new network name of your choice. You’ll be able to change what’s currently there and type in a new one.
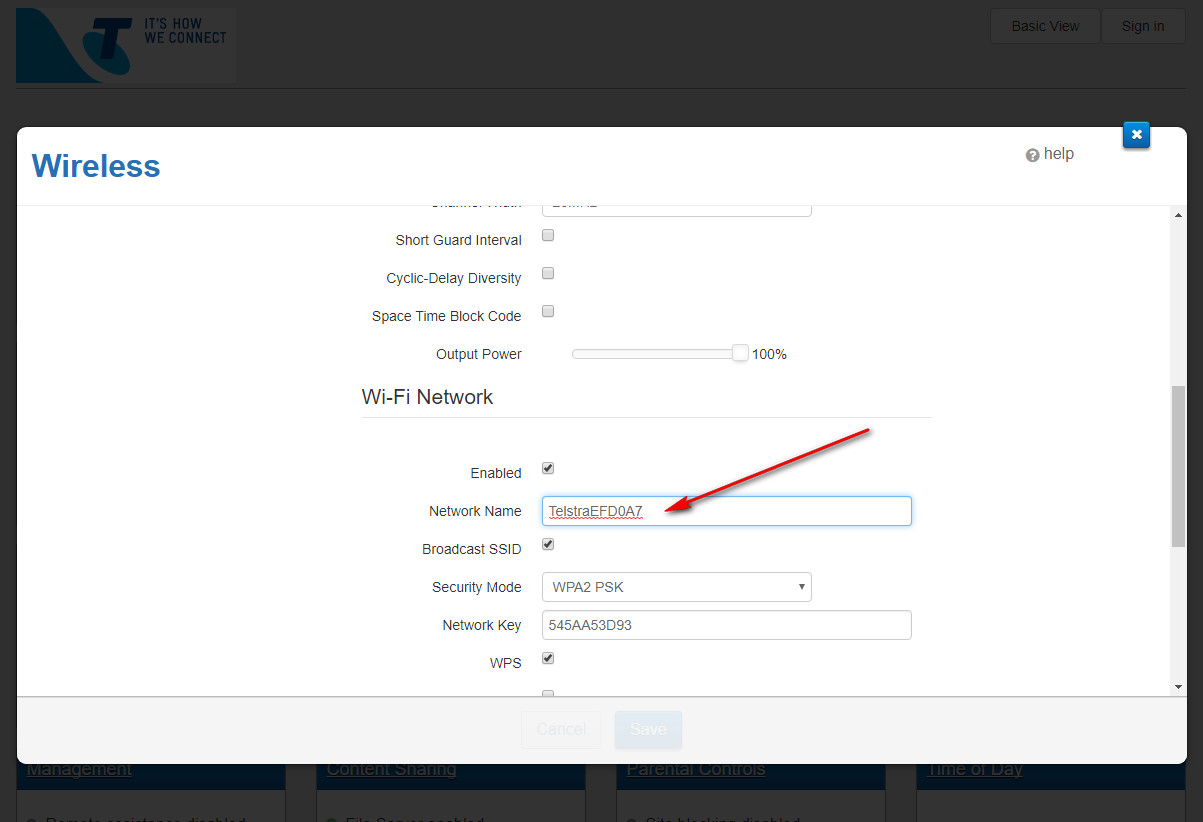
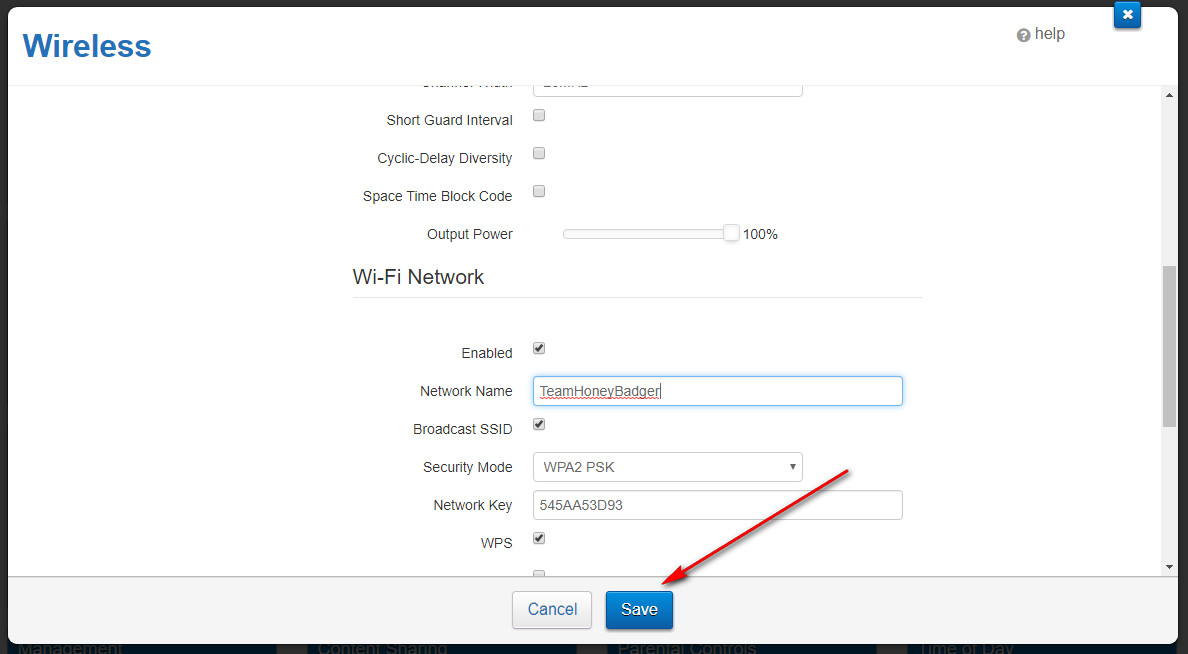
After you’ve changed the name, click on the “Save” button at the bottom.
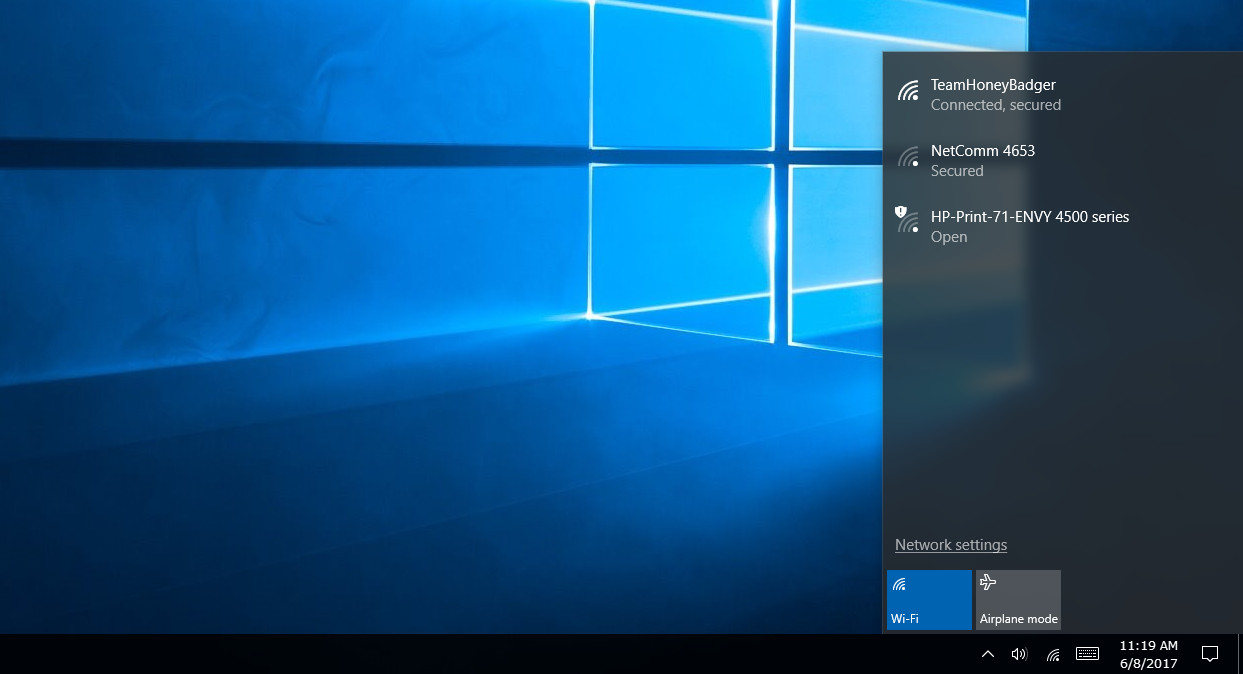
If you click on the WiFi icon available in the system tray, you’ll see your new name appear under the available WiFi network options to choose from. However, there will also be a symbol on the WiFi icon letting you know that there is a problem with the connection. That’s because you need to reenter the password before the WiFi can work.
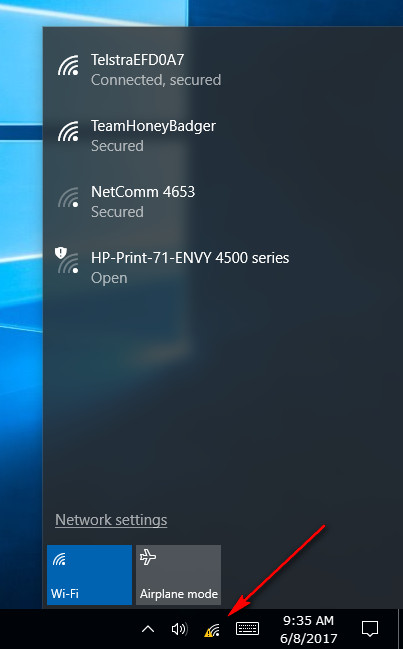
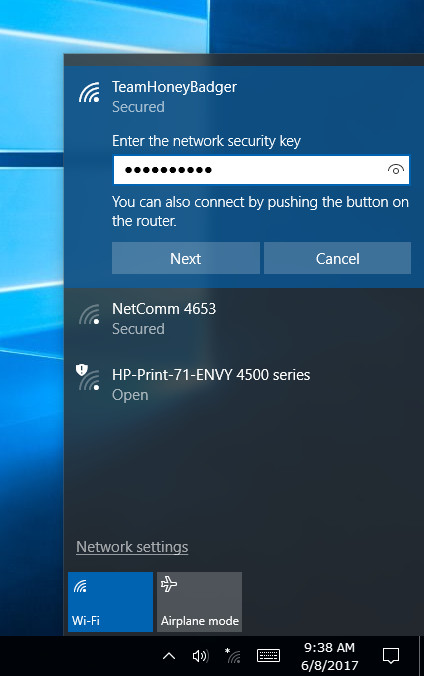
Click on the network that you want to connect to that has the new name, and then click on the “Connect” button.
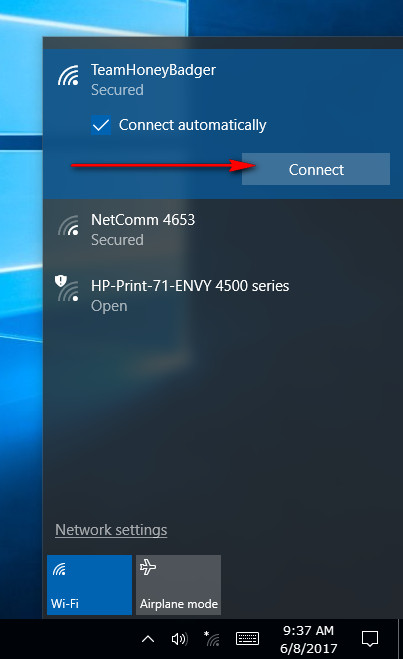
Enter the network security key (which is the existing password) and then click on the “Next” button.
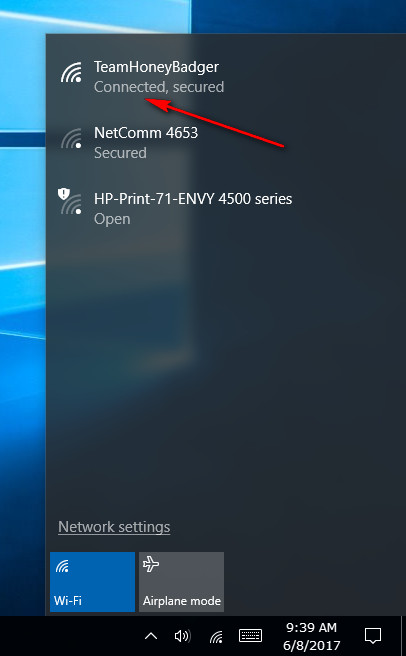
It then lets you know that you have connected to the WiFi network by displaying the word “Connected” directly beneath the network name.
How to Change Your WiFi Network’s Password
You don’t need to modify the password when you change the network name, but it is possible to do it if you prefer having a new password to go along with your new name. To alter the password of the network, you can do that from the same page that offers the option to change the name. Where that will be exactly will vary depending on your provider, but it shouldn’t be far away from the network name that you entered. You can see with my example that it’s just a few lines down the page.

Don’t forget to click on the “Save” button again after you have changed the password.

Lastly, you’ll need to click on the WiFi icon in the system tray again and go through the steps to connecting to the network with the new password, just like you did earlier with the new network name.


