 Email article
As soon as you get used to staring at that desktop of yours after installing Windows 10, you’ll probably want to get your WiFi connection working. Not only is WiFi required before you can start browsing the web, but even the Windows 10 operating system relies on WiFi to support itself. Windows 10 is designed for computers that have unlimited internet connections. We know this because it will routinely start using your download and upload bandwidth without asking for your permission.
Having a network connection up and running is your first step in enjoying your time with Windows 10. Most people choose to have a wireless network instead of a wired one because who wants a bunch of wires hanging around the house when you don’t have to? The answer is some people—but not most.
Once you have connected to a wireless network, the Windows OS automatically creates a profile for that wireless network. The profile that it creates consists of a network name (SSID), password, as well as additional security information. What’s more, Windows will also continue to connect to that network for as long as it is within range. Having it set up that way doesn’t annoy many people because most people only want to stay connected to the one connection in a particular area. If they aren’t, then it’s usually because they want to connect to a mobile hotspot.
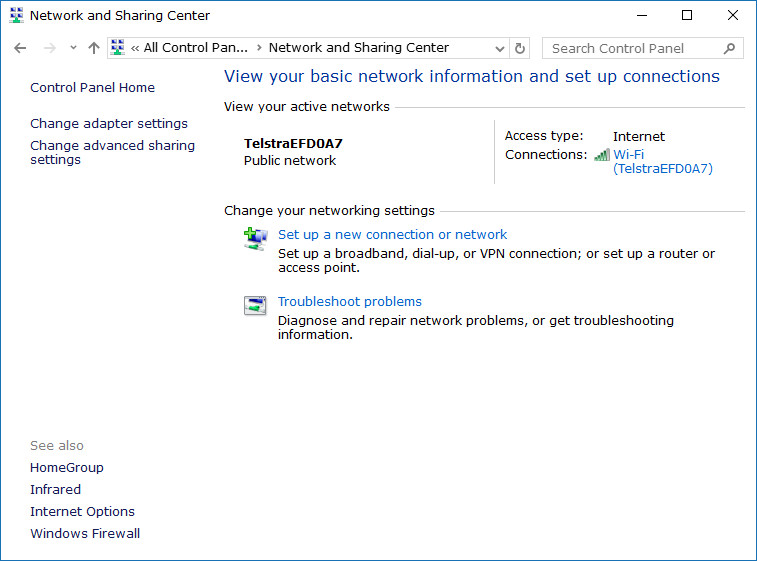
How to Connect to Wireless Network in Network and Sharing Center
Open the Control Panel to show the small icons view and then click or tap on the “Network and Sharing Center” link from the menu. Once that is done, you’ll get to the same picture that is featured below. Click or tap on the “Set up a new connection or network” link.
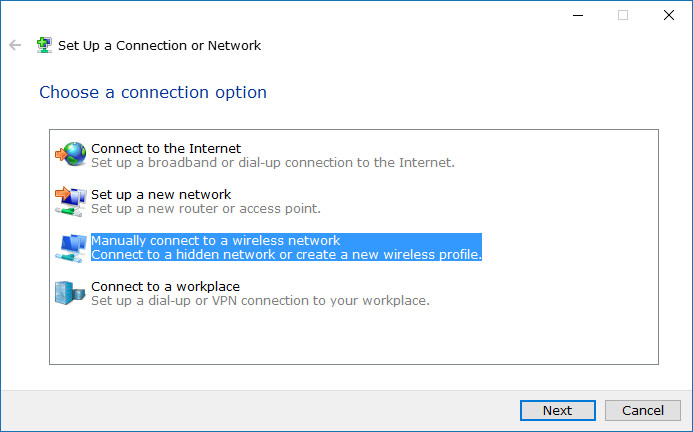
Next, click or tap on the “Manually connect to a wireless network” and then click on the “Next” button at the bottom of the window.
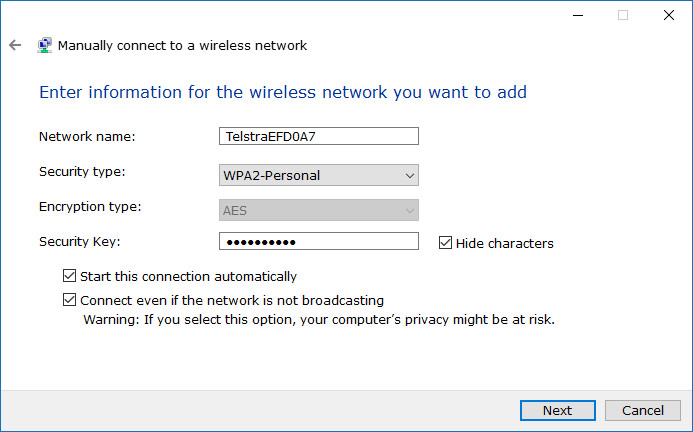
You’ll need to find that WiFi security card that your provider gave to you when they were setting up the router in your home so you can find your network name and network key information. Once you have the card, enter the information into the empty fields on the page. Also, make sure that you check both boxes under the security key, so the connection starts automatically and connects even if the network is not broadcasting.
Lastly, click or tap on the “Use the existing network” link to connect the network that is already created on the computer.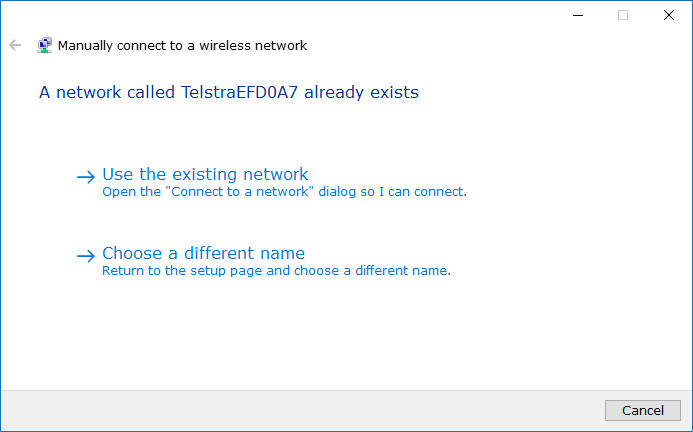
How to Connect to Available Wireless Network in Settings app
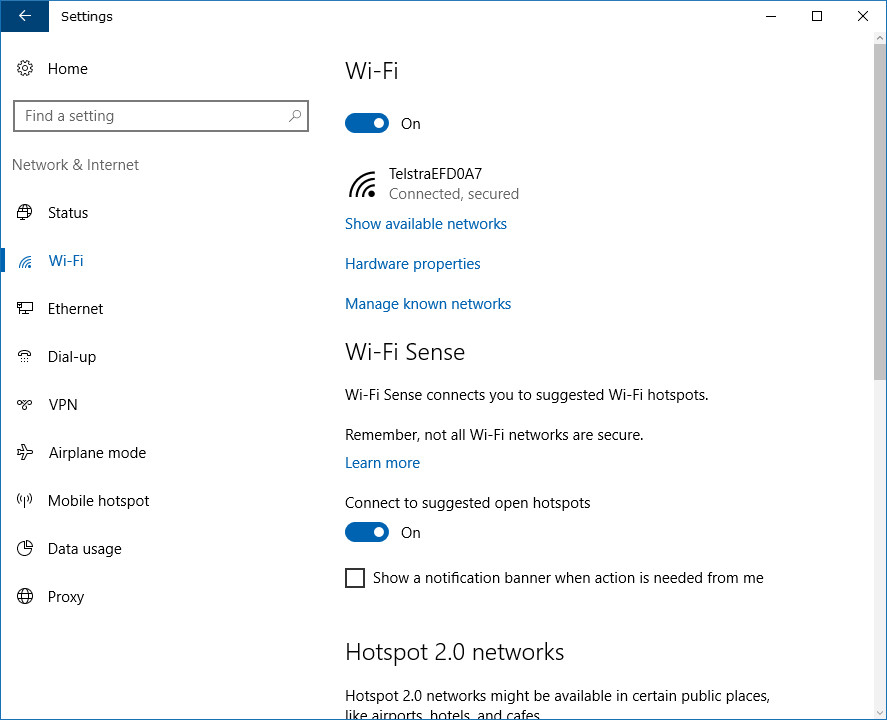
The Settings app in Windows 10 also offers a way for users to connect to available WiFi networks. To do that, navigate to the Start menu > Settings app > Network and Internet > WiFi and then click on the “Show available networks” link in the right pane under the “WiFi” heading.
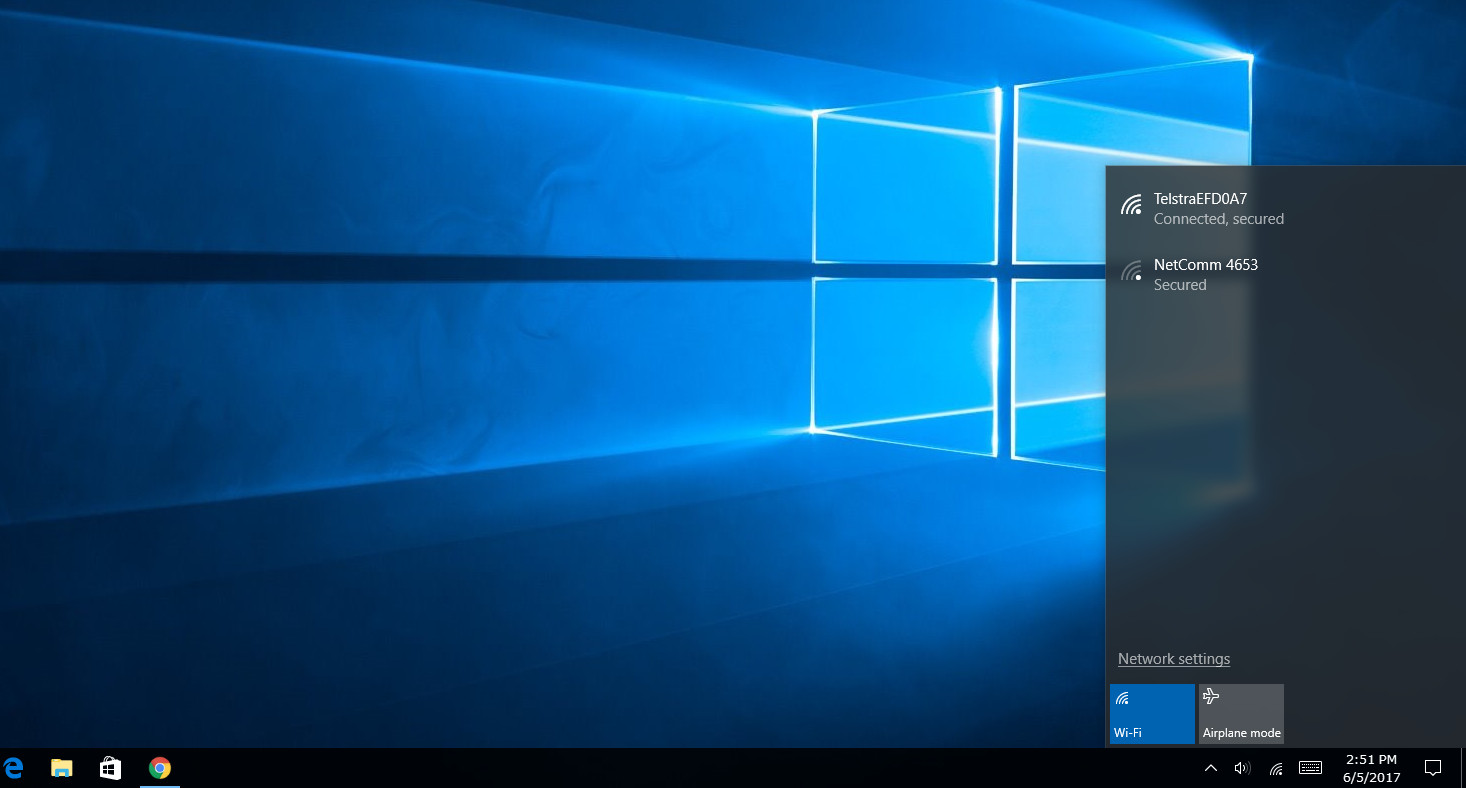
How to Connect to Available Wireless Network in Network Flyout
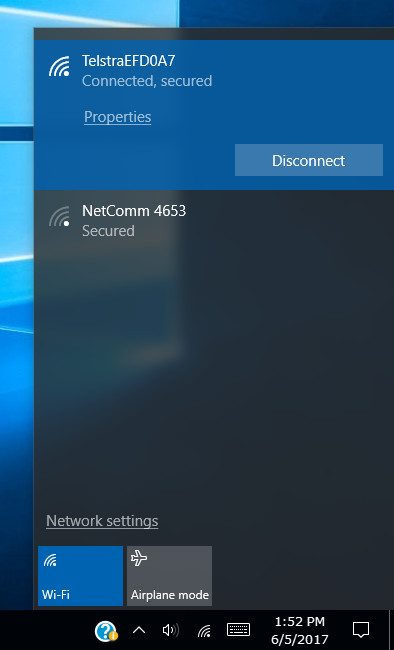
The system tray that’s over to the right side of the taskbar has a wireless icon available on it that you can click or tap to bring up more information about your WiFi connections.
![]()
If you aren’t connected to a WiFi network already, then it shows all of the networks in range of your computer. Click or tap on the one that is yours and that you want to connect to. When you click or tap on it once, you’ll see a box that says “Connect automatically” that you can turn on if you always want this network to connect automatically. If you don’t then just leave this box empty and it won’t automatically connect it to after your session is finished.
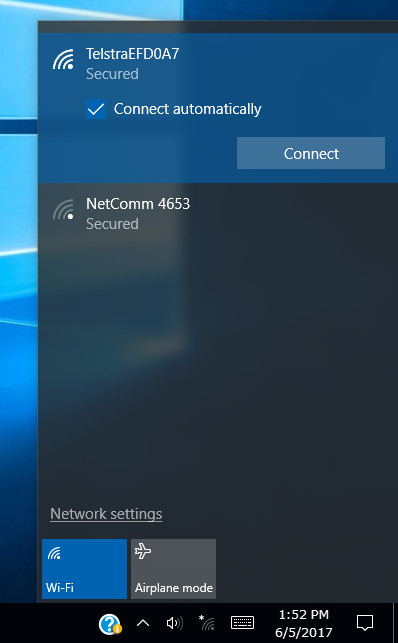
The chance to choose whether you want to connect automatically to the network or not is only there when you have turned it off already and are clicking or tapping on it to get it on again. If your network is already using WiFi, it only shows a “Disconnect” button instead. Once you click on the button to disconnect, you can see the option for connecting automatically again.
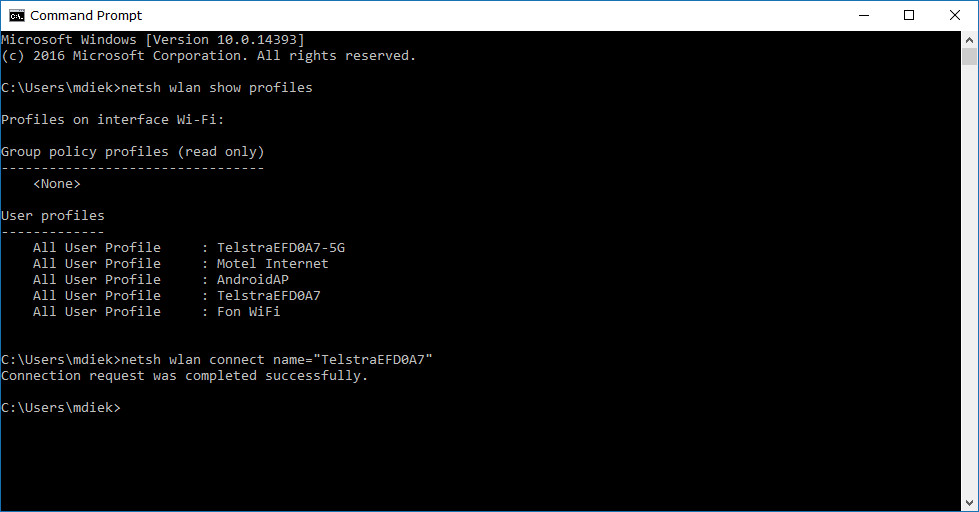
How to Connect to Existing Wireless Network Profile in Command Prompt
The Command Prompt allows you to find existing networks and then connect to them. It doesn’t enable you to connect to networks that are not yet created on the computer. If you do have an existing connection already, open the Command Prompt by starting to type “Command Prompt” into the search field in the taskbar and then click on the “Command Prompt Desktop app” option under the Best match section.
With the Command Prompt open, type “netsh wlan show profiles” to find any existing profiles on the computer.

Now to connect to the WiFi network that the Command Prompt just found, type “netsh wlan connect name=”the name of wireless network profile” and then hit the Enter key. You’ll get a success message if things go well.
Most people are thankful that WiFi networks have gotten easier to connect to over the years. It wasn’t that long ago when it would cause many people a lot of anxiety to connect to an internet connection. Nowadays most people are able to walk the planet can connect to networks without much hassle, and the Windows developers are to thank for that. It also wouldn’t be a Windows operating system unless there were several ways to do it. You can use any of the ways to connect to a WiFi network in Windows 10. No one way is better than other unless it’s quicker for you to get to one way over the other or there’s another feature you want to get access to such as the box that enables you to connect automatically.


