Microsoft has designed Windows 10 in such a way that the Windows Update feature automatically installs the drivers when they are available to download. That means you are going to be getting hardware drivers whether you wanted them or not. If you don’t like the sound of that, you could decide to stop Windows from downloading updates altogether if you prefer, or you could just use the Local Group Policy Editor and Settings if you have Windows 10 Professional or Windows 10 Enterprise and stop the driver updates that way instead.
Microsoft has made a few changes regarding the driver update policies in Windows 10. To begin with, users had no option for enabling or disabling them. Then came Windows 10 build 14328 (announced by Gabriel Aul on the 22nd of April 2016) that gave Windows 10 Pro, Enterprise, and Education operating system owners the chance to enable and disable driver updates from the Local Group Policy Editor.
Next was the Windows 10 build 15002 update that Microsoft rolled out. With it came the option to enable and disable the driver updates from the Windows Settings.
How to Enable or Disable Driver Updates When using Windows Update in Settings
Your options to enable or disable the driver update from the Settings app depends on the version of Windows 10 that you have running. Starting with the Windows 10 Insider Preview Build 15002 (which was announced by Dona Sarkar—the head of the Windows Insider program—from Microsoft blog on the 10th of January 2017), there was an option from the Settings app that allowed the enabling and disabling of the driver updates. Now, running on Windows 10 version 1703—last updated on the 16th of June 2017—the option is no longer there. So, you’ll need to be running a version of Windows 10 close to the 15002 update from January.
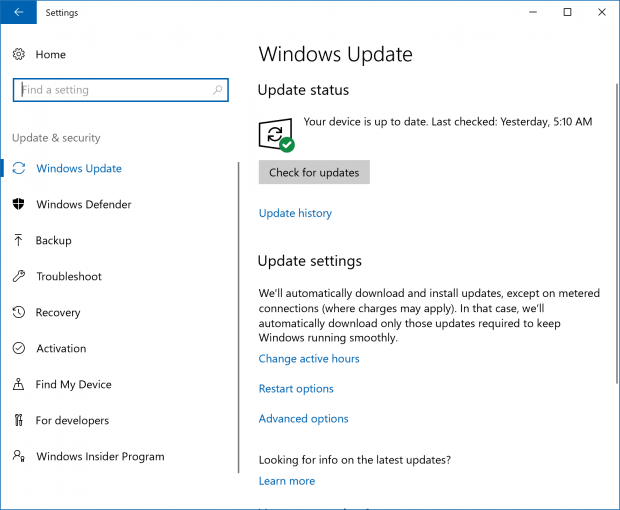
Start by signing into an account with the administrator permissions assigned to it and then open up the Settings app. Next, click on the “Update and security” link from the Windows Settings menu. It gives you the same picture as below. From there, click on the “Advanced options” link in the right side pane.
You’ll now be inside the Advanced Options, and directly beneath the heading that says “Choose how these updates are installed” is the checkbox you can check and uncheck for enabling and disabling the driver updates. The text accompanying the box reads “Include driver updates when I update Windows.”
How to Enable or Disable Driver Updates When Using Windows Update using Group Policy
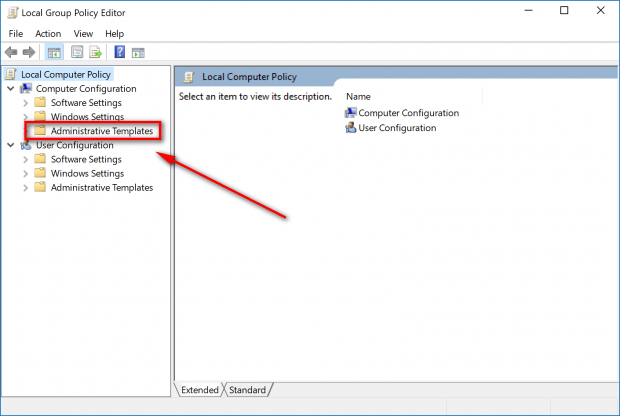
Start by logging in as an administrator to a version of Windows 10 Pro or Windows, Enterprise or Education and then open up the Local Group Policy Editor. Now look in the left side pane and click on the “Administrative Templates” folder.
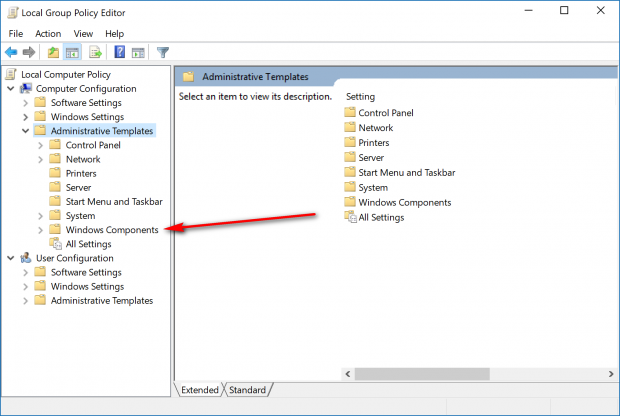
Click on the “Windows Components” folder.
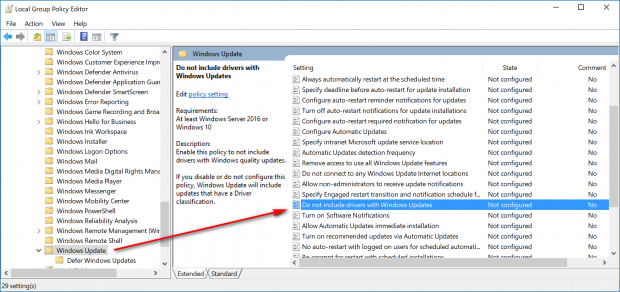
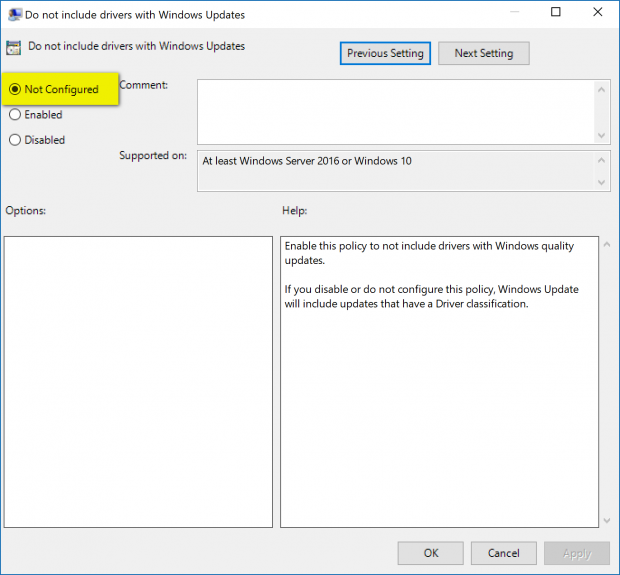
Click on the “Windows Update” folder and then click on where it says “Do not include drivers with Windows Updates” in the right pane.
It’s set as “Not configured” by default. Leaving it there means you’ll continue to get the updates automatically as Microsoft wants.
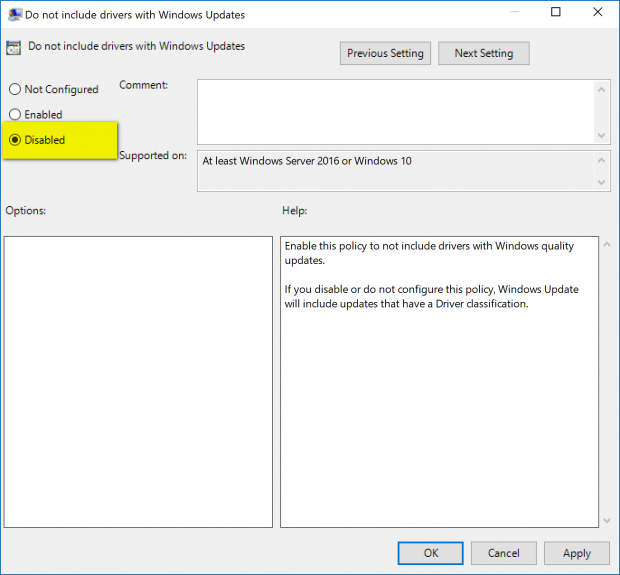
Disabling it will have the same effect as not configuring it, but you can set it to “Disable” if you prefer.
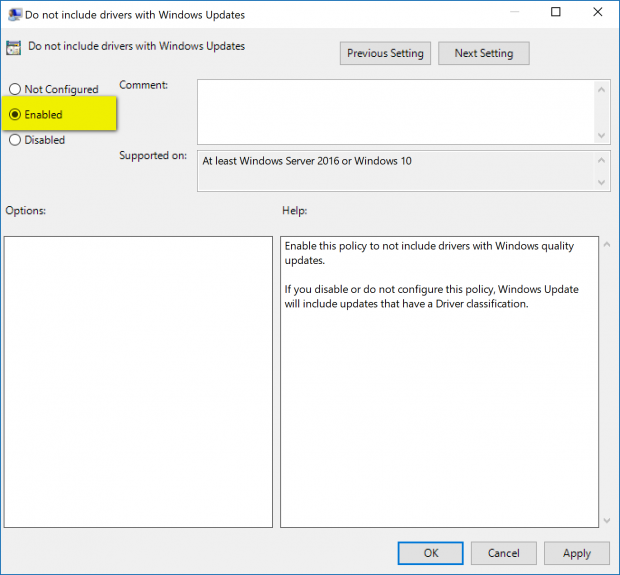
Change the setting to “Enable” if you want to stop the driver updates from being rolled out from the Windows Update feature.
Some people are reporting that Windows Update is continuing to download the updates. It is true that Windows Update does continue to download the driver updates for the device, but it doesn’t install them. There’s nothing unusual about that when you understand how Windows 10 updates work. What Windows does instead is it will report an installation error has occurred in the Windows Update window. You’ll need to remember that error message is related to your driver settings that you’ve made, or you might get a shock. If you are worried about other people using the computer not understanding the message from Windows Update, you could always hide the update as well.
If you ever change your mind and want to have the device drivers installed again in the future, it’s a relatively easy path to follow in the Group Policy Editor, and it’s even easier to do from the Settings.

 Email article
