 Email article
Windows operating systems have historically had the Control Panel made available to give you most of what you need for adjusting settings. In the most recent version of Windows (Windows 10) there is a new Windows Settings hub available that is designed to give you the chance to change most of the settings that you would want to change.
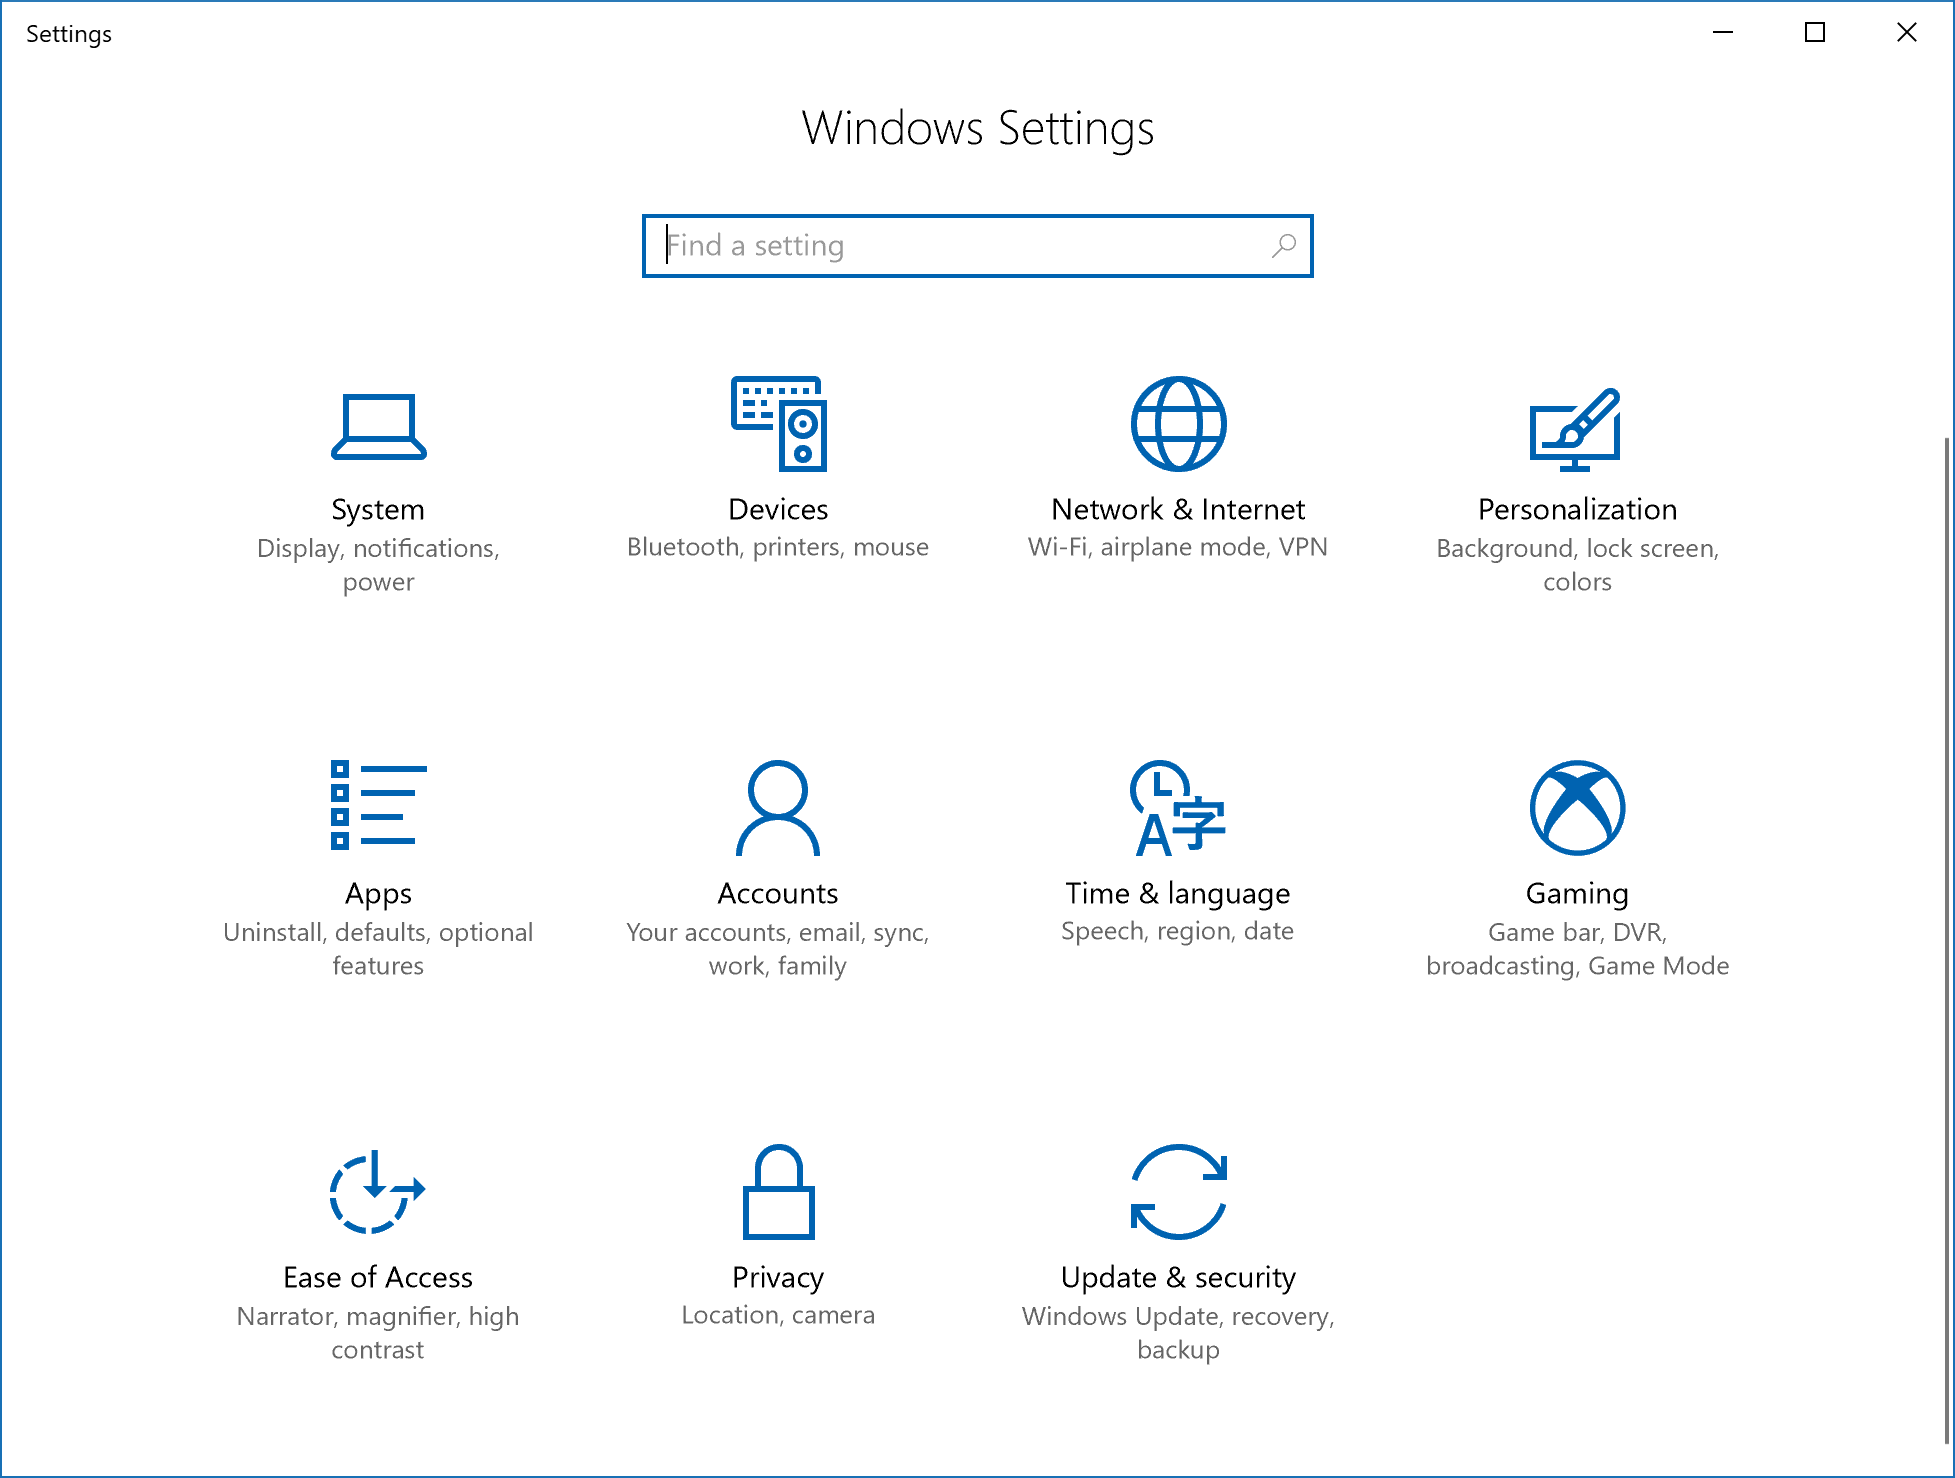
Similar the Control Panel if you have it selected on “View by: Category,” the Windows Settings menu offers the chance to find what you are looking for via categories. There are nine categories available from the Windows Settings menu in all versions of Windows 10 up until the Anniversary Update and eleven if you include the new “Games” and “Apps” categories that are available after the Creators Update (build 15002) has rolled out in your direction.
In addition to the eleven buttons available from the Windows Settings menu, there is also a search box available directly above the top row of buttons so you can type for something you are searching for instead if you prefer. That’s useful if you have tried sorting through the categories and you haven’t been able to find what you were looking for or you just don’t know where to begin looking at all.
There are a few different ways to open up the Windows Settings menu in Windows 10. All of the available ways in the guide below are there for you to use in each version of the Windows 10 operating system as well as all software updates that you might be running. There have been some minor tweaks made to the Windows Settings menu itself since Windows 10 Insider Preview Build 14328 such as new icon colors and background colors, but the way you get to the Settings menu itself has not changed.
How to Open Settings menu in Windows 10
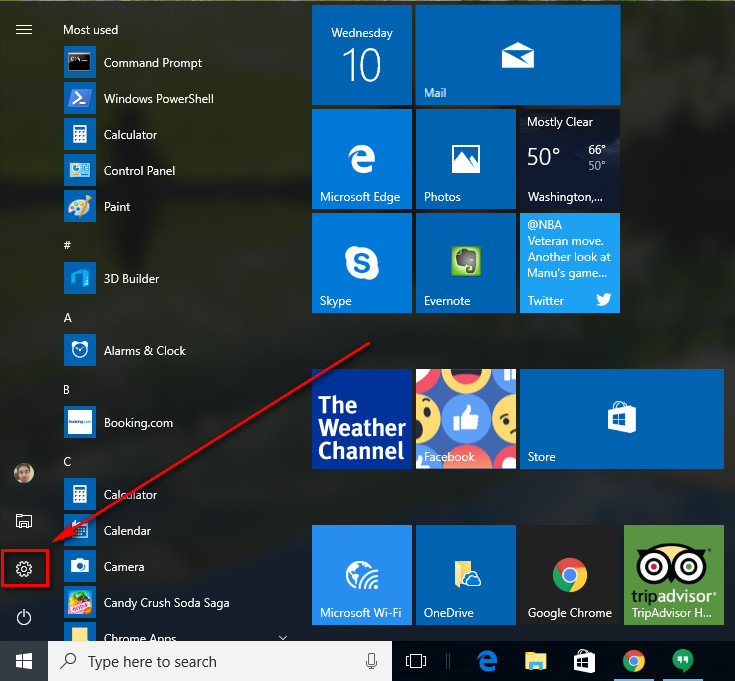
The most common way to open the Settings is by heading to the Start menu > Settings in the left pane.
Additionally, you can innovate a bit by using the Windows 10 tile feature and “Pin to Start” the Settings app so you can get access to it from the Start menu as a tile.
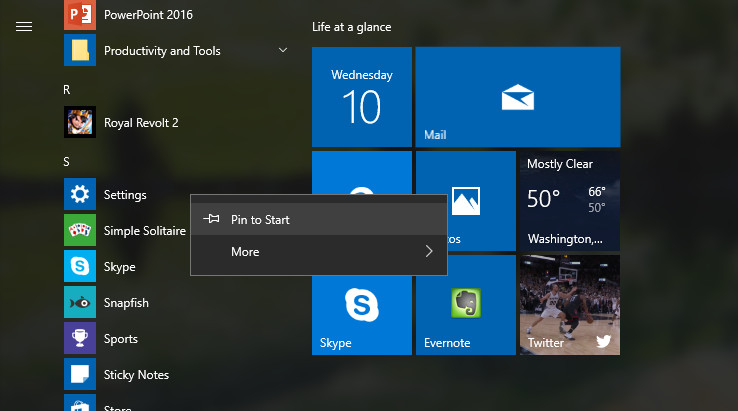
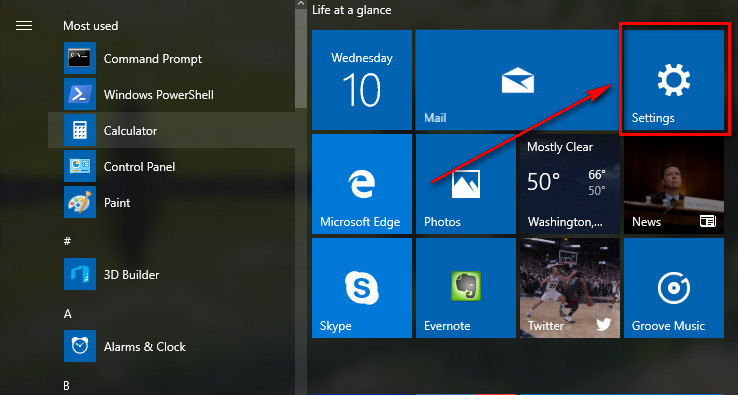
When you do pin the Settings to the Start menu, it appears as a tile like so:
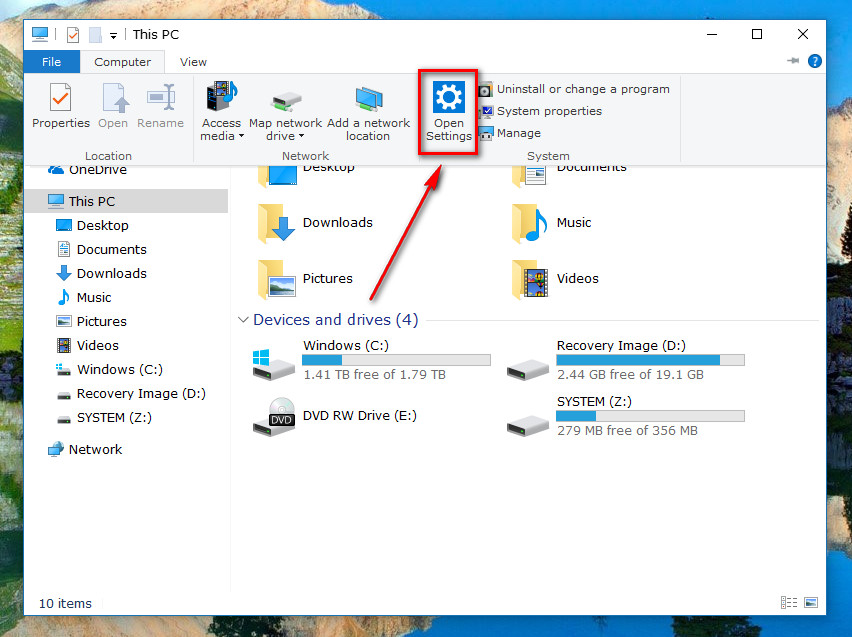
You can also file the “Settings” link available from the File Explorer by navigating to the Start menu > Settings > File Explorer and then click on the “Computer” tab at the top of the File Explorer window. It then brings up a new menu and one of the buttons on it is called “Open Settings.” Click on it to get direct access to the Windows Settings.
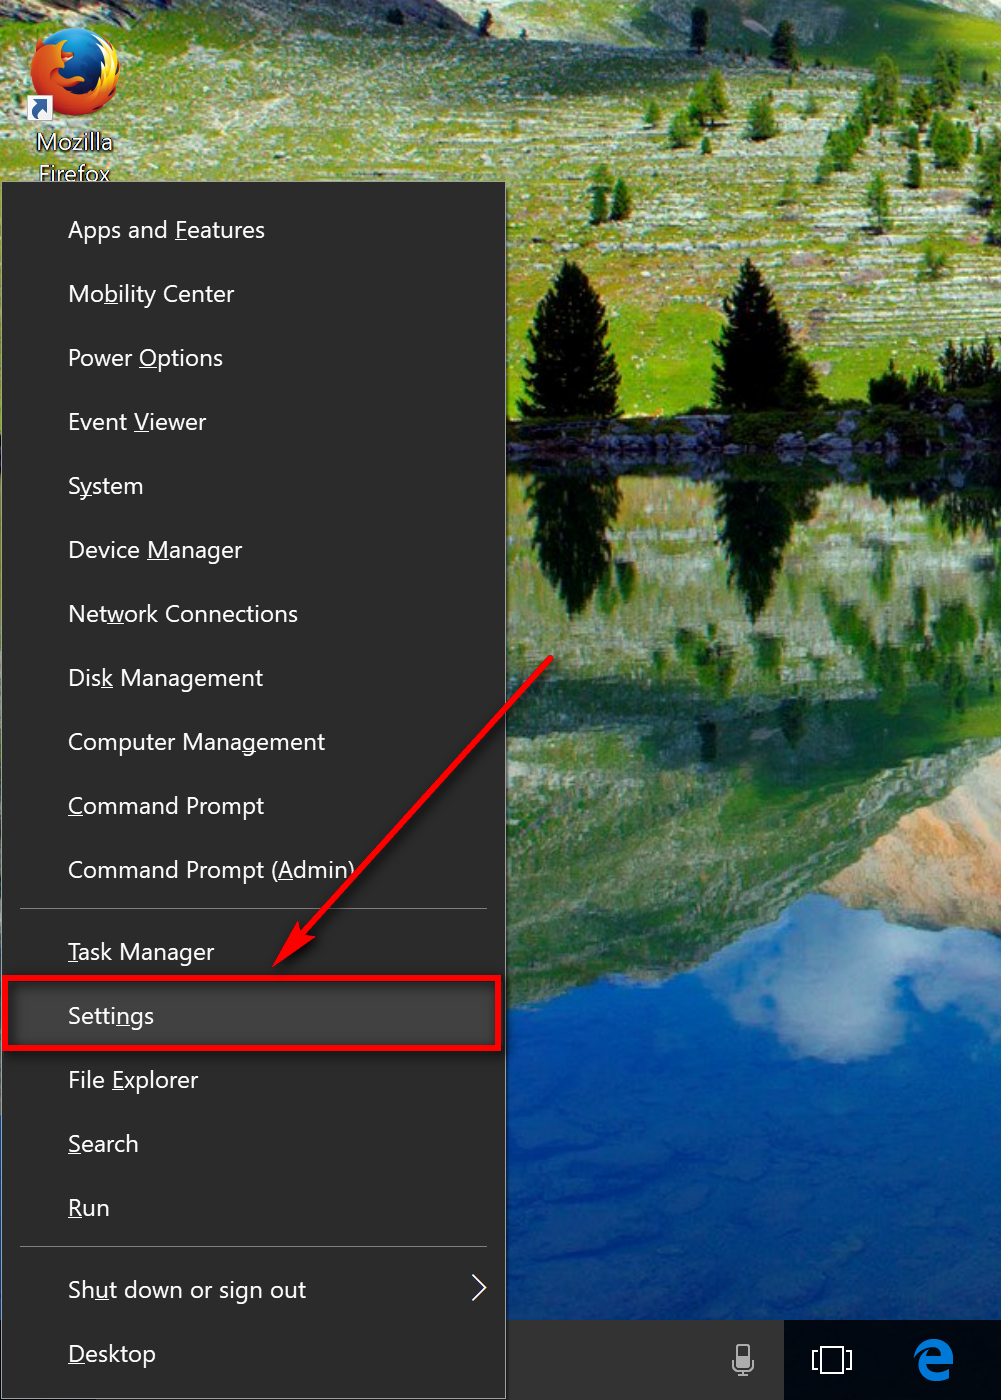
While not available for all versions of the Windows 10 packages, if you have the Pro, Enterprise or Education versions of Windows 10 you can also get access to the Windows Settings menu by bringing up the Quick Links menu. The Quick Links menu is available when you press the Windows logo key + X on your keyboard. Those of you who are running on the Windows 10 Home version can find the File Explorer link available in the place of the Windows Settings. It isn’t possible to swap the Control Panel for the Settings like it is to swap the Command Prompt for the Powershell on the Win+X menu.
You can now view and change all of the settings that Windows developers have made available for you to alter. (The image was taken of the Windows Settings after the Creators Update that includes the new “Apps” and “gaming” links in the menu.)
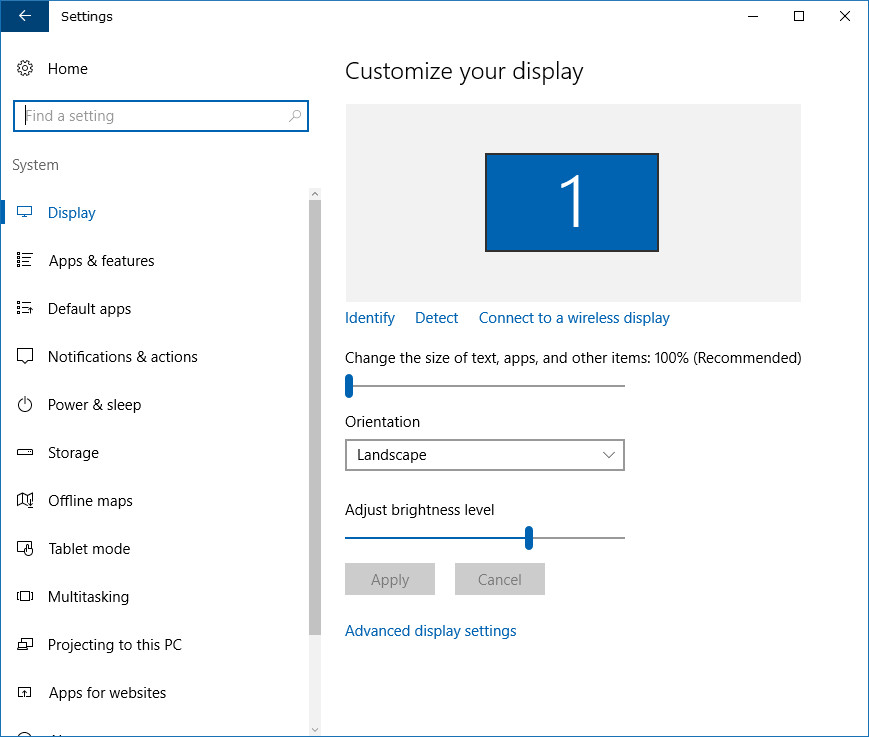
Clicking on the “System” icon directs you through to things to do with the display, shows you all of the apps and programs that are installed, shows you what the default Windows app are and lets you choose which ones you want, gives you all of the notification options, is your gateway to the power and sleep settings on the computer, and a bunch of other stuff that is all to do with your operating system. (If you run Windows 10 on a laptop, you can also get access to the power options from the system tray, so you don’t need to go to as much effort.)
Note: The “Apps & features” section in here has been moved to its own “Apps” category starting from the Creators Update build number 15002. You’ll only see it on the “System” section if you are running the Anniversary Update or earlier version of Windows 10.
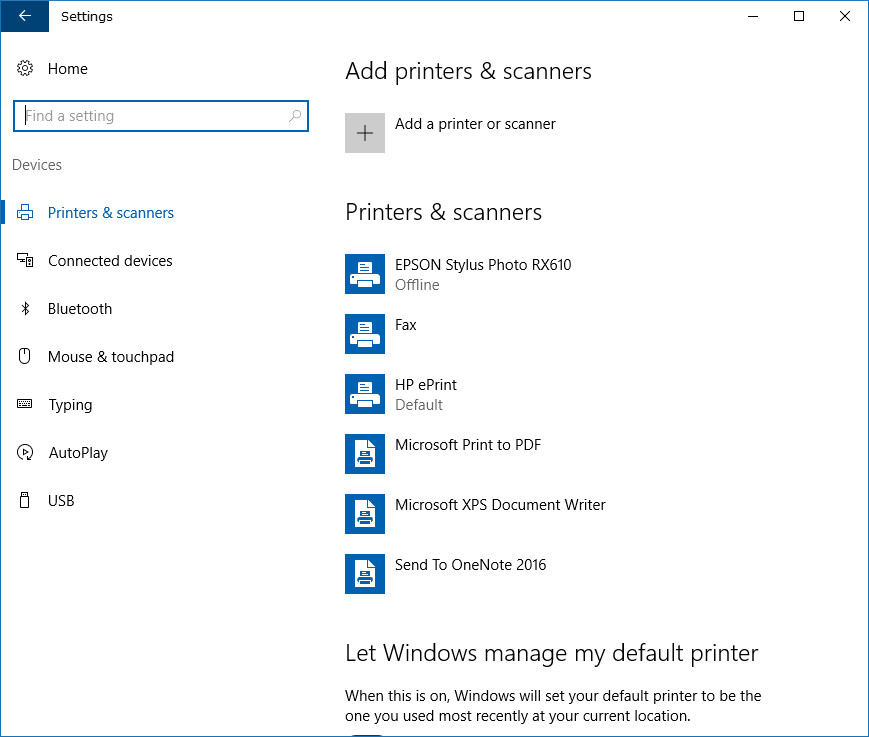
Inside the “Devices” link is where you’ll find everything to do with your printers and scanners, how you want Windows to control your typing, a few settings relating to the mouse for computers and touchpads for the Surface Pro, Surface Book, and Surface laptop devices, the chance to connect more devices and a few more things like managing the Bluetooth devices.
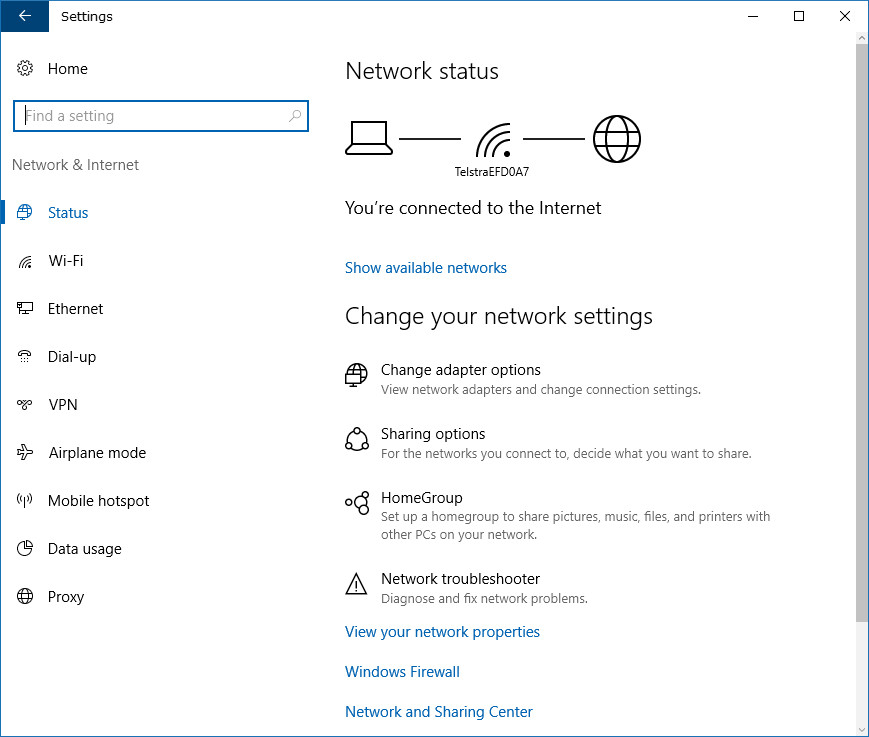
Inside the “Network and Internet” section is where you can change all of your network settings, find your WiFi settings, airplane mode and the chance to create a mobile hotspot. You also get your data usage stats from here and a few other things you might care for.
The “Personalization” section is where you can choose the colors of your theme (post-Creators Update) or choose your background image and have the colors of the theme picked for you (pre Creators Update.) You can also choose what happens on the lock screen, such as if you want to show the Windows Spotlight feature or not. The taskbar and Start menu tweaks can also be done from here.

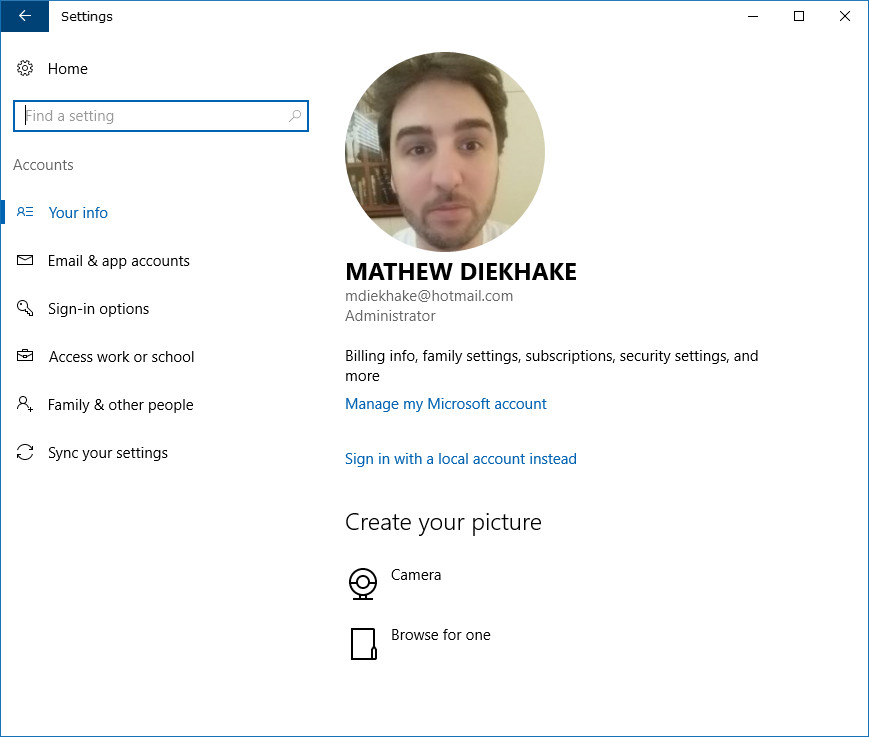
Add a picture of yourself in the “Accounts” section if you want to have a profile picture, choose what emails you can get access to from the Start menu, password and Windows Hello stuff, plus the chance to choose what other people can use your computer and sync the settings.
The “Time and language” area lets you choose a date and time, time zone, other features related to the time, such as the chance to have daylight savings taken care of by itself, the region and language that you want to Windows to know to deliver you more relevant content at times, and what language you speak for the microphone and text-to-speech.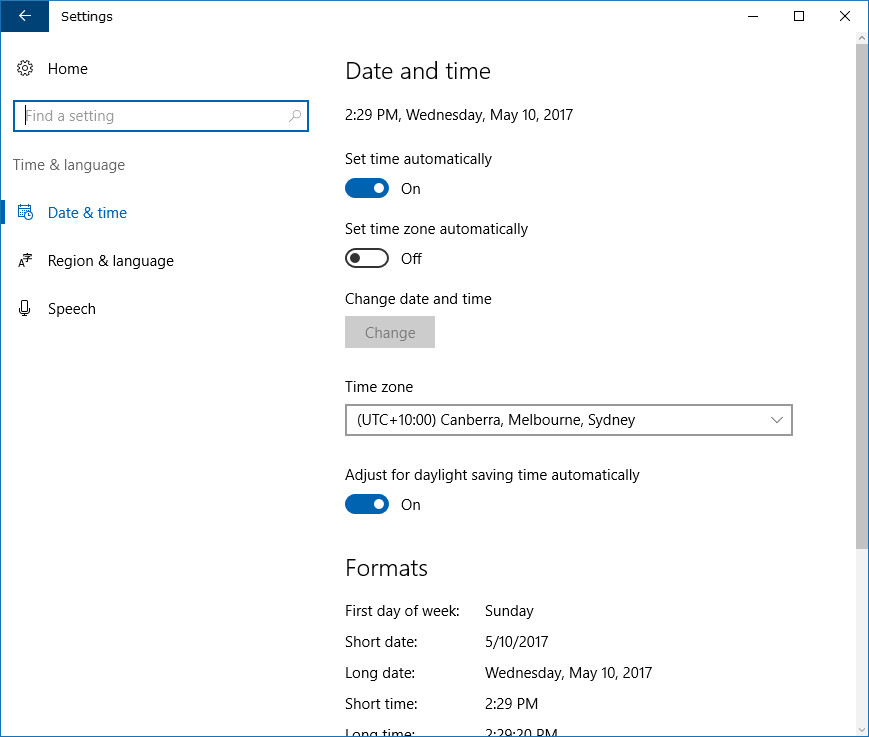
Click on the “Ease of Access” to check out the on-screen keyboard options, turn the narrator on or off (also available from the login screen), the magnifier if your eyes are finding it difficult to see the computer’s display, some mouse settings like the chance to adjust the cursor size, plus some more options for visuals and the touch feedback.

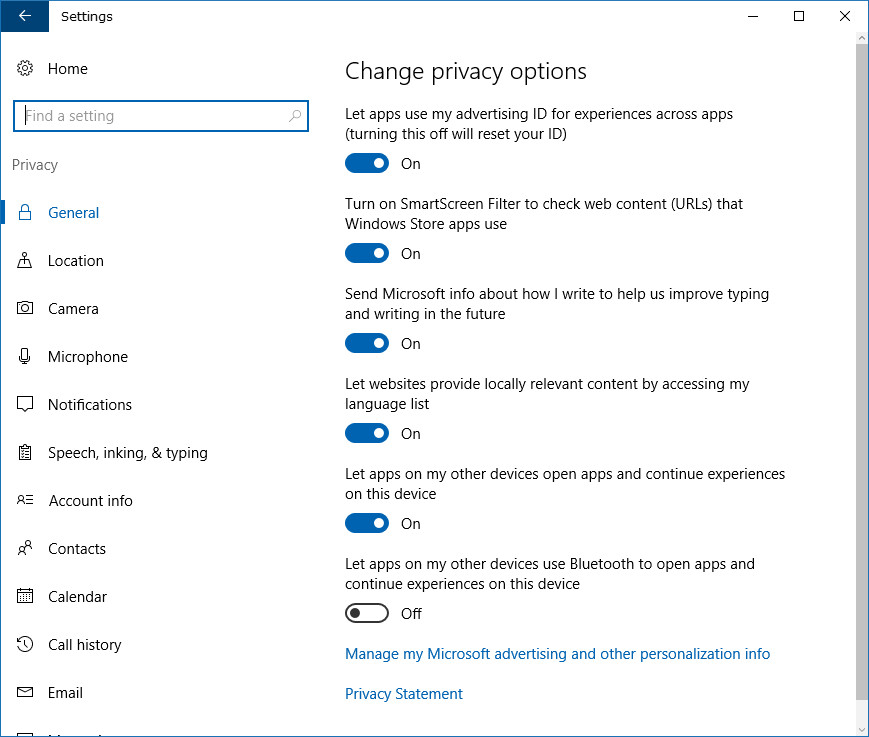
The “Privacy” section is your gateway to choose if you want Windows to know your location or not, the chance to deny apps and programs the opportunity to use the camera and microphone if you prefer, and lots of other settings related to your privacy.
If you don’t want to wait for Windows to update your software, you can enter the “Update and security” area and click on “Check for updates” button. You can read more about updating to the latest version of Windows 10 for more on your update status. In addition to the updates, you can open up Windows Defender—the default antivirus program that runs in Windows 10 in the background—and choose what settings you want to be enabled for it.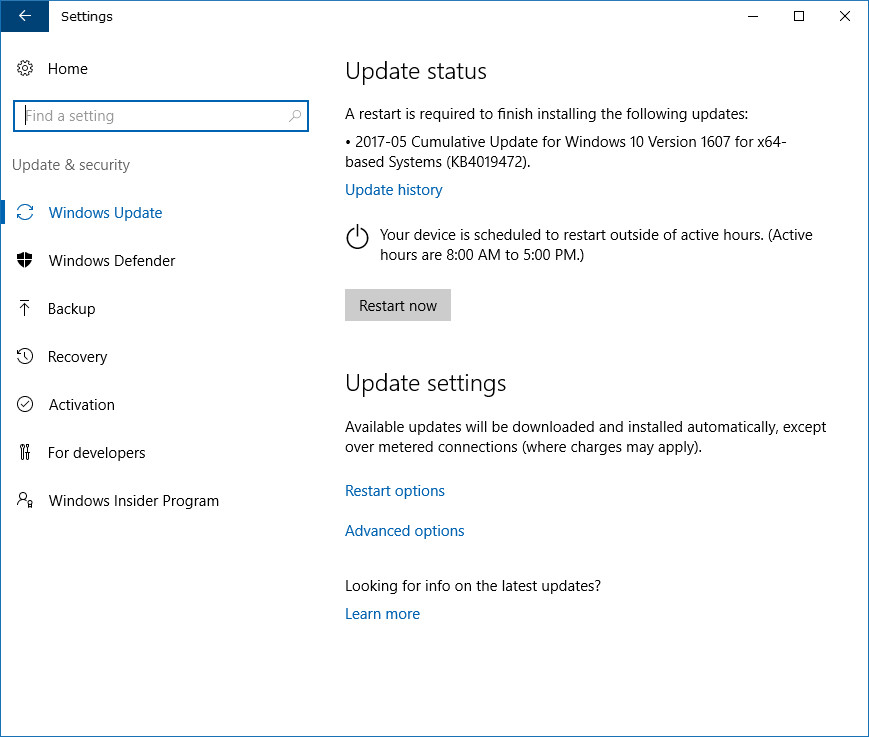
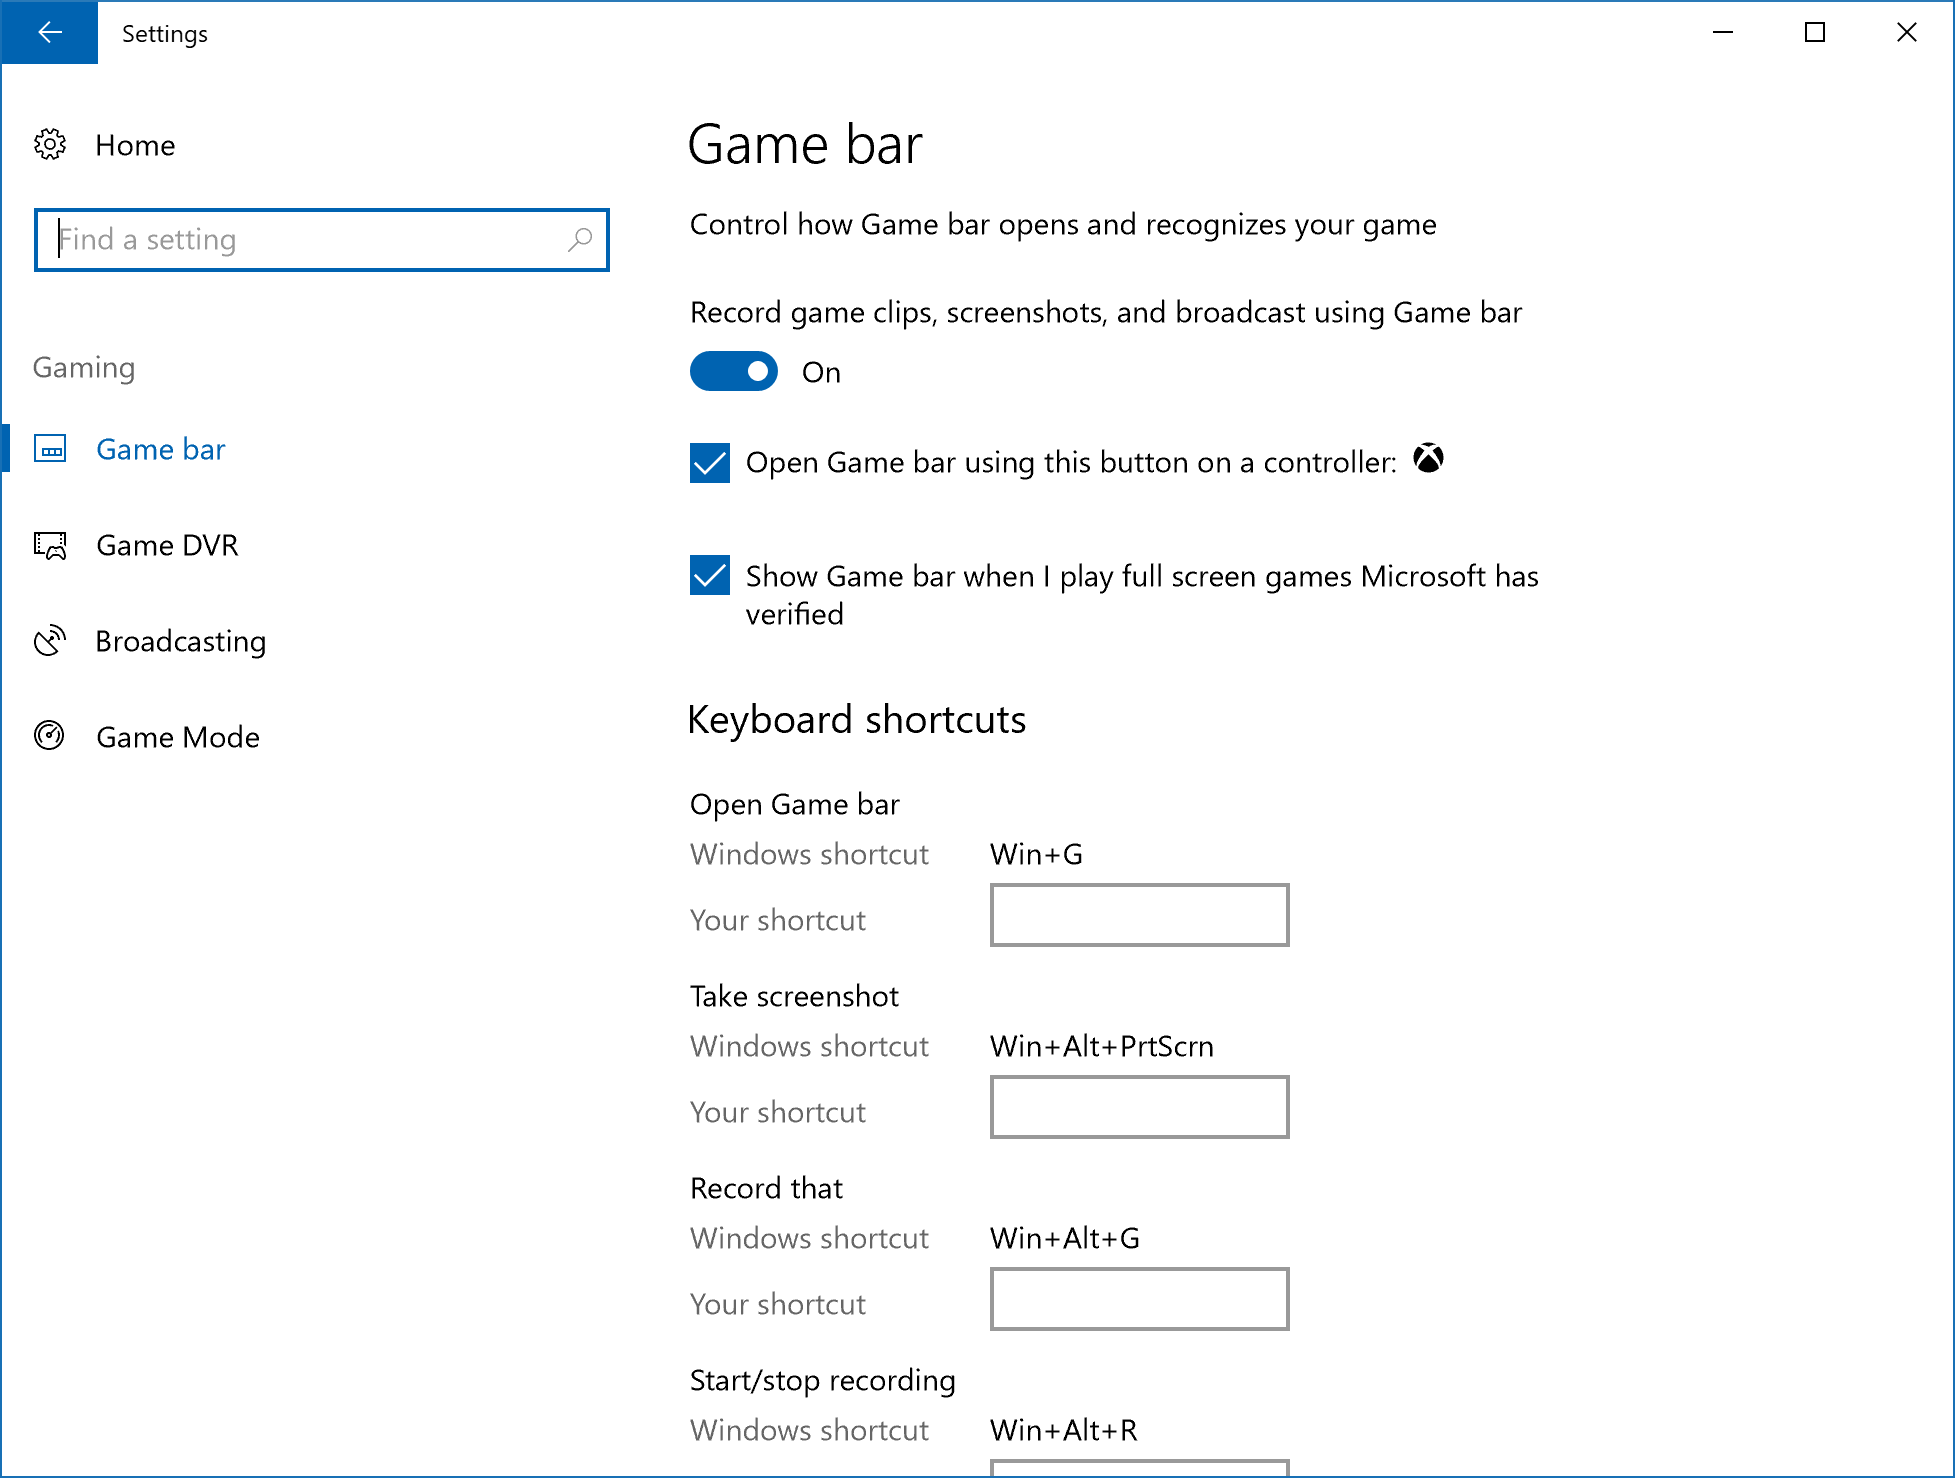
The “Gaming” section gives you access to the Game bar, Game DVR, broadcasting and Game Mode settings.
The “Apps” category takes much of what was in the “System” category before it was created. It is now where you can install and uninstall your applications and programs, plus choose what default apps your Windows 10 operating system has enabled.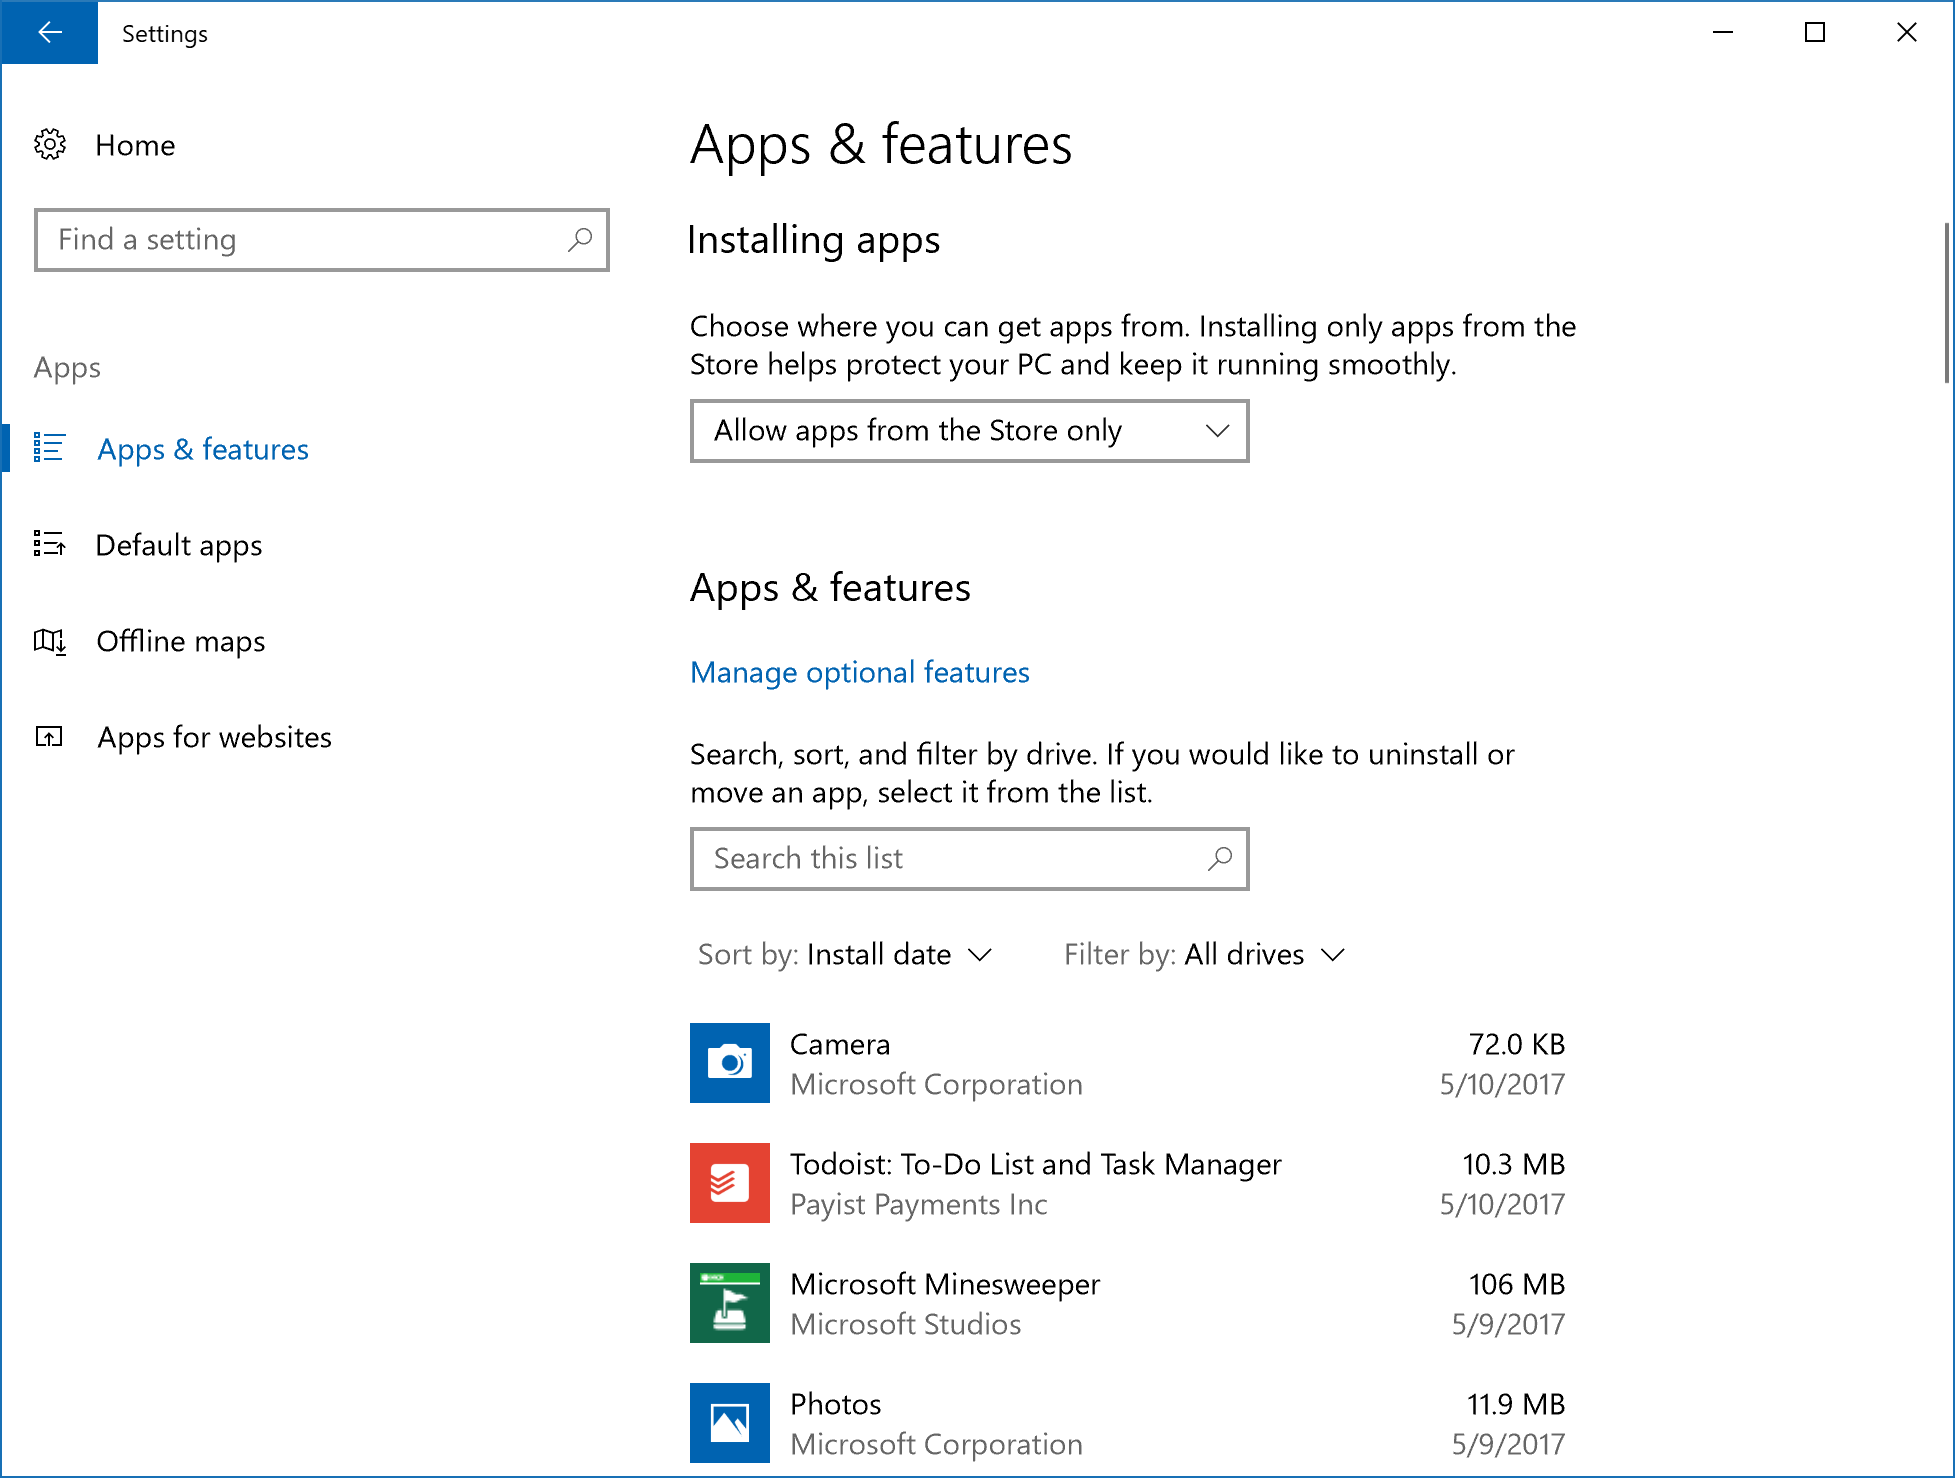
The new Windows Settings menu available in Windows 10 is designed to make life easier for those who were struggling to do the same tasks by using the Control Panel. The Windows Settings was designed to help everyday people be able to make changes that they otherwise might not have felt like making without the aid of an IT professional. It seems to be doing its job and the more you get to know the Windows Settings menu, the better you’ll be at navigating the future versions of Windows.


