During your time with Windows 10, you’ll likely use quite a few folders. Some of them can be deleted (like Windows10Upgrade folder), but some of them need to stay. You should always research a particular folder’s name to find out if it needs to be on your computer or not before going ahead and just deleting it.
If you are researching the WinSxS folder at the moment for that same reason, then I have a bit of bad news: unfortunately, it can’t be deleted entirely. You can, however, remove some items from the folder to reduce it in size and help create some additional disk space available to your computer that way instead.
The WinSxS folder needs to stay on the computer because it is the component store; it contains all of the components that make up Windows 10 and allow it to be a complete operating system. So, not only does it need to stay, but it is of critical importance as well.
Given that it is such an important folder, Windows 10 is programmed to do a decent enough job at maintaining it for you which then results in not as much need for people to play with its contents. You’ll also get Windows doing a similar thing if you happen to be running on Windows Server 2016 where it will self-maintain quite well. In any event, the job Windows does at cleaning up and making files smaller isn’t as good as what you can do if you wanted to clean it up using some of the available methods that Windows gives you to use.
Over time, you’ll build up some unnecessary files in there from older versions of the components that have been updated to the newer versions. It’s not uncommon for that to happen since part of what goes on in the component store folder is related to the Windows Update. The WinSxS folder also keeps a hold of all the uninstalled and disabled Windows components. That means you don’t need to have a Windows component installed still for to it be sitting there in the WinSxS folder and using up your disk space. If you don’t want to wait for Windows to self-maintain periodically or you just want to make sure you are clearing the most space on the hard drive as possible, the guide below shows you what you can do.
Disk Cleanup
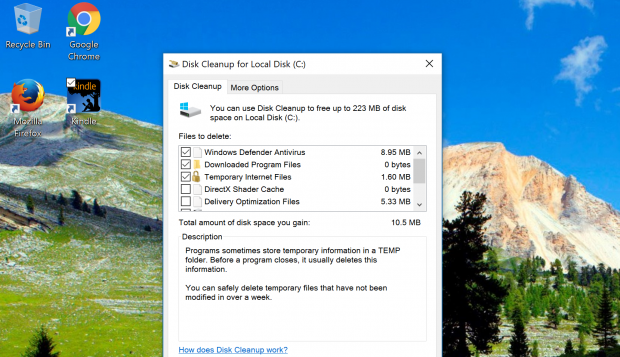
The WinSxS folder contains all the Windows system components and not just some of them. Any components found elsewhere on the computer are always going to be linked back to the WinSxS folder no matter what. So technically you can help clear space in the WinxS folder by emptying the “Windows Update Cleanup” option from the Disk Cleanup tool that comes with Windows 10. You can’t always delete everything from the Disk Cleanup tool without having potentially adverse effects—like if you were to remove the “Windows ESD Installation Files,” for example—so you should further research what it is you are choosing to delete if you decide to delete more than just what we are advising now with the Windows Update Cleanup files.
To get there, you can type “Disk Cleanup” in the search box or open the Run dialog box by pressing the Windows logo + R keys on your keyboard and then typing “cleanmgr,” followed by tapping on the “OK” button. Once the Disk Cleanup dialog box is open, click on the “Clean up system files” link and if you haven’t deleted it already, there should be an option for the “Windows Update Cleanup” that you can apply a checkmark in the box to delete it. From the same area in the Disk Cleanup dialog box might be another option for “System compression” that you can apply a checkmark if you like. The WinSxs folder can be compressed, so both of those options will help free up hard disk space from there.
Task Scheduler
Available in Windows 8 for the first time, the StartComponentCleanup task was developed by Microsoft to clean up any components when the computer is not in use. In other words, users with Windows 8 and Windows 10 don’t have to do anything to get it working; it just runs by itself automatically—like so many other things in a wonderful Windows operating system. Once the cleanup task is finished using the Task Scheduler method, it then waits another 30 days before running again to clean up the old components that are no longer needed. Doing it this way with the Task Scheduler also means there is a one-hour timeout that can sometimes mean not all the files get cleaned up as well as they might have. (If that sounds like an annoyance to you, then you should scroll down to the DISM solution a bit further down the page instead).
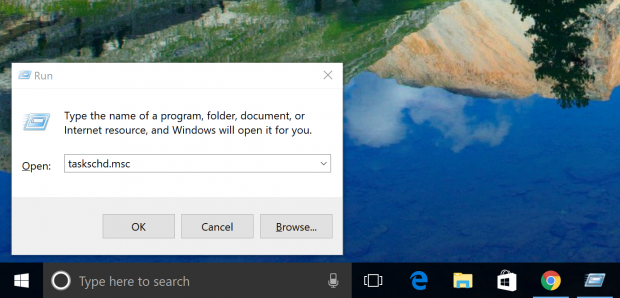
You can use the StartComponentCleanup task to clean up the Component Store WinSxs folder in Windows 10 from the Task Scheduler. To get started, press the Windows logo + R keys at the same time to open up the Run dialog box. Type “tasksch.msc” into the available field and then click on the “OK” button when the box is open.
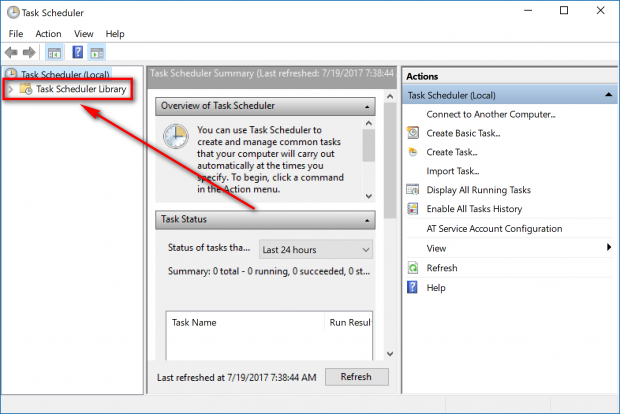
Now that the Task Scheduler is open, double-click the mouse on the “Task Scheduler Library” from the far left side pane to expand it.
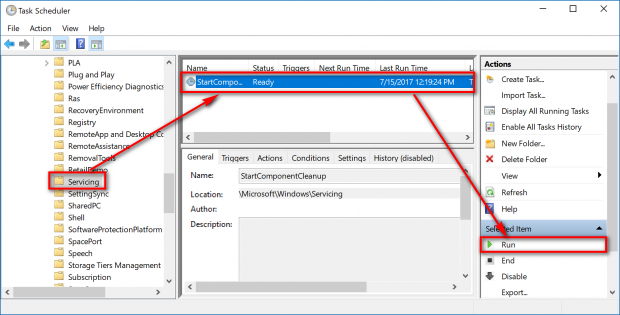
Next, double-click the mouse on the Microsoft > Windows > Servicing entries in the same left side pane and then highlight the “StartComponentCleanup” in the middle column by clicking on it just once. You’ll then get a “Run” option in the far right side pane that you need to click on to start running the cleanup.
Command Prompt
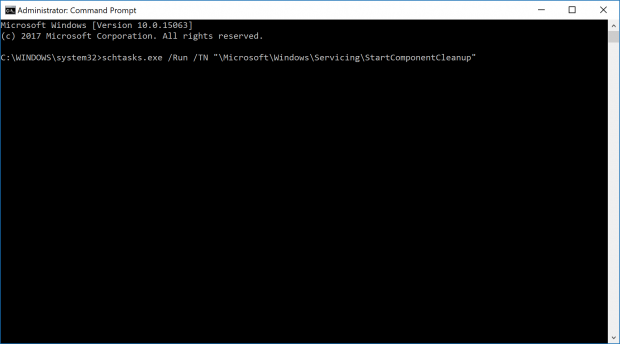
If you wanted to run the StartComponentCleanup task now, you can by opening an elevated Command Prompt, so you are using the command line with the administrative permissions, and then copy and paste the following command into the window: schtasks.exe /Run /TN "\Microsoft\Windows\Servicing\StartComponentCleanup". Press the Enter key to confirm the command after you’ve copied and pasted it in.
DISM
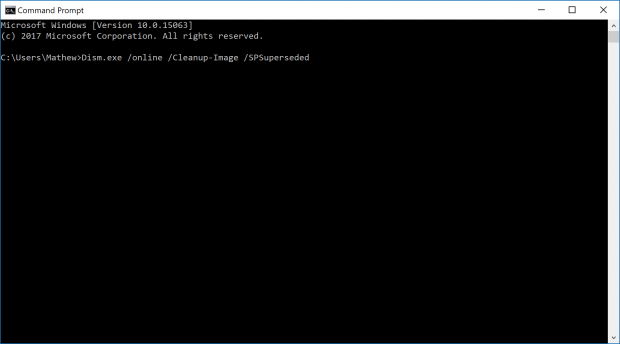
You can also use a DISM command from the command line to clean up the component store as well, but the way it cleans up is different to the Task Scheduler method that is listed above. The primary difference is that when you do it this way with the DISM command, all the versions of the updated components are immediately deleted; there is no 30-day waiting period. Also, there is no one-hour timeout limitation here either.
To use DISM, you’ll need to open up another elevated Command Prompt window, and then copy and paste this command: Dism.exe /online /Cleanup-Image /StartComponentCleanup /ResetBase. Hit the Enter key to confirm the command and then wait for the cleanup to complete. It can take quite a while to complete, so you might want to minimize the window to the taskbar and then continue using the computer in the meantime. Once the cleanup is finished, you can close the elevated Command Prompt window because there’s nothing else you need to do there.
The WinSxs folder is one of the largest folders you’ll have on your computer at all times because, well, it’s just really big and filled with lots of stuff. What’s even worse for your disk space is that the size of the folder continues to grow—often unnecessarily from your point of view—over time. If you run through any of the options above for cleaning up the WinSxSfolder at least once now and then every so often, your hard disk space will thank you for it.

 Email article
