 Optical character recognition is one of a few types of technology meant to make our lives easier. The only problem is, to take advantage of this convenience, one typically has to shell out a lot of cash: Good OCR programs are bloody expensive. Luckily, Google is in the business of making things better and free; and OCR is no exception.
Tesseract OCR and gImageReader
Tesseract OCR is an optical character recognition engine that was originally developed and maintained by HP from 1985-1995. At its peak, Tesseract was considered one of the best OCR engines out there. After 1995 HP stop putting much effort into Tesseract; and in 2005 HP released Tesseract’s source code. Since then, Google has been updating and maintaining Tesseract and today Tesseract is once again considered to be one of the most powerful OCR engines available. The only problem with Tesseract is that for the common user it is a pain in the [bleep] to use. This is where gImageReader comes in.
gImageReader is a program that serves as a GUI to Tesseract; it users Tesseract to process OCR but adds on an interface that the common man can use.
Getting Setup
First and foremost, you need to download gImageReader and Tesseract OCR; they are two separate downloads. (Download links are available at the end of this article.) Once you download them both, they both need to be installed. (Duh.)
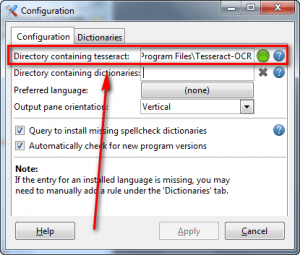
Once you have both gImageReader and Tesseract installed, open gImageReader. A Configuration dialog will be the first thing you see. At the Configuration window, you need to do two things:
- Type in the path to your Tesseract installation:
Unless you specifically changed it, the path for Tesseract is C:\Program Files\Tesseract-OCR for 32-bit machines and C:\Program Files (x86)\Tesseract-OCR for 64-bit machines.
Take note that the Tesseract path may be automatically filled in for you. If this is the case, just confirm that is it right – no need to change anything (unless its wrong, in which case you do need to change it).
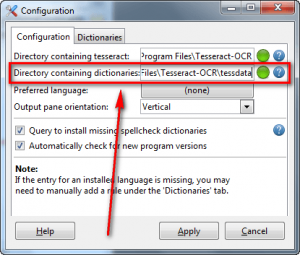
- Enter the path to Tesseract dictionaries:
Unless you specifically changed it, these are found in C:\Program Files\Tesseract-OCR\tessdata (32-bit) and C:\Program Files (x86)\Tesseract-OCR\tessdata (64-bit).
After doing all the above mentioned, you are ready to start OCR’ing.
Optically recognizing characters
As already mentioned, Tesseract is the engine while gImageReader is the GUI; so you don’t have to do anything with Tesseract itself; you use Tesseract through gImageReader.
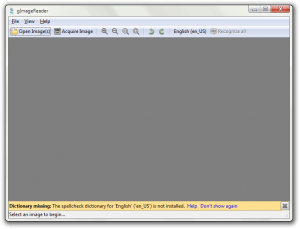
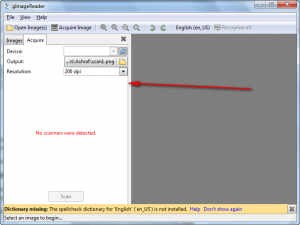
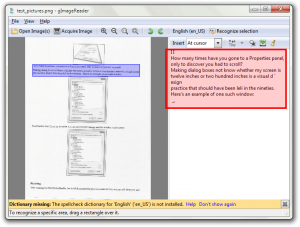
After you get past the configuration mumbo jumbo mentioned above, you’ll be met with the following:
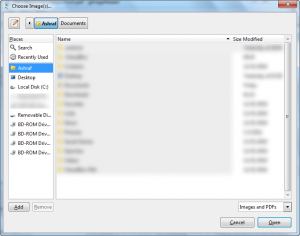
To start OCR’ing, either hit Open Images and import the images/PDFs you want to OCR…
…or hit Acquire Image to scan in a document:
Once you have images/PDFs loaded into gImageReader, what to do next depends on what type of images/PDFs they are:
- Mostly Text
On images/PDFs that are made up of mostly text you can do a full recognition. In other words, you don’t need to select any specific text – just hit Recognize all and gImageReader will OCR the whole image/PDF. Take note, however, if you are OCRing a PDF that has multiple pages, Recognize all will only OCR one page at a time. You need to manually do Recognize all on other pages.
- Text and Images
One of the down sides of Tesseract is it doesn’t recognize pictures embedded with text. So if you have a file that has text and images both, for the best result you need to selectively highlight the text portions and hit the Recognize selection button. Recognize selection only OCRs the part that you have selected.
(Although above I mention using Recognize selection for images/PDFs that contain text and images, if you want to only OCR a specific portion of an all-text document, you can use Recognize selection for that, too.)
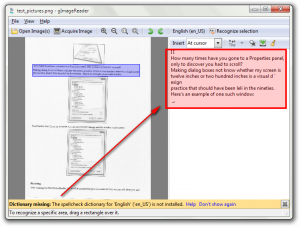
Regardless of if you do a full recognition or a selective recognition, once an image/PDF has been OCR’ed, the contents are displayed in a pane to the right:
Once the OCR’ed results are displayed, you can manually edit any mistakes, use a “search and replace” feature, save the output as a text file, or clear the output.
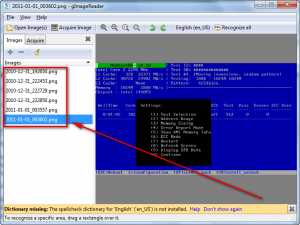
If you loaded multiple images/PDFs into gImageReader all of the files will be listed in a pane on the left…
…and you must conduct OCRs on them each separately. OCR results of multiple documents – or multiple pages of the same document – are displayed one after another in the results pane (the one that appears at the right of the program window after you OCR something) discussed previously.
Conversion Quality
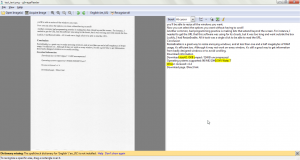
As already mentioned, Tesseract is considered to be one of the best OCR engines out there. The following was the results of two tests I did:
As you can see, for the first test only three minor mistakes were made: “XVW Wrst” instead of “Vista”, “Wrsion” instead of “Version”, and “size:42. OKB zmpped” instead of “size: 42KB zipped”. For the second test the OCR again is very good but “visual design” is converted as “visual d’ esign” (with “esign” on a whole separate line when it shouldn’t be) and “left” is converted as “leli”.
Of course no OCR program is perfect, and Tesseract is no exception: OCR quality will depend on the image/PDF being OCR’ed. The more clear the image/PDF, the better the results will be. However, generally speaking, Tesseract performs brilliantly.
Lastly, take note that Tesseract/gImageReader only support plain text; the OCR’ed text will not be formatted.
Update by Ashraf: For some reason I cannot get Tesseract/gImageReader to work on images. It works beautifully with PDFs but for images it produces garbage output. I am not sure what is up because Locutus doesn’t seem to having this problem. If you have this same problem as me and figure out a solution, please share in the comments below.
Update2 by Ashraf: Apparently Tesseract cannot work with low DPI images, which is why I am having the problem stated in the previous update. Please use higher DPI images (300 DPI seems to be the magic number) if you want good results. Or, alternatively, create a PDF out of your low DPI images and use that; Tesseract works great with PDFs.
Multi-Language Support
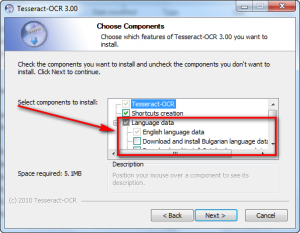
Tesseract is designed to work with Unicode, so it works with many different languages. If you want to OCR a language other than English, be sure to install that particular language file during installation of Tesseract:
Currently there are language packs for English, Bulgarian, Catalan, Czech, Chinese (traditional and simplified), Danish, Dutch, German, Greek, Finnish, French, Hungarian, Indonesian, Italian, Japanese, Korean, Latvian, Lithuanian, Norwegian, Polish, Portuguese, Romanian, Russian, Slovak, Slovenian, Serbian, Swedish, Tagalog, Turkish, Ukrainian, and Vietnamese.
Take note that I only tested the program in English; so I don’t know if the superior English quality is the same for other languages.
Annoying aspects of gImageReader
There are two things I found to be annoying about gImageReader:
- As already mentioned, with gImageReader you must OCR multiple pages of the same document and different images/PDFs separately. I find this to be very annoying. I wish there was the ability to OCR multiple pages and multiple images/PDFs with the click of one button.
- The other thing I found annoying was the inability to zoom in with the mouse scroll wheel; to zoom in one must click on the zoom buttons. I wish there was a way to use the mouse wheel instead.
Conclusion
OCR is not an easy thing to do. If can afford it and you want to, you could shell out hundreds of dollars for brilliant OCR software (there are many shareware solutions that perform extremely well). Or, if you can’t afford it or if you want to save the money, you can download and use gImageReader/Tesseract. Not only are they free, but they perform extremely well.
You can grab gImageReader and Tesseract from the following links:
Version reviewed: gImageReader v0.8.1 and Tesseract OCR v3.00
Supported OS: Pretty much all Windows for gImageReader and Tesseract OCR; Tesseract OCR also works on Linux and Mac OS X
Download size: gImageReader 16.8 MB and Tesseract OCR 1.8 MB
Malware scan: gImageReader VirusTotal scan (2/43) and Tesseract OCR VirusTotal scan (0/43)
gImageReader homepage [download link]
Tesseract OCR homepage [direct download – Windows version]

 Email article
