 The speed of your Internet connection largely depends on external factors you cannot control. However, sometimes there are software elements that influence your connection speed. Once such factor is Windows reserving 20% of your network bandwidth for special QoS (Quality of Service), essentially capping you at using 80% of your total available bandwidth. This guide shows you how to remove this limitation and force Windows to use 100% of your network bandwidth.
Food For Thought
Before you jump on the bandwidth bandwagon, there are a few things to consider.
Firstly, the 20% reserved bandwidth is for QoS traffic. This traffic includes stuff like streaming videos, Windows Update, VoIP, etc. — anything that makes use of the QoS Packet Scheduler. Windows has this reserved bandwidth to ensure a smooth experience with QoS traffic because this type of traffic typically needs a high amount of reliable bandwidth. If you go ahead and disable this reserved bandwidth, you may experience issues with QoS tasks.
Secondly, 20% of your bandwidth is reserved only when QoS tasks are running. When no QoS task is running, by default you have access to 100% of your bandwidth. So by going forward with removing the 20% reserve, essentially you wouldn’t be recovering all 20% of your bandwidth; you would be recovering the piece of the 20% that is wasted and unused when a QoS task is running.
Thirdly, having access to 100% of your bandwidth does not ensure faster connection speeds. First of all, as I mention in my second point above, you already have access to 100% of your bandwidth when no QoS task is running; as such, if you rarely run QoS tasks, manually removing the 20% reserve will do much of nothing because you already typically have all 100%. More importantly, however, if you aren’t using all 80% of your bandwidth with the 20% reserve, then removing the 20% reserve will do nothing — you will just have extra bandwidth you are not using. I am not saying removing the reserve will do absolutely nothing; I am saying keep your expectations in check.
Take a few minutes and think about the three points I mention above. Personally speaking I leave the 20% reserve as-is because I see no major advantages of removing it. However, if you insist on recovering that 20% reserve, continue reading to learn how.
How to force Windows to use 100% of your network bandwidth
Making Windows use 100% of your network bandwidth can be done one of two ways. You can change a setting in Windows’ Group Policy Object Editor or you can make a simple registry tweak. Group Policy Object Editor is available in only some versions of Windows (Vista Business and higher and Windows 7 Pro and higher); the registry tweak works on all editions of Windows XP, Vista, and Win7. As such, this guide describes how to remove the 20% reserve using the registry tweak.
To remove the 20% bandwidth reserve in Windows, do the following:
- Press Win + R on your keyboard, type regedit.exe in the Run box that pops up, and hit OK:
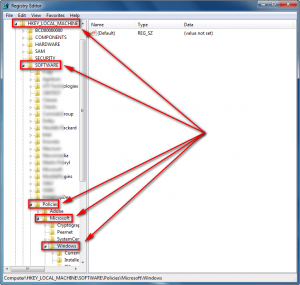
- Once you hit OK the registry editor will open. Navigate to the HKEY_LOCAL_MACHINE\SOFTWARE\Policies\Microsoft\Windows folder:
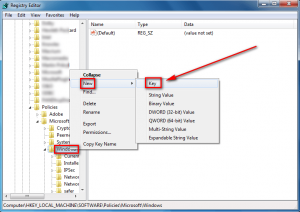
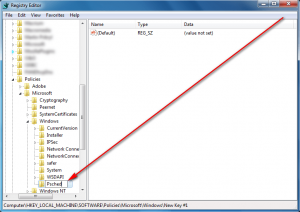
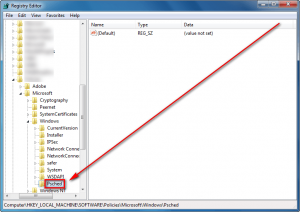
- Right-click on the Windows folder, go to New, click on Key, and name the new folder that is created Psched:
- Click (single left-click) on the new Pshed folder you just created.
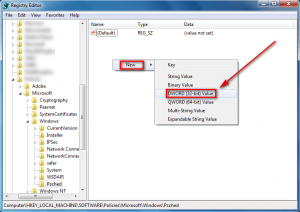
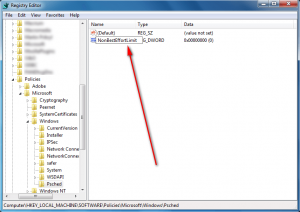
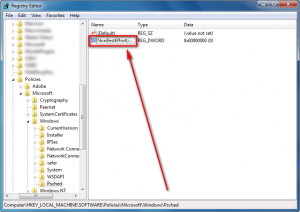
- Right-click in the right-pane (the white space), go to New, click on DWORD (32-bit) Value, and name the registry entry that was created NonBestEffortLimit:
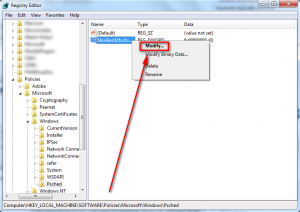
- Right-click the NonBestEffortLimit key you just created and select Modify:
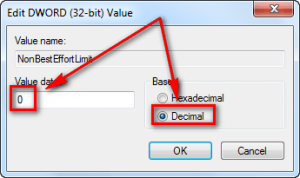
- At the window that pops up make sure the Value data is 0 and and the base is Decimal:
Take note instead of 0 you can put whatever number you want. The number in the Value data box corresponds to the percentage of your bandwidth you want to reserve for QoS traffic. So, for example, if I wanted to keep the QoS traffic reserve but wanted make the reserve 10% instead of 20%, I would enter 10 in the Value data box.
Hit OK when ready.
- Restart your computer.
- Done.
How To Restore The 20% Reserve
If at a later date you decide you no longer like removing/modifying the 20% reserve, you can simply edit the NonBestEffortLimit key in HKEY_LOCAL_MACHINE\SOFTWARE\Policies\Microsoft\Windows\Psched and enter 20 in the Value data box to restore the reserve back to its default 20%; or you can delete the whole Psched folder, which makes it like you never modified the reserve in the first place (it goes back to its default 20%). Then restart your computer and you are good to go.
Conclusion
At this point I would typically make a snide comment about how you can now commit 100% of your bandwidth to downloading… stuff… but that would be insensitive considering the mega events that have transpired this past week. Instead I’ll finish off this post with a signature, Enjoy!
[via Speed Up PC | Thanks buckoooo, alalata | Image credit: Shaymus22]

 Email article

