Using Windows’ HOSTS file is a quick and painless way to block websites (such as Facebook, ad networks, or malicious websites) on your machine. In the past blocking websites using the HOSTS file was (is) as easy as editing the HOSTS file and adding the websites/servers you want to block. In Windows 8, however, it is a bit different. You see one of the many changes Microsoft has made in Windows 8 is introducing a native anti-virus/anti-malware security program. Called Windows Defender (it is essentially Microsoft Security Essentials), one of the things this security program does is protect the HOSTS file from modification. For most users this protection by Windows Defender is a good thing; it prevents malware from hijacking your HOSTS file without your knowledge. For users that want to modify the HOSTS file, however, this is a roadblock in blocking websites with the HOSTS file. If you are confused on how to block websites/servers in Windows 8 with the HOSTS file, this guide is here to help. (The following method works for Windows 8 desktops, laptops, and tablets.)
How To Block Websites/Servers/Ads With The HOSTS File In Windows 8
Step One — Exclude HOSTS From Windows Defender Protection
One of the ways to turn off Windows Defender’s protection of the HOSTS file, and thus allow you to edit it, is by disabling Windows Defender altogether. However, for 99.99% of Windows users there is no reason to disable Windows Defender; Windows Defender provides basic, much-needed native protection to Windows 8. If you want to disable Windows Defender so you can use a different security program, such as avast! or Avira or AVG, don’t bother — Windows Defender automatically disables itself when it detects a third-party security solution is installed. Therefore, the solution to the Windows-Defender-is-blocking-access-to-HOSTS-file problem is not disabling Windows Defender but rather adding the HOSTS file to the exclusion list in Windows Defender.
To exclude the HOSTS file from Windows Defender protection, do the following:
- Run Windows Defender. This can be done by searching for Windows Defender via Windows 8’s built-in search functionality (bring up the Charms menu by either swiping in the top-right corner or pressing Win + C then going to Search -> type query). If you aren’t exactly sure how to access Windows 8’s built-in search, read dotTech’s guide on how to quickly find files and launch programs/apps on Windows 8.
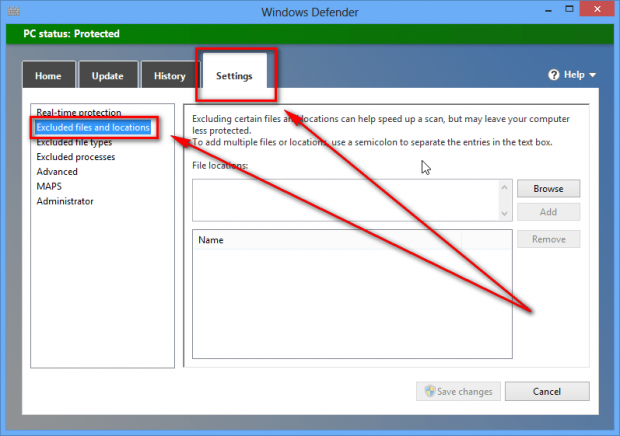
- Once you have Windows Defender open, go to Windows Defender’s Settings -> Excluded files and locations:
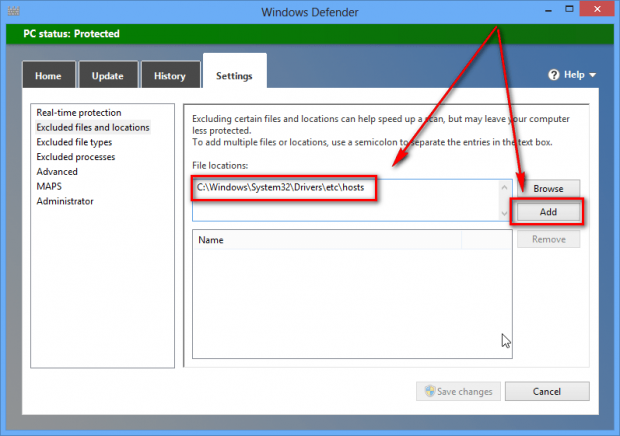
- Next type “C:\Windows\System32\Drivers\etc\hosts” (without the quotes) in the File locations box and hit the Add button:
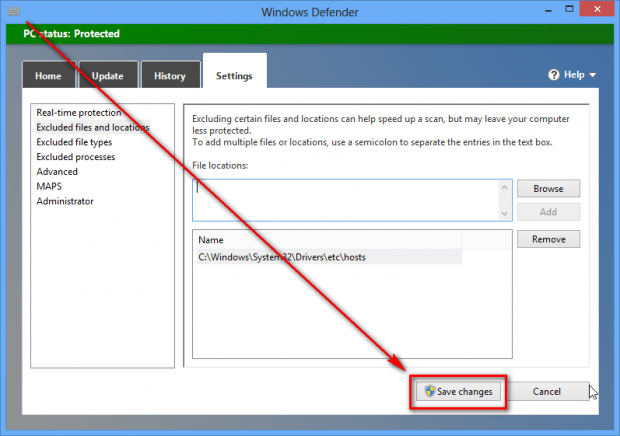
- Now hit Save changes:
- Done. You can X out of (close) Windows Defender.
Once you have done what is described above, you have successfully disabled Windows Defender’s protection of Window 8’s HOSTS file. Proceed to the next step in this guide to learn how to edit the HOSTS files to block websites.
Step Two — Modify The HOSTS File
Once you disable Windows Defender protection, editing the HOSTS file on Windows 8 is the same as on previous versions of Windows. Do the following:
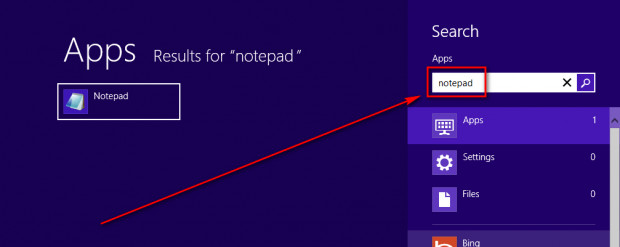
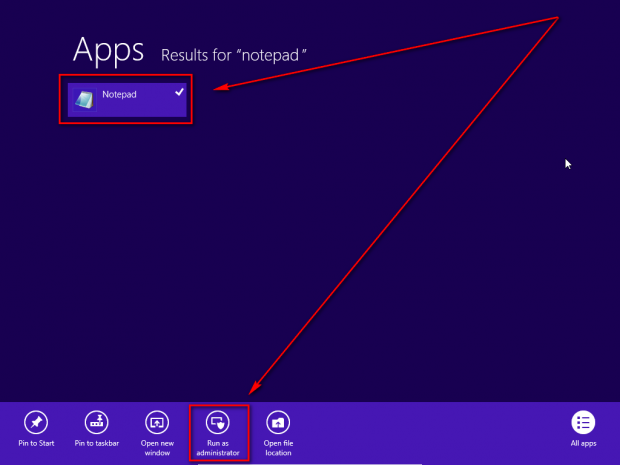
- Open the Charms menu (press Win + C on your keyboard or swipe the top-right corner of your tablet), click/tap the Search button, and type “Notepad” (without the quotes) in the search box:
- Now right-click or long tap Notepad from the search results so a checkmark appears by the name, go to the bottom of your screen, and click/tap Run as administrator:
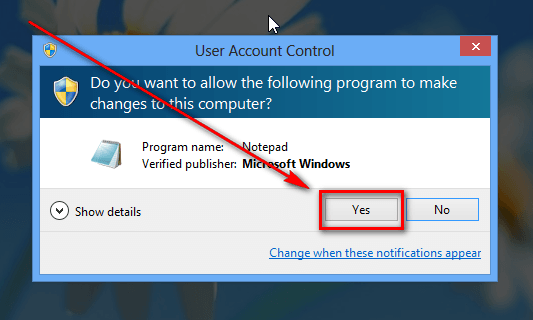
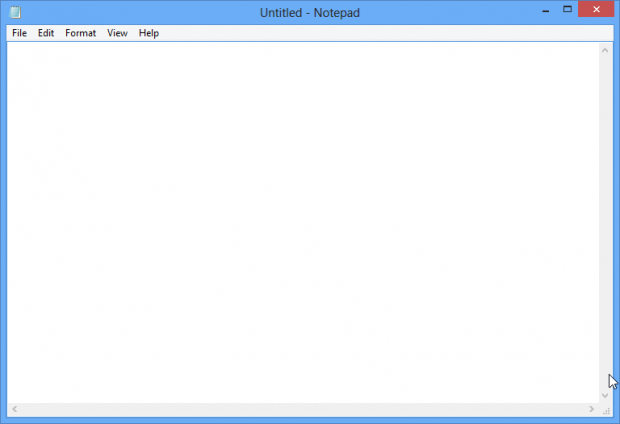
- Next confirm you want to open Notepad as admin and Notepad will open:
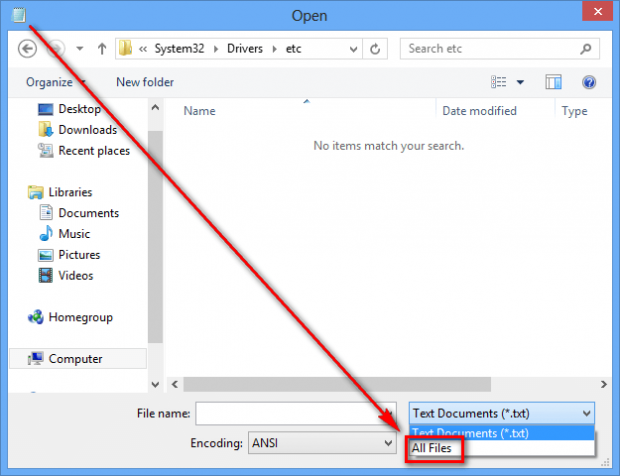
- Once Notepad is open, go to File -> Open and navigate to the C:\Windows\System32\Drivers\etc\ folder.
- Once at the C:\Windows\System32\Drivers\etc\ folder you should see no files in there. To see files inside the folder, click/tap the drop-down menu in the bottom that says “Text documents (.txt)” and click/tap “All Files”:
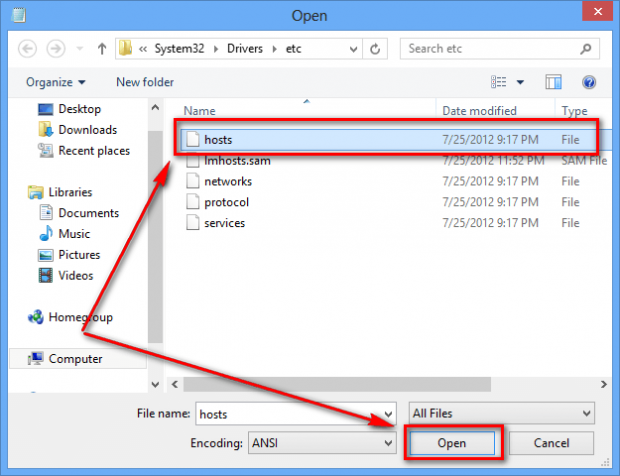
- Once you select “All Files” you should see a bunch of files appear. Select the file named “hosts” and click/tap Open:
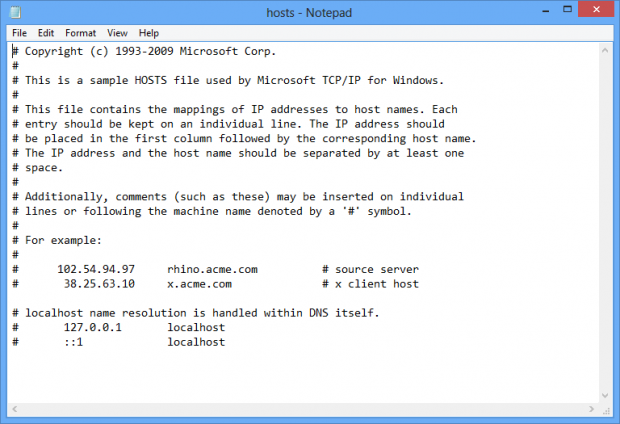
- At this point the HOSTS file will be opened in Notepad:
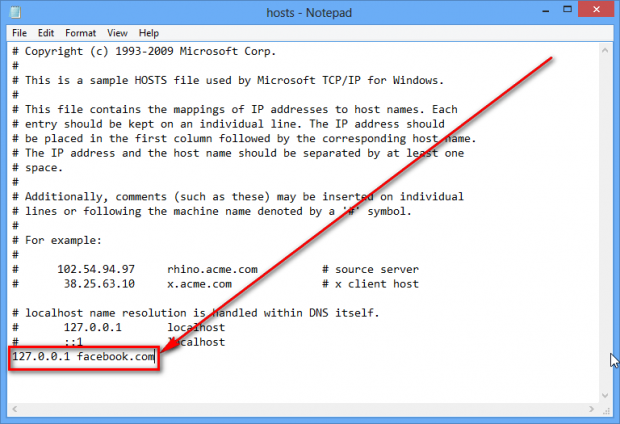
Add whatever you want to block at the end of the HOSTS file in the format of 127.0.0.1 [website URL]. For example, if you want to block Facebook you would add “127.0.0.1 facebook.com” (without the quotes):
Add as many websites, servers, ad networks, etc. that you want to block.
- When you have finished adding whatever websites, servers, ad networks, etc. that you want to block, you need to save the file. To do that, go to File -> Save.
- Close the HOSTS file once you are finished.
- Restart your computer or tablet.
- Done! All the websites you added to block in the hosts file are now blocked. Test it by trying to go to a blocked website in your browser.
If you don’t want to manually add thousands of websites to block, there is a very popular HOSTS file block list maintained by MVPS that you can copy and paste into your HOSTS file to block ads and known malicious websites. To use MVPS’s host file as your own, go to http://winhelp2002.mvps.org/hosts.txt and copy all the text starting from “# [Start of entries generated by WinHelp2002]” and ending at “# [end of entries generated by WinHelp2002]”. Then paste it at the end of your computer’s/tablet’s HOSTS file and save it.
Conclusion
Using the HOSTS file to block websites is one of the best ways to block websites, servers, ads, etc. in Windows. Yes it does take some work as opposed to using something like an ad blocker in your browser but its native nature (i.e. it is a built-in Windows feature) makes it extremely desirable. Stay safe and enjoy!

 Email article
