Start screen in Windows 8 is not only the brand new thing to focus on touch users, but it also confuses tradition users who use Windows with mouse and keyboard. However, it is the place that provides tons of information from everywhere by everyone at every time by using Live Tiles. On Start screen, tiles are arranged in rows and column; the number of rows is often determined automatically by your screen resolution. Otherwise, by default, Windows 8 often doesn’t arrange the tiles into the maximum number of row. Therefore, in this article, I will show you how to add/remove rows to show more or less tiles in your Start screen.
HOW TO ADD/REMOVE ROWS ON START SCREEN
As I mentioned above, the rows on Start screen are determined by your screen resolution. In a simple understanding, the higher your vertical resolution, the more tile rows you have. Below is the table about maximum, minimum, and default rows for different screen resolutions.
To change the number of rows on Start screen, you have to edit Registry. This is a very important thing to Windows, so that you should backup your Registry before doing this or your device may work incorrectly.
After backing up the Registry, you should follow these steps.
- Open Registry Editor by pressing Windows key then type “regedit” (without the quotes) and choose “regedit.exe” result on the left. If you are using a table, you should wipe from the right screen edge, select “Search” then type “regedit” and choose “regedit.exe” result.
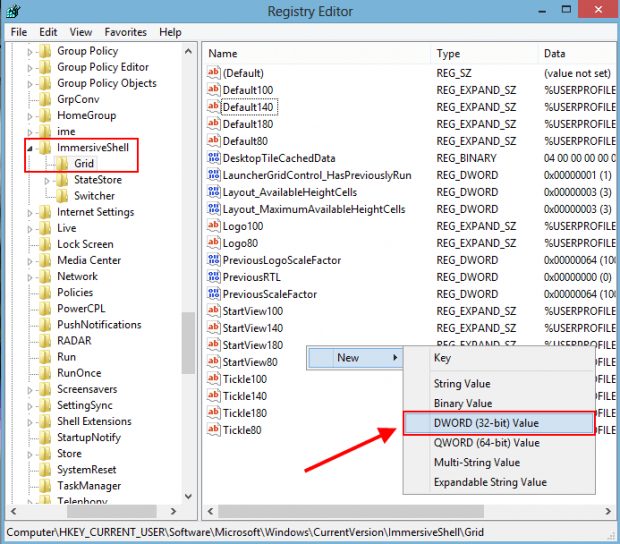
- Once Registry Editor has opened, on the left side, you should navigate to HKEY_CURRENT_USER\Software\Microsoft\Windows\CurrentVersion\ImmersiveShell\Grid
- After that, on the right side, you have to right click/long tap on the empty space and choose New then select “DWORD (32-bit) Value.” Then name the new property as “Layout_MaximumRowCount“
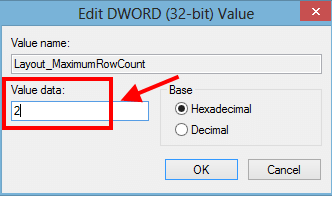
- What you have to do next it double click on the new property and enter the number of rows you want into the box “Value Data.”

- However, the largest value you can enter is the maximum number of rows that is set by the system based on the screen resolution. Additionally, if you want to know what your system’s maximum row is, you can look at the property “Layout_MaximumAvailableHeightCells.” Its value is determined by the system, so that you can’t change it. Once you’ve changed it, the system will reset it to the default value. That means there is no way to exceed the maximum number of rows.

- After you’ve done, you can log out or restart Windows to apply the change.
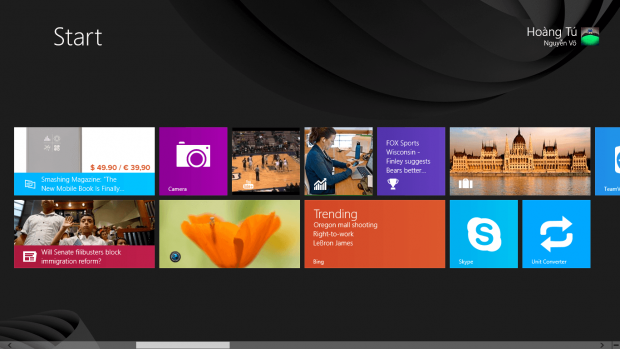
- For example, my default number of rows on Start screen is three; below is the result after I changed the value to two.

CONCLUSION
Enjoy!
[the screen resolution table via WindowsEightForums]

 Email article


