 Email article
A previous dotTech article covered how you can bring back classic DOS game titles to Windows. However, how about classic arcade games? For classic arcade games you should add MAME (Multiple Arcade Machine Emulation) emulator to Windows. Read on to learn more.
The MAME emulator is by default a command-line tool. Among its variations are MAMEUI32 and MAMEUI64 which are 32 and 64-bit Windows front ends for the emulator that come prepackaged with MAME, a GUI and game database. That’s the software which with which you can run a variety of classic arcade games on Windows.
Setting up MAME
Firstly, you should unpack the emulator. Those with 32-bit windows should add MAMEUI32 to Windows from this page. If you have 64-bit Windows, add MAMEUI64 to your software library from this page. After selecting the download options for those emulators, you should choose a folder location to save the emulator’s Zip file to.
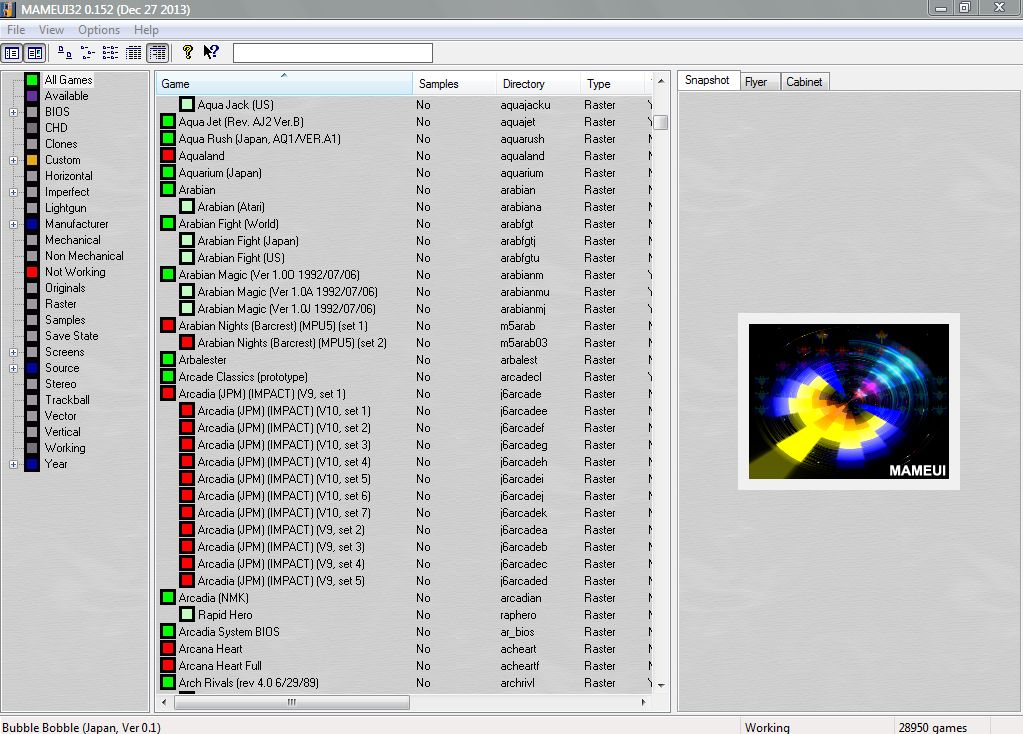
Then you right-click MameUI64.7z or mameui32.7z Zip files, and select an Extract Here option to extract it. You might need some utility software, such as 7-Zip, to extract the 7z format. Then open the emulator folder, and click on the mameui.exe or MameUI64.exe to open the window in the shot below.
Adding ROMs to MAME
If you click All Games you can browse through a list of MAME games. Note that those with red boxes beside them will not run with the MAME emulator you’ve installed. As such, when searching for emulator game ROMs you should search for those that have green boxes beside them in the list. Click on the Available entry in the sidebar to open the actual ROM games in the ROM’s folder. When you first run the emulator, that folder will most probably be empty.
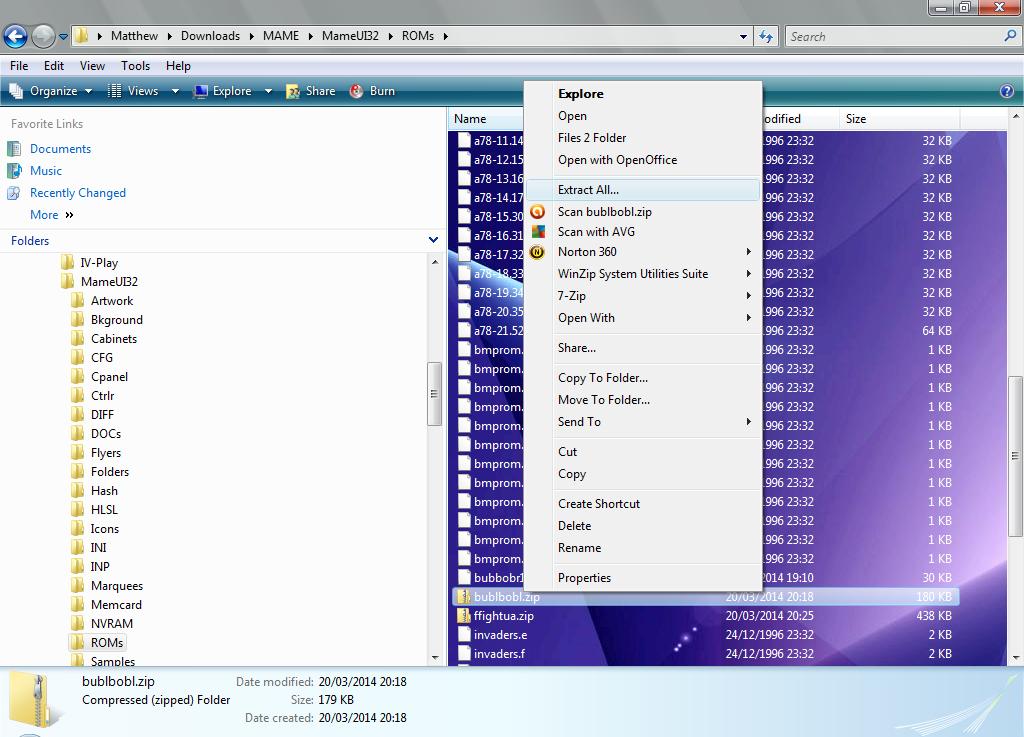
Now you should find some ROM games for the emulator. Check out the ROMNation site, and then select a MAME game title. Then you should select the Download This Rom option and click Download. You must save the ROMs to your MAME emulator ROM subfolder where they are saved as Zip files. Then open that folder, right-click the Zip file and select Extract All. Extract them to the same ROM folder the Zip file is in.
Note that the emulator probably won’t display the games in the Available entry until you refresh it. To refresh the emulator, click View > Refresh. The emulator will then refresh the Available game list, and then the game you added to the ROM folder should appear in the list as in the shot below.

Running Games with MAME
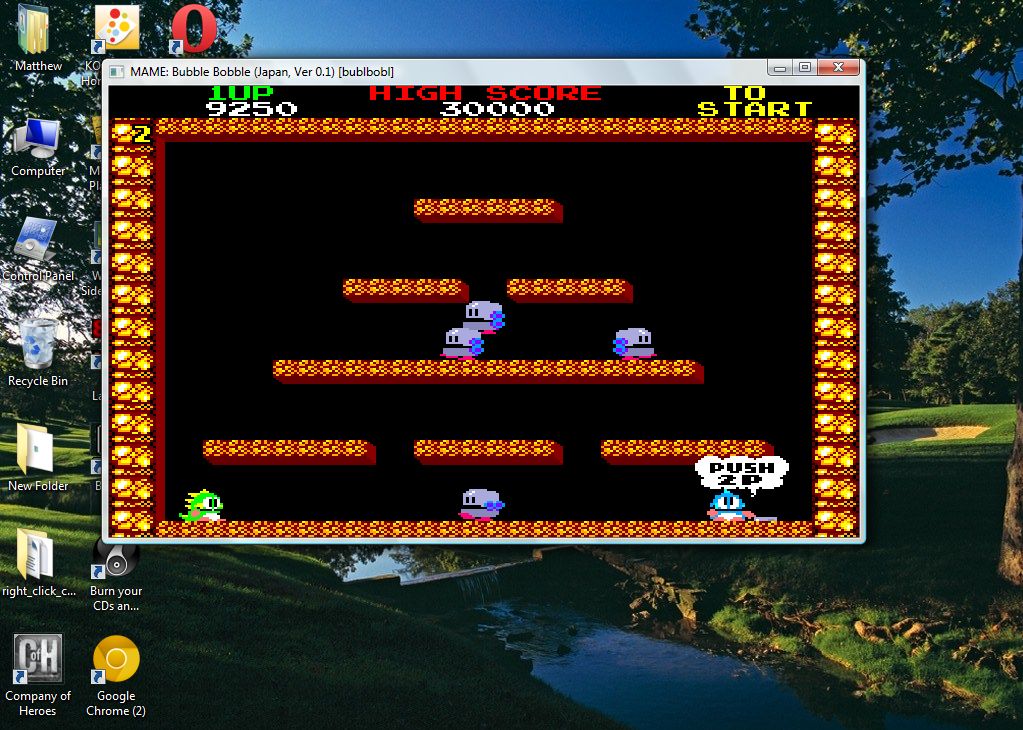
Then click a game title to run it as in the shot below. Input OK a few times to flick through some MAME diagnostic details before loading the game. When you get to the title screen, you should press 5 to insert coins and 1 to start. These are a few of the other MAME controls to note:
- Arrows – Move
- Ctrl – Action Button 1
- Alt – Action Button 2
- Space – Action Button 3
- Mouse – Analog Control (needed for some games)
- P – Pause
- ESC – Quit the MAME Emulator
- F2 – Service Mode
- Tab – Open MAME Options Menu

To further configure a game, you should select its title within the MAME emulator; and click Options > Default Game Options. That opens the window below from where you should select the Display tab to adjust graphical settings. Click the Run in Window check-box, Apply and OK to switch to the emulator’s window mode as below.
With this MAME emulator you can now bring back classic arcade games, such as MS Pac-Man and Bubble Bobble, to Windows. Note that the MAME emulator does have updates, and that ROMs which worked well with previous versions of MAME might not always run with the upgrades. Check out the MAME website for further emulator details.


