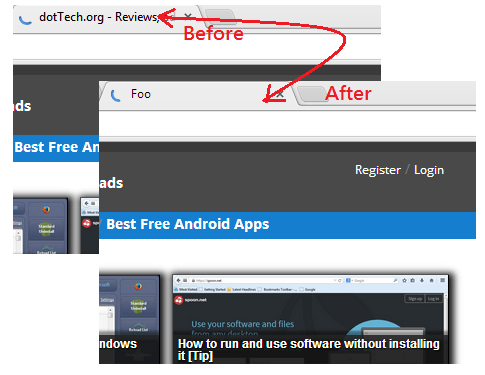
Renaming tab titles on Chrome does not only come in handy for tech-savvy folks who constantly work on their sites and blogs. It can also benefit those who wish to mask the sites that they’re visiting. One good example of this is when you’re trying to search online for secret gift ideas. You’ll never know. Someone might unintentionally take a glance at your active tabs and spoil the surprise.
Anyways, here are the steps on how to rename your tab titles on Chrome. Read on.
Step 1
Go to Chrome Web Store then download and install the extension called “Tab Title Tweaker”.
Step 2
Once installed, you need to configure the extension by adding your own set of rules. To do this, type “chrome://extensions” on your address bar then press “Enter”. Once you’re on your browser’s “Extensions” page, click the “Options” link for Tab Title Tweaker.
Step 3
You will then be redirected to Tab Title Tweaker’s “Options” page. On that page, you’ll see a total of three tabs – Your Rules, Instructions and Examples.
Go to “Instructions” tab first then read the instructions. Apparently, you’ll be asked to configure your own set of rules for each tab that you wish to rename.
Speaking of which, you can create rules using a standard syntax. A rule must contain three elements – operation, pattern and text.
For operations, you can use the following:
- “rename “ – to completely replace the tab title with your own text
- “prefix” – to add text to the beginning of the tab page title
- “suffix” – to add text to the end of the tab page title
- “revert” – to reset the title to its original value
For pattern, you can simply indicate the URL of the site that you’re loading on the tab that you wish to rename sans the http:// or https://. (See the “Example” tab for overriding basic rules, etc.)
For text, you can simply enter the text that you wish to use. Example: If the tab name is “dotTTech”, you can replace it with “Foo”, “DEV”, etc. It’s all up to you.
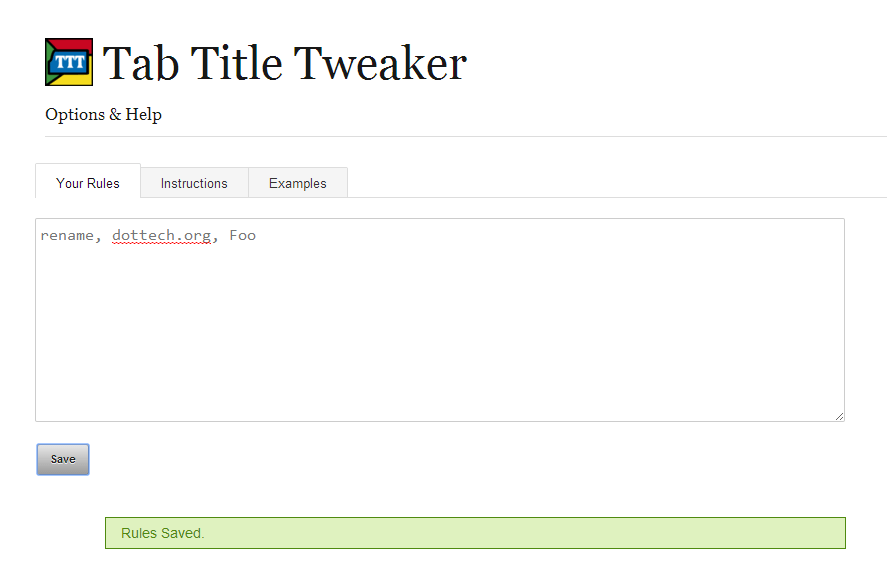
So by following the standard syntax, you can create a simple rule like the one below:
rename, dottech.org, Foo
Once you’ve finished creating a rule, proceed to the next step.
Step 4
Go to the “Your Rules” tab and paste the rule that you’ve created in the text area. You can use multiple rules but remember, you must only place ONE RULE per LINE. Don’t leave any breaks or empty lines. Once you’re done, click “Save”.
Step 5
Now, load the site where your rule applies. You’ll know if the extension can successfully act on the tab that you’re loading because you will be able to see its icon on the omnibar.
That’s it. You can immediately notice that the tab’s name or title has been successfully renamed using the text that you entered in the rule box. So go ahead and give it a try.

 Email article


