{rw_text}Software reviewed in this article:
Version reviewed:
v4.12 Pro
Software description as per the developer:
Ocster Backup Pro 4 is a great backup software that was designed from the start to work fully automatic. You simply specify what you want backed up and when and then the software takes care of the rest.
A special new feature called “Automatic Pausing” will automatically pause the backup process when you need the full power of your computer. Never be bogged down by your backup software again!
Apart from backing up files and folders, the software also features built-in support for backing up emails and calendars from Microsoft Outlook.
Ocster Backup Pro 4 can store the backups on an external hard disk, a network drive or on the specially secured Ocster Secure Storage.
Ocster Backup Pro 4 is really easy to use and requires no technical knowledge at all. With the software’s scheduled automatic backups you simply select what to back up and when and that’s it. The software will automatically keep your data safe!
Supported OS:
Windows XP/Vista/Win7
Price:
$39.90 (USD)
Ashraf’s note:
Ocster Backup Pro 3 has been reviewed on dotTech in the past. Here are the changes made to Ocster Backup Pro 4 as per the developer:
- Automatic Pausing: Ocster Backup Pro 4 aims to never slow down your computer when you need it. It monitors the resources other programs use and automatically pauses when it detects that it might slow things down.
- Outlook support: makes backing up your Microsoft Outlook emails and calendars really easy (works with Outlook 2003 or higher).
- Improvements “under the hood”: enhanced performance, compatibility and other aspects of the backup service
In addition to the changes mentioned in the official changelog, I noticed Ocster fixed one bug that was in v3: In v4 “no encryption” backups are no longer automatically password protected based off the password protection of the last backup job.
{/rw_text} –>
{rw_good}
- Straightforward and easy to use.
- Nice, aesthetically pleasing interface.
- Allows users to backup individual files or whole folders.
- Includes handy “shortcuts” for easy backup of common folders, and file extensions.
- Has the ability to easily backup Microsoft Outlook (2003 and higher) emails and calendars.
- Includes an “exclusion” filter which users can use to exclude specific files, folders, or file extensions from being backed up.
- Has an “automatic pausing” feature that automatically pauses/resumes backups based on current computer usage (i.e. if you are doing something on your computer that is resource intensive, the backup will be automatically paused and will be automatically resumed when computer resources are freed up).
- Allows users to restore files/folders selectively.
- Has multiple methods of compressing and encrypting backups.
- Allows users to schedule backups to automatically occur.
- Gives users the ability to keep extensive reports and automatically e-mail the reports.
{/rw_good} –>
{rw_bad}
- Uses a proprietary format for the backed up data.
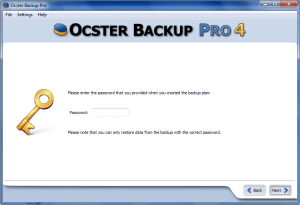
- When restoring backups, password is left in the password field (and appears the next time user runs a restore) unless user manually removes it.
- Lacks different backup methods.
- Aside from Microsoft Outlook, lacks the ability to easily backup third party software related data.
- Users are unable to limit the file extension “shortcuts” to a specific partition.
- Automatic backups can only be scheduled for a daily or weekly basis.
- Sending out backup report e-mails requires users to register (for free) with Ocster – no ability to use own e-mail address.
{/rw_bad} –>
{rw_score}
{for=”Ease of Use” value=”7″}Very easy to use. However, there are a few annoyances: 1) Lack of support for easy backup of third party software data (only Microsoft Outlook is supported) 2) Can only schedule a backup on a daily or weekly basis 3) Users are forced to register an account with Ocster if they want to be able to send out backup reports in e-mails 4) Uses a proprietary format to store backed up files 5) The file extensions “shorcuts” backup files from multiple partitions automatically… users cannot limit which partitions’ files are backed up.
{/for}
{for=”Performance” value=”7″}Performs well overall. However, speed and compression can be improved, lacks the ability to perform different types of backups (full, differential, etc.), and has a potential security risk in regards to password protection.
{/for}
{for=”Usefulness” value=”7″}I can see quite a few people finding this program useful.
{/for}
{for=”Price” value=”3″}Asking $39.90 for this software is too much. Not only does it lack some features that even freeware file backup software have, but for $10 more users can purchase rival backup software that will allow users to perform file and image backups). Personally I would pay $15 max for this software.
{/for}
{for=”Final Score” value=”5″}
{/for}
{/rw_score} –>
{rw_verdict}[tdown]
{/rw_verdict} –>
Ocster Backup Pro 4 is an easy-to-use, commercial file-level backup software. (To learn the difference between file-level backup software and image-level backup software, read my post on Why are there so many backup programs out there? Don’t they all do the same thing? No!)
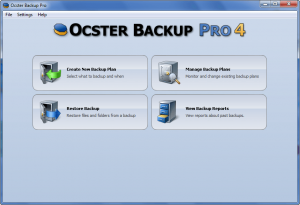
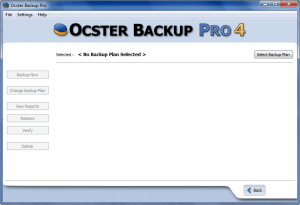
This is what the main program window looks like:
Like most other modern file backup software, OBP4 (Ocster Backup Pro 4) works by allowing users to create backup “jobs”. A backup “job” is simply a backup task (that backups up files/folders) the user creates that can be rerun whenever desired with the click of a button. Therefore, to use OBP4, you have to create backup jobs.
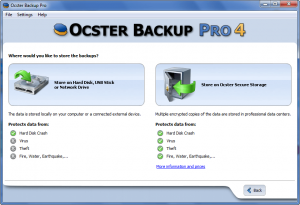
To get started, click on the “Create a New Backup Plan” button. This will then lead you to a screen that allows you to select to run the backup locally, or on Ocster servers:
To store your data on and backup to Ocster servers, you need to purchase Ocster’s online storage service. (You will be asked to login if you click to “Store on Ocster Secure Storage”). If you don’t have a subscription to their online storage service, you need to select the “Store on Hard Disk, USB Stick, or Network Drive” option. Since I don’t have a subscription to Ocster’s online storage services, this review will focus on the later backup option.
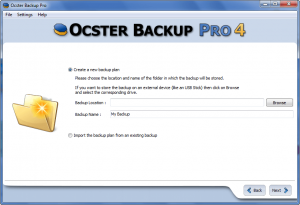
Once you get select “Store on Hard Disk, USB Stick, or Network Drive”, you will be asked specifically where you want to store your data and what to call your backup job:
You can select to store your backup locally, to a portable drive, or to a network share. Additionally, if you have already created a backup with OBP4 – or a past version of OBP – but for whatever reason can’t access the backup job anymore, you have the ability to “import” backup jobs at this screen. Click “Next” whenever you are ready.
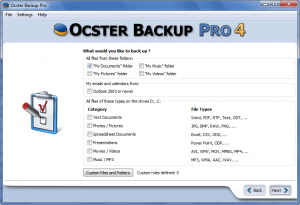
At the next screen, you will be shown this:
This screen is where you select the data you want to backup. A cool thing about OBP4 is that it gives you access to some “shortcuts” to easily backup data from commonly used folders, and/or to backup all the files on your computer of a specific file type. OBP4 also supports the ability to easily backup Microsoft Outlook (2003 and higher) emails and calendars.
When using the file extension “shortcuts” take note files from more than just your C:/ partition are backed up – it specifies exactly which partitions’ files will be backed up. I do wish there was some way to limit this to a specific partition because users may not necessarily want to backup files from all partitions with these file extension “shortcuts”. Also, note that “My Documents” is select by default – be sure to uncheck it if you don’t want to include it in your backup.
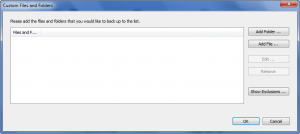
If you want to backup data other than what is given to you in the list of “shortcuts”, you need to click on “Custom Files and Folders”. When you click on “Custom Files and Folders”, this window will pop up:
From this window you can add as many files or folders as you want to backup. Keep in mind all the files and folders you add will be backed up together whenever you run this backup job.
One interesting feature I found is that if you try to add a shortcut to backup, instead of backing up the actual shortcut OBP4 will backup the file behind the shortcut. Fairly handy if you ask me, but of course can backfire if a user wants to backup the actual shortcut.
OBP4 allows users to exclude specific files, folders, and file extensions from being backed up…
…so be sure to check that out if you need it.
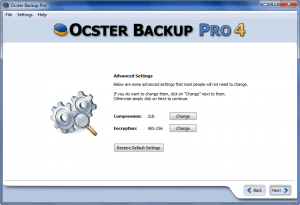
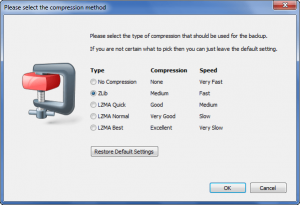
After you have selected what files/folders to backup, clicking “Next” will take you to the screen where you can select how to compress and encrypt the backup:
If you don’t want to compress and/or encrypt, you always have the option to opt out of compression and/or encryption.
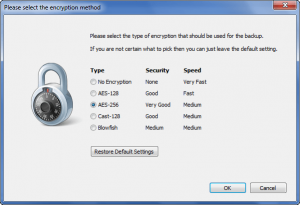
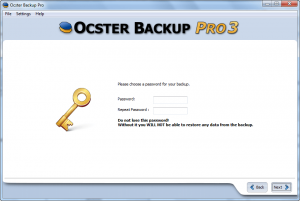
After changing compression/encryption settings and clicking “Next”, if you selected to encrypt, you will be asked to enter a password which will be used to protect the backed up data…
(Take note that you can opt to use no password at all – just click “Next” at the password screen.)
…but if you select no encryption, you will be taken directly to the next screen.
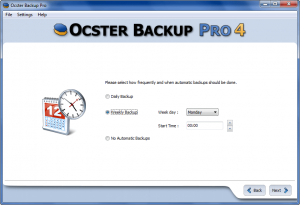
After you are done with the encryption settings, you are given the option to set your backup to automatically occur:
Unfortunately, you can only set it at daily or weekly backups – there is no option to set it at monthly, or custom dates. If you prefer not to have the backups occur automatically, simply select “No Automatic Backups”.
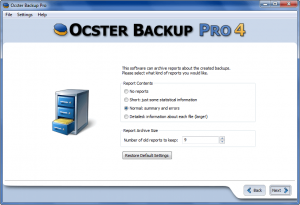
After the schedule screen, you are asked to select how reports will be recorded for the backup:
If you don’t want to keep reports, select “No reports”.
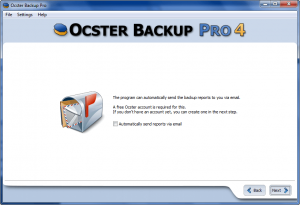
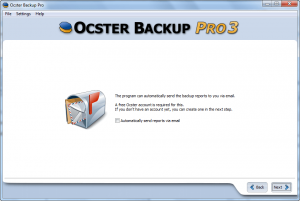
If you decided to have reports created, you will be asked if you want to have the backup reports automatically e-mailed to you:
The thing is, in order have the reports e-mailed to you, you must register an account with Ocster (it is free), so be ready to fill out a form if you want to use this feature. It is unfortunate you are not allowed to use your own e-mail address, such as Gmail or Hotmail.
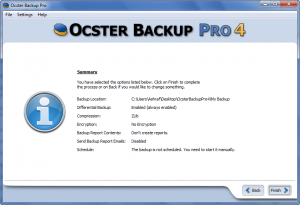
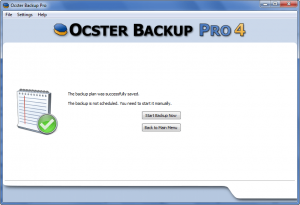
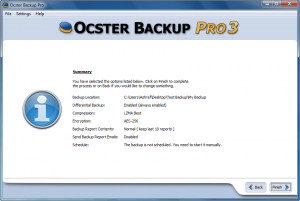
Last but not least, you are shown the summary of your backup job before being given the option to run the backup right that moment:
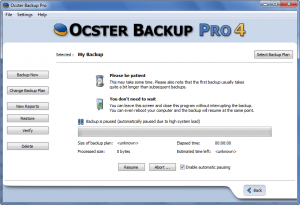
This is the backup-is-in-progress screen…
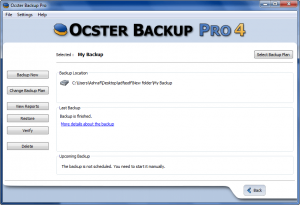
…and this is the backup-has-finished screen:
An interesting feature added in OBP4 is the ability to “automatically pause” backups-in-progress if the user is doing something else on their computer. In other words, OBP4 monitors computer resource availability and will automatically pause the backup if OBP4 feels running the backup will cause a degradation in performance for whatever else the user is doing; when computer resources are once again free, OBP4 automatically resumes the backup. While I wish there was a “sensitivity meter” users could use to customize when backups are paused/resumed and I found OBP4’s thresholds for pausing and resuming backups to be a little erratic, this is a very nice feature.
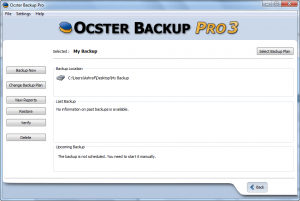
Once you have created a job (keep in mind you can create as many jobs as you want), you can manually run the job whenever you want by going to clicking on the “Manage Backup Plans” button from the main screen, selecting what job you want to run, and run it:
Other things you can do from the “Manage Backup Plans” screen is verify the validity of the backup, change what the job backs up, restore the back ups, view the reports related to the backup job, and delete the backup job and the data it backed up.
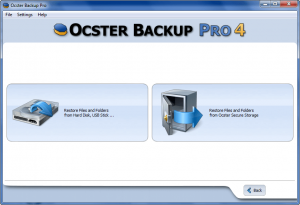
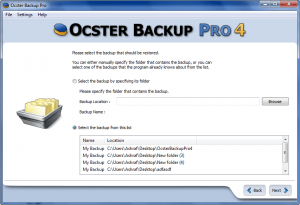
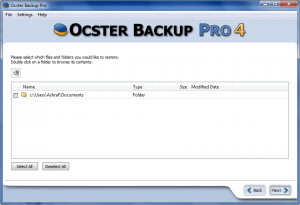
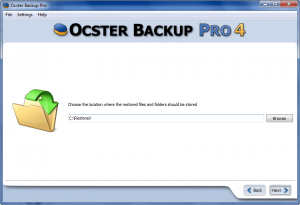
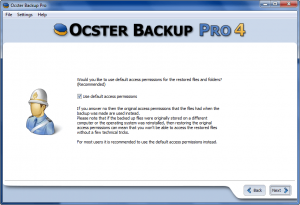
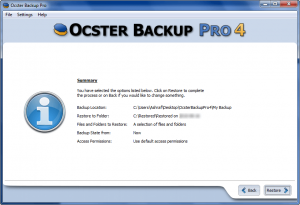
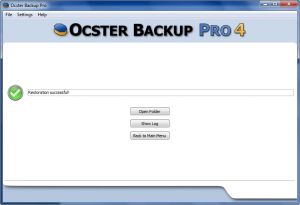
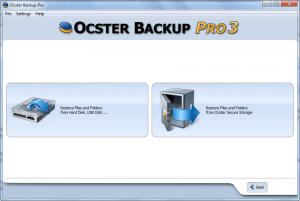
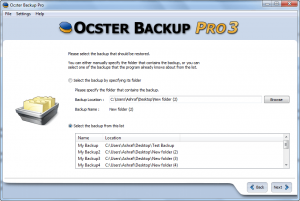
Even though you can restore backed up files from the “Manage Backup Plans” screen, you can also restore your data via the “Restore Backup” button from the main screen:
Take note
- If your backed up files are not password protected, simply click “Next” at the screen that asks for password and you will be allowed to restore your files without having to enter a password.
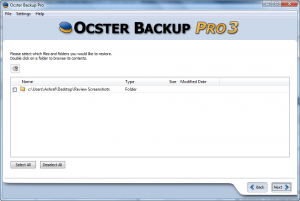
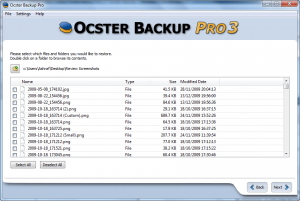
- You can selectively restore specific files/folders.
- In order to access the files inside a folder, you must double click on it.
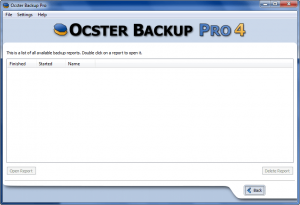
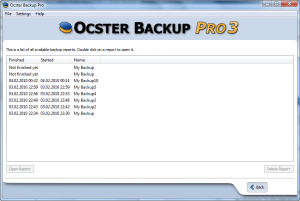
Last but not the least, you can access all the reports of all your backup jobs via the “View Backup Reports” button from the main menu:
In terms of performance, Ocster Backup Pro 4 computer resource usage varies typically between 20-50% CPU usage and 30-40 MB of RAM (as per my tests – keep in mind resource usage will vary greatly depending on what is being backed up and how it is being compressed/encrypted), which is not bad. However, compression and speed can be improved upon.
It took me just over 3 minutes and 30 seconds to backup up my 112 MB screenshots folder at the highest compression and AES 256 encryption. The backup data was 107 MB, so hardly any compression at all. Compare this to me simply zipping my screenshot folders with 7-zip at the highest compression level and AES 256 encryption: took less than a minute and output zip file was just under 99 MB. While I am not necessarily saying OBP4 needs to be faster or compress better than 7-zip, what I am saying is speed and compression needs improvement.
For users who plan on making large backups, here are some numbers for reference: It took just under 14 minutes for me to backup 5.76 GB of data at Zlib compression but no encryption. The data was compressed to 2.55 GB.
Overall Ocster Backup Pro 4 is not too bad of a software. However, there are a few aspects of the program that make me give it a thumbs down:
- After you type in a password to restore a backup, the password stays there (i.e. the password is always there filled in so you don’t have to retype it again) until you manually remove it yourself. In other words, if you go to restore a backup (which required you to type in a password) and later you go to restore another backup, the password from the previous backup will still be present in the password box when restoring backups. While it may be convenient for you to not have to type the password in again, this is a huge security risk.
- The data is backed up to a proprietary format. In other words, you will not be able to restore your data if you don’t have OBP4 installed. However, if you lose OBP4 don’t worry – the developer offers a fully functional 30 day trial users can always use to restore their data so your data will never be lost. But, the use of a proprietary format for file backups is bad convention when non-proprietary archive formats are available.
- There are no features to easily backup third party software data such as e-mail or settings/data (aside from Microsoft Outlook).
- OBP4 can only do incremental – no full backups, differential, or other types of backup.
This review was conducted on a laptop running Windows 7 Professional 32-bit. The specs of the laptop are as follows: 3GB of RAM, a Radeon HD 2600 512MB graphics card, and an Intel T8300 2.4GHz Core 2 Duo processor.
{rw_freea}
All of the following are file-level backup software:
{/rw_freea} –>
{rw_verdict2}While Ocster Backup Pro 4 is an improvement over Ocster Backup Pro 3, I feel it is still overpriced and lacks in key areas. However in my not-so-humble opinion, even with all that, the real deal-killer is the potential security risk of automatic-saving-of-password when restoring backups. I give Ocster Backup Pro 4 a thumbs down – rejected! My personal recommendation for file-level backup software is GFI Backup. GFI Backup is feature filled, easy to use, and my all-time favorite.
{/rw_verdict2} –>
Ocster Backup Pro 4 is an easy-to-use, commercial file-level backup software. (To learn the difference between file-level backup software and image-level backup software, read my post on Why are there so many backup programs out there? Don’t they all do the same thing? No!)
This is what the main program window looks like:
Like most other modern file backup software, OBP4 (Ocster Backup Pro 4) works by allowing users to create backup “jobs”. A backup “job” is simply a backup task (that backups up files/folders) the user creates that can be rerun whenever desired with the click of a button. Therefore, to use OBP4, you have to create backup jobs.
To get started, click on the “Create a New Backup Plan” button. This will then lead you to a screen that allows you to select to run the backup locally, or on Ocster servers:
To store your data on and backup to Ocster servers, you need to purchase Ocster’s online storage service. (You will be asked to login if you click to “Store on Ocster Secure Storage”). If you don’t have a subscription to their online storage service, you need to select the “Store on Hard Disk, USB Stick, or Network Drive” option. Since I don’t have a subscription to Ocster’s online storage services, this review will focus on the later backup option.
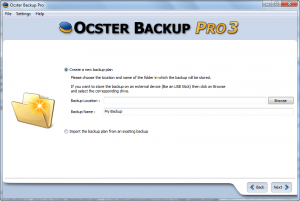
Once you get select “Store on Hard Disk, USB Stick, or Network Drive”, you will be asked specifically where you want to store your data and what to call your backup job:
You can select to create your backup locally, to a portable drive, or to a network share. Additionally, if you have already created a backup with OBP3 but for whatever reason can’t access the backup job anymore, you have the ability to “import” backup jobs at this screen. Click “Next” whenever you are ready.
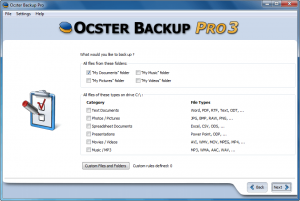
At the next screen, you will be shown this:
This screen is where you select the data you want to backup. A cool thing about OBP3 is that it gives you access to some “short-cuts” to easily backup commonly used folders, or to backup all the files on your C:/ of a specific file type. (Take note that “My Documents” is select by default – be sure to uncheck it if you don’t want to include it in your backup.)
If you want to backup data other than what is given to you in the list of “short-cuts”, you need to click on “Custom Files and Folders”. When you click on “Custom Files and Folders”, this window will pop up:
From this window you can add as many files or folders you want to backup. Keep in mind all the files and folders you add will be backed up together whenever you run this backup job.
One thing cool I found is that if you try to add a shortcut to backup, instead of backing up the actual shortcut, OBP3 will backup the file behind the shortcut. Fairly handy if you ask me, but of course can backfire if a user wants to backup the actual shortcut.
OBP3 allows users to exclude specific files, folders, and file extensions from being backed up…
…so be sure to check that out if you need it.
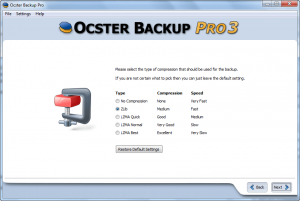
After you have selected what files/folders to backup, clicking “Next” will take you to the screen where you can select how to compress the backup:
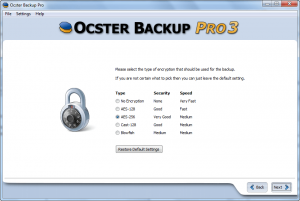
After you select what type of compression to use, click “Next” to select what type of encryption to use for the backup:
If you select an encryption type, you will be asked to enter a password which will be used to protect the backed up data…
(Take note that you can opt to use no password at all – just click “Next” at the password screen.)
…but if you select no encryption, you will be taken directly to the next screen.
There is one bug to take note when selecting encryption types. During my tests, I noticed that when using “no encryption”, even though there with “no encryption” there is no password that is supposed to be used to protect the backup, the password used for the last backup job you created is applied. Confused? Let me explain by example. Lets say I create My Backup1, encrypt it with AES 256 and set the password to be “123456”. After that, I create My Backup2, and select no encryption. When I go to restore My Backup2, I am asked to enter a password even though I select “no encryption”. Turns out that My Backup2 – even though I selected no encryption and did not enter a password for it – is password protected with “123456”. This is a fairly huge bug for someone not aware of it; the ramifications of it are scary for people trying to restore their data down the road and running into an unexpected roadblock of “enter password please”.
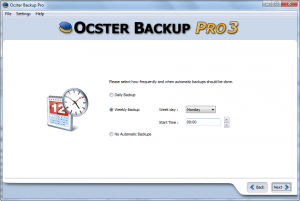
After you are done with the encryption settings, you are given the option to set your backup to automatically occur:
Unfortunately, you can only set it at daily or weekly backups – there is no option to set it at monthly, or custom dates.
If you prefer not to have the backups occur automatically, simply select “No Automatic Backups”.
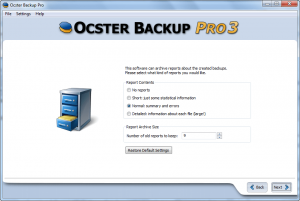
After the schedule screen, you are asked to select how reports will be recorded for the backup:
After that, you have the option to have the backup reports automatically e-mailed to you:
The thing is, in order have the reports e-mailed to you, you must register an account with Ocster (it is free), so be ready to fill out a form if you want to use this feature.
Last but not least, you are shown the summary of your backup job and then given the option to run it right after you created it:
Once you have created a job (keep in mind you can create as many jobs as you want), you can manually run the job whenever you want by going to clicking on the “Manage Backup Plans” button from the main screen, selecting what job you want to run, and run it:
Other things you can do from the “Manage Backup Plans” screen is verify the validity of the backup, change what the job backs up, restore the back ups, view the reports related to the backup job, and delete the backup job and the data it backed up.
Even though you can restore backed up files from the “Manage Backup Plans” screen, you can also restore your data via the “Restore Backup” button from the main screen:
Take note
- If your backed up files are not password protected, simply click “Next” at the screen that asks for password and you will be allowed to restore your files without having to enter a password.
- You can selectively restore specific files/folders.
- In order to access the files inside a folder, you must double click on it.
Last but not least, you can access all the reports of all your backup jobs via the “View Backup Reports” button from the main menu:
In terms of performance, Ocster Backup Pro 3 uses low computer resources (~30% CPU and ~25 MB RAM on average as per my tests – keep in mind resource usage will vary greatly depending on what is being backed up and how it is being compressed/encrypted). However, compression and speed can be improved upon. It took me just over 3 minutes and 30 seconds to backup up my 112 MB screenshots folder at the highest compression and AES 256 encryption. The backup data was 107 MB, so hardly any compression at all. Compare this to my simply zipping my screenshot folders with 7-zip at the highest compression level and AES 256 encryption: took less than a minute and output zip file was just under 99 MB. While I am not necessarily saying OBP3 needs to be faster or compress better than 7-zip, what I am saying is speed and compression needs improvement.
For users who plan on making large backups, here are some numbers for reference: it took around 16 minutes for my to backup 1.75 GB of data at the highest level of compression but no encryption. The data was compressed to 1.25 GB.
Overall Ocster Backup Pro 3 is not a bad software at all. In fact I had a hard time deciding to thumb it up or thumb it down. While I do feel I may be being a little harsh on the developer, I give Ocster Backup Pro 3 a thumbs down for the following reasons:
- The “no encryption” password bug I talked about earlier.
- After you type in a password to restore a backup, the password stays there (i.e. the password is always there filled so you don’t have to retype it again). While it may be convenient for you to not have to type the password in again, this is a huge security risk.
- The data is backed up to a proprietary format. In other words, you will not be able to restore your data if you don’t have OBP3 installed. However, if you even lose OBP3 don’t worry – the developer offers a fully functional 30 day trial users can always use to restore their data so your data will never be lost. However, the use of a proprietary format for file backups is bad convention when non-proprietary archive formats are available.
- There are no features to easily backup third party software data such as e-mail or settings/data.
- OBP3 can only do incremental – no full backups, differential, or other types of backup.

 Email article
