Okay, so you’ve been searching the web for various images but you don’t exactly feel like saving them to your computer or even to your cloud storage account. So after thinking things through, you decided to save the images to your Google Plus account. Since Google+ offers users the option to save photos to various albums, all that’s left for you to do is to upload and save each image to the Google Plus photo album that you want.
The thing is it can get really tedious especially if you have a lot of photos to save. You need to download them first before you can upload them. If you want to lessen the hassle, this post will teach you how to directly save web images to Google Plus photo albums. You just need to make sure that you’re using Chrome as your web browser.
How to directly save web images to Google Plus Photo Albums
- In Chrome, the first thing that you need to do is to download and install “Clip It Good”.
- After installing the said extension, type chrome://extensions on the address bar and then press the “Enter” key on your keyboard.
- You will be taken to your browser’s extensions page. From there, look for Clip It Good and then click the “Options” link right below it.
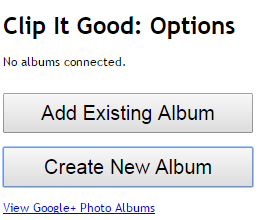
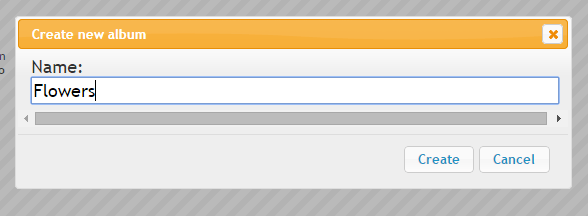
- On the options tab, click “Create a New Album” and then enter a name for your album.
- Click “Create” to confirm. This album will be automatically saved and synced with your Google Plus account.
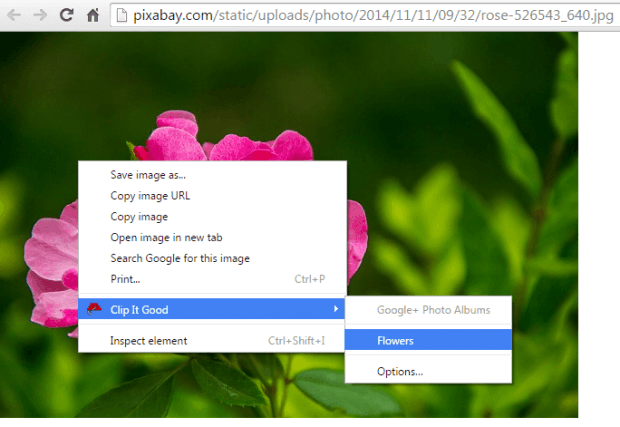
- So what’s next? Just browse the web for images. Right-click on any image and then on the context menu, select “Clip It Good” and then choose the album where you want to save your image.
- While uploading, the extension will show its icon on your browser’s address bar. The icon will disappear once the photo has been successfully uploaded to your photo album in Google Plus.
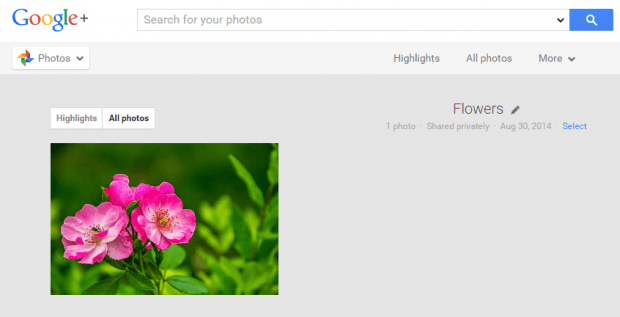
So that’s it. Just go to Google+ Photos to view your images. It’s as simple as that!

 Email article


