Okay, so this tip is for the newbie bloggers out there who are blogging using the Blogger platform. Of course, nowadays, being social online also helps you generate more views and followers. That is where Twitter comes in and if you’re still wondering how to add a Twitter feeds widget to your Blogger blog, then here’s what you need to do.
How to add a Twitter feeds widget in Blogger
- First off, you must log in to your Twitter account.
- After you’re logged in, just click here to go to the Twitter widgets page. Or, if you want, you can just go to “Settings” > “Widgets”.
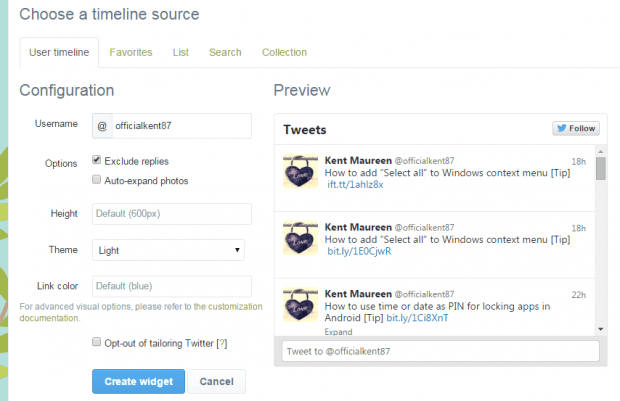
- So once you’re on the widgets page, click the “Create New” button and then fill in the required fields like your Twitter username, your preferred Twitter widget height, theme, link color, etc.
- Do not forget to click the blue “Create widget” button once you’re done.
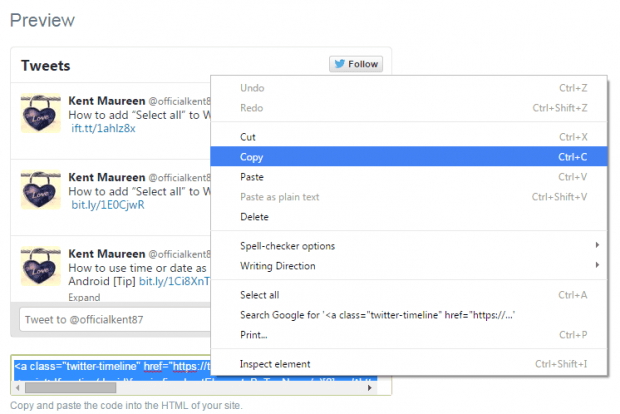
- So after your widget has been created, just copy the code below the preview area and then go to your Blogger blog.
- Make sure that you go to the correct blog account where you want to place your Twitter widget.
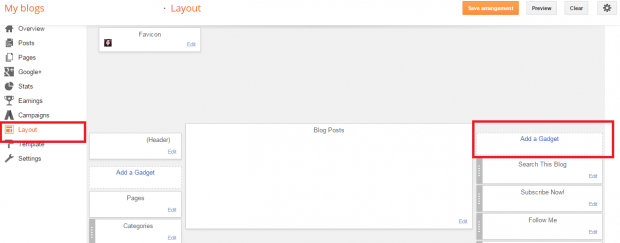
- After which, just go to your blog’s “Layout” and then select “Add a Gadget” in the sidebar.
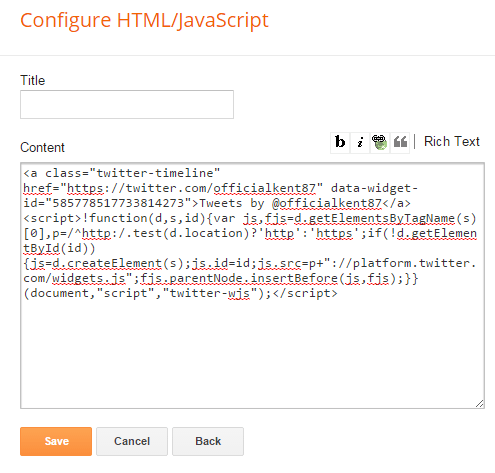
- On the popup window that appears, select “HTML/Javascript” and then paste the code that you copied from Twitter. Don’t forget to click “Save” to confirm.
- Back your blog’s “Layout” page, click “Save arrangement”.
- So that’s it. Go to your blog’s actual view and you’ll see that your Twitter feeds widget will automatically appear on the sidebar.
You’re done!

 Email article


