Email article
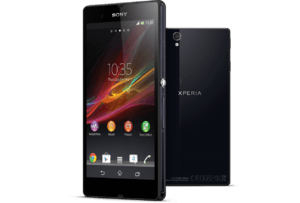 The Sony Xperia Z is a beast of a smartphone, but all that power can be wasted if you don’t have root access. Having root on your device can help you accomplish some very cool things, and with this guide’s help, you’ll be using exciting root apps in no time at all.
Disclaimer: This guide is intended as a helpful “how to”. dotTech and its writers are not responsible for any gain or loss (including but not limited to bricked devices) incurred as a result of following this guide. Root your device at your own risk. Rooting may void your warranty.
Requirements
This root guide is for the Sony Xperia Z running Jelly Bean and firmwares 10.1.D.0.317, 10.1.D.0.322, 10.1.A.1.350 (but may work with other firmwares). It is specifically for model C6603. After following this guide, do not update to any OTA release from Sony, as this guide isn’t confirmed to work.
Before We Begin
Before you can root, do the following:
- Download and install Sony USB drivers for Windows on your computer, if you don’t have them already.
- Download and install ADB and Fastboot on your computer, if you haven’t on already.
- Download the root tool on your computer and extract it to whatever location you want.
How To Root Sony Xperia Z
To root Sony Xperia Z, do the following:
- Change the settings on your phone so the screen will stay on for 10 minutes or more until timeout. This is possible by navigating to Settings, then Display, then Sleep. Once in the Sleep section, select the 10 minutes (or higher) option.
- Be sure that your device has USB debugging enabled. Do this by navigating to Settings, then Developer options, then check Enable. Then go to Settings, Developer options, and then check USB debugging.
- You will also need to enable installs from unknown sources. Accomplish this by opening the Settings section on your Xperia Z. Once in the Settings section, tap the Security option, then check the Unknown sources box.
- Connect your Xperia Z to your Windows PC via USB cable.
- On your computer, navigate to where you extracted the root tool you downloaded earlier.
- Find runme.bat and double-click on it to run it.
- Once you have runme.bat running, press the Enter key on your keyboard to start the rooting process. The device will be detected automatically and the tool will start to execute steps one at a time; all you have to do is wait but keep a close eye on the command prompt because you will soon soon see a message “press the button to restore the data in your phone”.
- When you see that message, your Xperia will open an app. Be sure to tap the RESTORE option.
- Once completed, you should get a message “If restoring data is complete,” inside the command prompt window on your PC. When you get that message, open your Xperia Z’s phone dialer and enter *#*#7378423#*#* into it.
- Select the Service tests option on your Xperia Z.
- Now, select the Display option. You may see a “Service Menu isn’t responding, force close it?” message; tap Yes.
- Your screen should now turn the color white. When your screen is white, make sure the command prompt window is still open on your computer and press the Enter key. The root tool will start executing commands. Wait while this happens.
- Note: If the above step doesn’t work, you may need to press the power button to turn the screen off. Wait a couple of seconds, then press the power button again. Repeat this a few times. Be sure to keep an eye on the command prompt window to see what it is outputting.
- Very soon, in the command prompt window, you’ll see “transfer files to your phone part 2”, “installing busybox, su, Superuser, etc”, and then lastly, you will see the “Cleaning up” prompt. When you see that last “Cleaning up” prompt, your Xperia Z should automatically reboot itself.
- Once you are booted back into Android, your Xperia Z should now have root access. Enjoy!
The following is a video showing you how the rooting process, for anyone that is confused:
Conclusion
Enjoy a rooted Xperia Z running Android Jelly Bean.
[via xda-developers]