 Email article
System Restore is a feature that has been included since Windows ME (yeah, you read it right). In case you don’t know what this is, it’s a system component that creates a copy of your system, called a Restore Point, so that you can revert back to that copy when the system encounters serious problem in the future. I can’t say enough how useful it is but it has saved me countless time. It’s a time machine of Windows.
In Windows 10, System Restore is still there but Microsoft somehow decides to turn it off by default on a fresh install of the new OS.
If your Windows 10 is an upgrade, System Restore will retain its status. That means Windows 10 doesn’t turn off System Restore if you had it enabled in previous Windows version before upgrading.
How to turn on System Restore in Windows 10
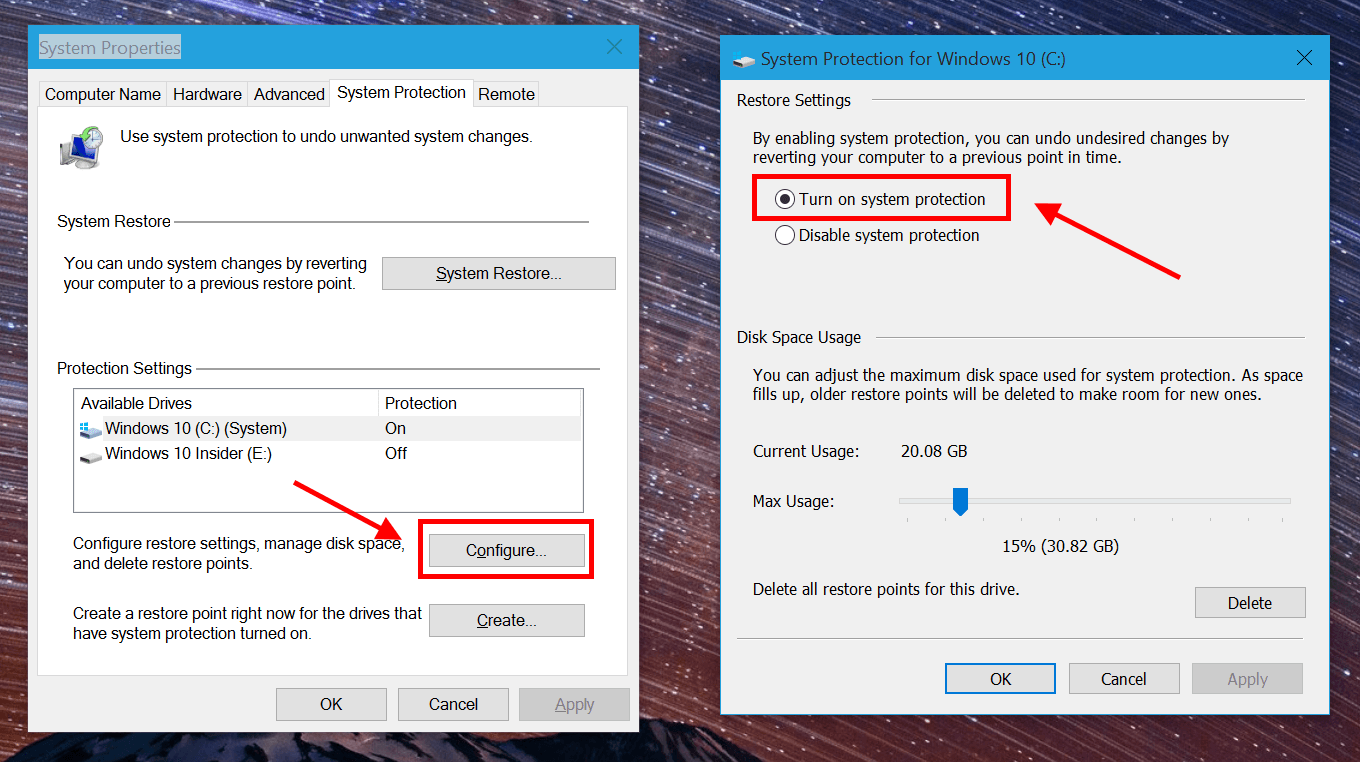
- System Restore is still in the same place in Windows 10. You can open it by typing “System Restore” into the search box on the Taskbar. Then open the result “Create a restore point.”
- In the window, you need to choose a partition you want to turn on System Restore and click the button “Configure…”
- Now just select “Turn on system protection” and select the amount of disk space System Restore can use. Click OK and you’re done.
How to create a Restore Point
Usually, the system and some programs will create a restore point automatically. The most frequent restore points you’ll see are Windows Update points. You can easily manually create a restore point too.
In the System Restore window, just click Create button to create a restore point. You’ll need to name the point also. Wait for a while and that’s all you have to do!


